Working with Text
| Text editors are among the most commonand essentialapplications. You'll need to know how to edit text to accomplish just about any of the tasks described throughout the rest of this book, and it's a good idea to find a text editor that you like as early as possible in your FreeBSD career. Unlike a word processor, a text editor simply works on plain-text files (which, in FreeBSD, can be denoted with any kind of filename, with any kind of extensionnot just .txt). It does not have the ability to store font changes, styles, margins, or any other such information in the document because plain-text files don't support such formatting information. Plain-text files make up a great deal of the FreeBSD system, from configuration files to documentation; you'll be working with them all the time. Here are some common uses for a text editor:
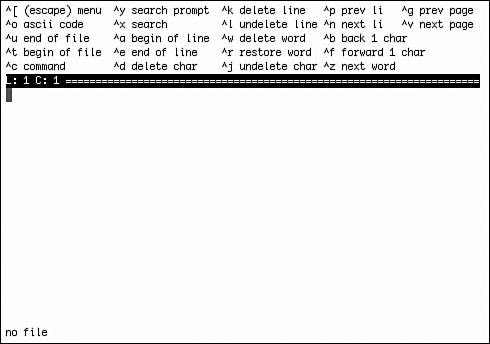
In the following sections, we'll look in detail at some of the built-in text editing solutions available in FreeBSD, namely the ee and vi editors. After that, we'll look at a couple of more modern graphical text editors that are part of the KDE or GNOME user environments. Using ee (Easy Editor)ee (Easy Editor) is installed by default as part of FreeBSD. As its name indicates, the Easy Editor is a basic text editor that is designed to be easier to work with than some other traditional UNIX text editors. ee can be invoked either by simply typing ee at the command line or by typing ee followed by the name of a file you want to edit. Figure 6.2 shows a sample ee session with a blank document. Figure 6.2. A sample ee session. You can use the key combinations shown at the top of the screen to access various features. Using ee Key CombinationsThe caret (^) in each of the listed key commands means the Ctrl key. Most of the options in the menu are self-explanatory, but there are a few that deserve greater discussion. Table 6.1 shows these options and their meanings.
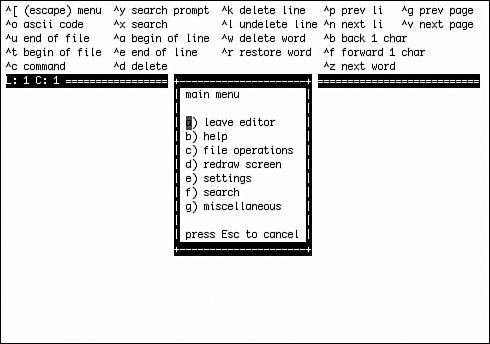
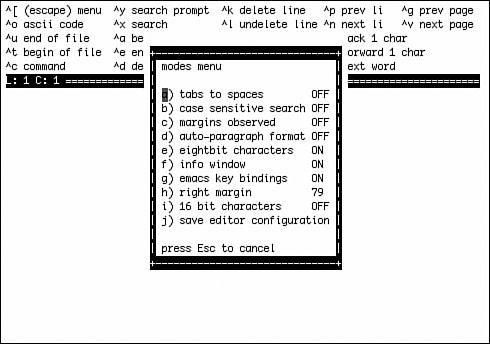
Setup and Configuration of eeIf a file called .init.ee exists in your home directory, ee will read the configuration options in this file each time it starts. You can create this file by hand, or you can choose setup options from the ee setup options list. To access this list, press Esc within ee to open the main menu, shown in Figure 6.3. Press E to select the Settings menu or use the down arrow to highlight the Settings option in the menu and then press Enter to open the modes menu (see Figure 6.4). Figure 6.3. The main menu in ee. Figure 6.4. If you choose the Settings option from the ee main menu, you open this list of setup options. In the Modes menu, shown in Figure 6.4, you can toggle an option on or off by pressing the letter corresponding to the option, or by using the arrow keys to highlight the desired option and then pressing Enter. Table 6.2 shows the various setup options and what they do.
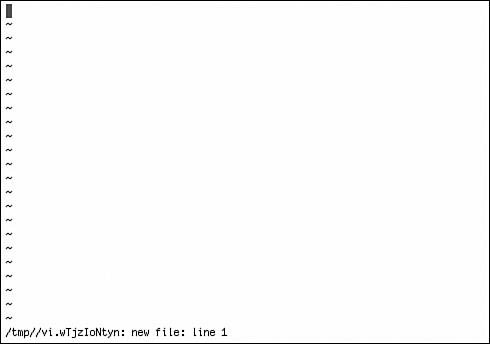
The final option in the menu, Save Editor Configuration, writes the configuration information to the file .init.ee. When you choose to save the configuration information, you will be asked whether you want to write the configuration file to the current directory or to your home directory. If you write it to your home directory, the configuration will be the default configuration for all files you create and open in ee. If you write it to the current directory, the settings will override the default settings from the configuration file in the home directory any time ee is started from the directory you're in. The vi Editorvi was one of the first editors developed for UNIX-like operating systems. To this day, it is still one of the most powerful editors available, and it comes standard on virtually every UNIX-like operating system. It has also been ported to several non-UNIX systems, including Microsoft Windows and OS/2. Unfortunately, vi also has a reputation among newbies for being notoriously arcane and difficult to learn. Unlike in editors such as ee, you can't just navigate with the arrow keys to a point in the file and start typingyou have to know certain kinds of editing modes and key combinations to accomplish the tasks you're used to in more modern editors. So why learn vi? There are two primary reasons, really. The first is that you can be virtually guaranteed that vi will be available on any UNIX-like system you might ever have to work on. If you find yourself working on an unfamiliar Linux or UNIX system in the future, and you need to edit a text file, vi might be the only editor you will have available. The second reason for learning vi is that once you have learned its various keystrokes and commands, you'll find it to be a very powerful editor. If you are a touch typist, it is also an extremely fast way to workit's designed so that you don't have to remove your hands from the home keys to access most vi commands. Tip A third reason to learn vi is that its key command structure crops up in lots of unexpected places throughout FreeBSD. For example, if you're using less to page through a file, you can use vi's search commands to navigate it and look for particular text strings. You'll also find that vi uses many of the same conventions as appear in regular expressions, such as $ for the end of a line. This will help keep your mind tuned to the proper mode if you program in Perl or other languages that use regular expressions. To start vi with an empty file, type vi. To start vi and load a file for editing, type vi followed by the filename. If the filename you specify doesn't already exist, vi will assume that this is a new file. Figure 6.5 shows a vi session with a new file ready for editing. Figure 6.5. The vi editor, ready to edit a new file. The status line at the bottom of the screen gives information about the file being edited; note the temp file location. Looks rather plain and boring, doesn't it? One of the first things you may notice if you start trying to type text is that vi does nothing except beep at you; it doesn't insert any of the text you are typing. You may also hit certain keys and see strange-looking messages on the status line at the bottom of the screen. This is because vi has different modes of operation, and you don't start out in one where typing does any good. When vi first starts, it is in command mode, in which keypresses are interpreted as commands to the editor rather than as text to be inserted into the document. To switch into the mode in which you can enter text into the document, you must press the A, I, or O key, or use Shift to invoke their alternative command meanings, depending on where you want the text to appear in the document:
Note In vi, key commands are differentiated on the basis of capitalization because they're intended to be combined with other keypresses in sequence to create a complex command that can be written out (for example, 75G). Thus, for example, when you see a reference to "the q command", it means to press Q by itself; but a reference to "the Q command" means for you to press Shift+Q. These two commands have very different meanings! If you want to get back into command mode after entering text-entry mode, press the Esc key. By default, vi will beep when entering command mode. Tip Remember that if you are trying to enter text and vi simply keeps beeping at you or doing other unexpected things, you are probably in command mode. Press A, I, or O to enter textentry mode. Also, if you are ever unsure what mode you are in, simply press Esc to move into command mode (if you are already in command mode, it will have no effect). You can then press A, I, or O to enter text-entry mode. If you mistakenly pressed keys in command mode and caused errors in your document, you can often press U to undo them. Moving Around in viIn text-entry mode, you can usually use the arrow keys and the Page Up/Page Down keys to move around. However, vi is designed with specific editing functions in mind, not the ad-hoc freedom you might be used to in more WYSIWYG-style text editors. This means there are many other movement keys available in command mode than just the arrow keys; they're all described in Table 6.3.
Note that each of the commands in the table (with the exception of G) uses the unit of one, by default. The command j moves the cursor down one line, k moves it up one line, w moves one word to the right, and so on. You can modify the default behavior by typing a number before the command. For example, the following line causes the cursor to move down five lines instead of one line: 5jThe following line causes the cursor to move to the 75th line in the current file that is being edited: 75GThe following line causes the cursor to move to the line that is five lines up from the bottom of the screen: 5LThis syntax works for all of the commands in Table 6.3, except for the ^ command, which moves to the first non-space character in the document. Tip If you enter a number followed by one of the previous commands, and vi seems to do nothing except beep, it probably means you entered a number out of the viable range. For example, if you enter 560G to move to line 560, and the document has only 557 lines, vi will simply beep at you, indicating that it can't perform the requested function. Unfortunately, no error message will be printed telling you what exactly is wrong. Other Movement KeysIn addition to the cursor-movement keys described previously, there are also some key combinations that are related to scrolling the screen (Table 6.4 lists them).
Text-Editing CommandsModifying existing text is where using vi gets particularly tricky. The Backspace and Delete keys will not do what you might expect. Instead, you will have to use various keystrokes from vi's command mode in order to delete text in the manner to which you're accustomed or to overwrite existing text. Table 6.5 lists the various text-editing commands available in vi.
File Operations and Exiting viSeveral vi commands relate to loading and saving files. Table 6.6 shows the various command sequences available for these actions.
Caution Note that the ! option on the end of several of the commands in Table 6.6 is a stronger variant of another command without the !. Usually it means to suppress warnings and take whatever action you're requesting without complaint. For example, :q! will exit vi immediately without asking first whether you want to save any changes. Use the ! option with care. Searching and Replacing Text in viSeveral commands are available for performing a search-and-replace operation in vi. Table 6.7 lists these commands and their actions.
Tip Many of these commands are similar to how the less pager worksyou can use vi search commands when reading system documentation with less. This table doesn't include a few other search-and-replace functions that aren't often used. The operations listed in the table are the ones you will probably use most often. Copying, Cutting, and Pasting Text in viTo copy text to a buffer in vi, use the y command. This command, in popular vi parlance, "yanks" text into the buffer. Table 6.8 shows the various ways the Y command can be used.
After you have yanked text into the buffer, you can paste it anywhere in the document by moving to the appropriate location and then using p or P to "put" the text. The p command places the text into the document after the cursor, whereas P places the text into the document before the cursor. After you have "put" the text, it continues to remain in the buffer. You can use p or P again to copy the text to another location in the document. If you want to cut instead of copy, use one of the deletion commands. For example, 5dd will cut the current line as well as the next four lines, as well as copying them into the buffer. They can than be pasted into the document in another location by using p or P. Caution vi stores only the last text that was yanked or deleted. In other words, if you use dd to delete a line of text, and you later use yy to copy a line of text, the text from the dd operation will be overwritten in the buffer with the text from the yy operation. This means the text from the dd operation will no longer be available, nor will you be able to undo the delete. vi has many more powerful features that cannot be covered here without making this into a vi textbook. When you get to know vi, you'll recognize it as a very powerful editor that offers a fast and reliable way to edit documents. If you would like to learn more about vi, a few books are available on the subject, including Learning the vi Editor and vi Editor Pocket Reference, both available from O'Reilly. Editing Text Graphically in KEdit or geditKDE provides a fully functional text editor, similar to Notepad in Windows, called KEdit. This program can be found in the Editors submenu of the K menu. Similarly, GNOME provides a Notepad-style text editor called gedit, found in the Accessories submenu of the Applications menu, and labeled simply Text Editor. gedit is shown in Figure 6.6. Figure 6.6. gedit, the built-in text editor in GNOME. Its equivalent in KDE is KEdit.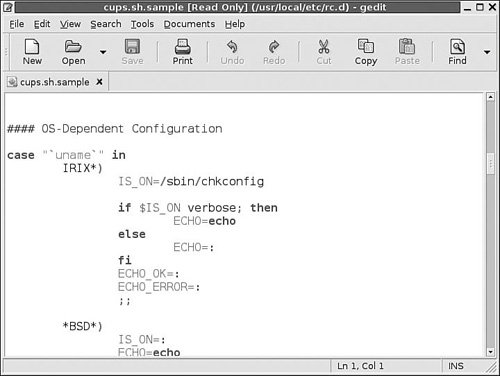 Operating either of these text editors is very similar to working with Notepad in Windows: you use the File menu to perform operations such as opening and saving files, and you use the Edit menu (and its associated keyboard shortcuts) for operations such as copying and pasting text you select with the mouse. As shown in Figure 6.6, these editors even provide functionality that you won't have seen in Notepadgedit, for example, automatically renders parts of recognizable program files (such as shell scripts) with boldface and differently colored text, even though this special formatting isn't saved in the plain text of the file. This formatting is of special importance to programmers, for whom having variables shown in one style of text and flow-control statements in another is very helpful. Note If you're running KDE or GNOME as a non-root user (as you should be), you'll find that you can't directly edit system configuration files that are owned by root. In KDE you can get around this by opening up the Options pane of the Run Command dialog box and turning on the Run as a Different User check box, where you can specify root's username and password so you can edit the file with root privileges (which apply only to that KEdit process). GNOME doesn't have this functionality, however; you have to either run GNOME as root (which is dangerous), or simply save your edited files in a location where you have write access, and then use su in a terminal window to assume root privileges and move the edited file back into its proper location. The inconvenience of this workflow is why even KDE or GNOME users often prefer to use CLI-based text editors to work on system configuration files. |