33.1 Diagnostics Tools
| With SMB networking, it is often not immediately clear what the cause is of a certain problem. Samba itself provides rather useful information, but in some cases you might have to fall back to using a sniffer . A sniffer is a program that listens on your LAN, analyzes the data sent on it and displays it on the screen. 33.1.1 Debugging with Samba ItselfOne of the best diagnostic tools for debugging problems is Samba itself. You can use the -d option for both smbd and nmbd to specify the debug level at which to run. See the man pages for smbd, nmbd and smb.conf for more information regarding debugging options. The debug level can range from 1 (the default) to 10 (100 for debugging passwords). Another helpful method of debugging is to compile Samba using the gcc -g flag. This will include debug information in the binaries and allow you to attach gdb to the running smbd/nmbd process. To attach gdb to an smbd process for an NT workstation, first get the workstation to make the connection. Pressing ctrl-alt-delete and going down to the domain box is sufficient (at least, the first time you join the domain) to generate a LsaEnumTrustedDomains . Thereafter, the workstation maintains an open connection and there will be an smbd process running ( assuming that you haven't set a really short smbd idle timeout). So, in between pressing ctrl-alt-delete and actually typing in your password, you can attach gdb and continue. Some useful Samba commands worth investigating are: $ testparm more $ smbclient -L //{netbios name of server} 33.1.2 TcpdumpTcpdump [1] was the first UNIX sniffer with SMB support. It is a command-line utility and now, its SMB support is somewhat lagging that of ethereal and tethereal .
33.1.3 EtherealEthereal [2] is a graphical sniffer, available for both UNIX (Gtk) and Windows. Ethereal's SMB support is quite good.
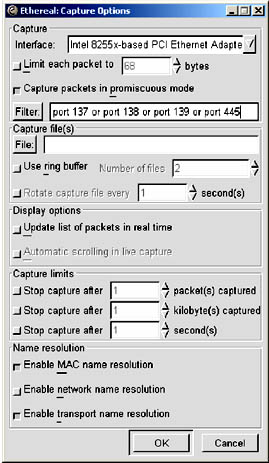
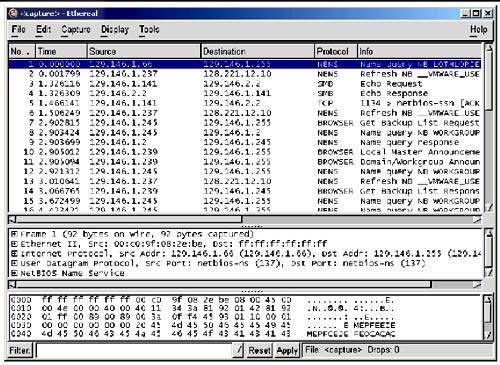
For details on the use of ethereal , read the well-written Ethereal User Guide. Listen for data on ports 137, 138, 139, and 445. For example, use the filter port 137 , port 138 , port 139 , or port 445 as seen in Figure 33.1. Figure 33.1. Starting a capture. A console version of ethereal is available as well and is called tethereal . Figure 33.2. Main ethereal data window. 33.1.4 The Windows Network MonitorFor tracing things on Microsoft Windows NT, Network Monitor (aka Netmon) is available on Microsoft Developer Network CDs, the Windows NT Server install CD and the SMS CDs. The version of Netmon that ships with SMS allows for dumping packets between any two computers (i.e., placing the network interface in promiscuous mode). The version on the NT Server install CD will only allow monitoring of network traffic directed to the local NT box and broadcasts on the local subnet. Be aware that Ethereal can read and write Netmon formatted files. 33.1.4.1 Installing Network Monitor on an NT WorkstationInstalling Netmon on an NT workstation requires a couple of steps. The following are instructions for installing Netmon V4.00.349, which comes with Microsoft Windows NT Server 4.0, on Microsoft Windows NT Workstation 4.0. The process should be similar for other versions of Windows NT version of Netmon. You will need both the Microsoft Windows NT Server 4.0 Install CD and the Workstation 4.0 Install CD. Initially you will need to install Network Monitor Tools and Agent on the NT Server to do this:
At this point, the Netmon files should exist in %SYSTEMROOT%\System32\netmon\*.* . Two subdirectories exist as well, parsers\ which contains the necessary DLLs for parsing the Netmon packet dump, and captures\ . To install the Netmon tools on an NT Workstation, you will first need to install the Network Monitor Agent from the Workstation install CD.
Now copy the files from the NT Server in %SYSTEMROOT%\System32\netmon to %SYSTEMROOT%\System32\netmon on the Workstation and set permissions as you deem appropriate for your site. You will need administrative rights on the NT box to run Netmon. 33.1.4.2 Installing Network Monitor on Windows 9x/MeTo install Netmon on Windows 9x/Me, install the Network Monitor Agent from the Windows 9x/Me CD ( \admin\nettools\netmon ). There is a readme file located with the Netmon driver files on the CD if you need information on how to do this. Copy the files from a working Netmon installation. |
EAN: 2147483647
Pages: 297