| When creating a component in MXML, elements can be added to the component using standard MXML tags. These tags are not available to you when you create components in ActionScript, so to create children of your component, you need to override the createChildren() method of your components superclass. The createChildren() method is automatically called during the initialization sequence of a Flex component. The initialization sequence is the following: Constructor createChildren() commitProperties() measure() updateDisplayList()
The four methods after the constructor are initially implemented in mx.core.UIObject. Virtually any ActionScript 3.0 component you create will need to override the createChildren() and updateDisplayList() methods, as you will do in the next few exercises. The commitProperties() method needs to be overridden only if you need to set properties dependant on other properties that are already set, or if you want to explicitly pass in properties to be set on newly created components. After all the children of a component are created, commitProperties() is called to set all the properties passed in. By waiting until this method is called, you know that the children have already been successfully instantiated before their properties are set. The measure() method exists to enable you to manually calculate the height and width of all created children, if necessary. This method often needs to be overridden for creation of new containers with unique layout rules. In the case of the MaxRestorePanel, the commitProperties() and measure() methods of the superclass (Panel) are adequate and therefore do not need to be overridden. Creating a Button in ActionScript When working with ActionScript 3.0 components, you need a way to instantiate child components. Fortunately, Flex 2 and ActionScript 3.0 enable you to do this just like any other class you instantiate by using the new keyword. To create a new instance of the Button component, you would simply declare the following: import mx.controls.Button; var myButton:Button = new Button();
After you instantiate the Button, you can set any properties on it, just as you would with any other object, such as the following: myButton.label= "click me"; myButton.addEventListener("click",doClick); myButton.width=150;
Using the addChild() Method to Add the Button to your Component Merely creating a component does not add it to the interface. As you learned earlier, user interface elements in Flex must be shown within a container. To add an element to a container, you need to use the container's addChild() method. The mx.core.Container class implements the addChild() method that will append the new child in the container. Depending on the type of container, this may impact where in the container the child is shown. For example, a VBox shows its children in order vertically, so the first child is shown on top, the next vertically below the first, and so on. So, in the following example, the order in which the children are added dictates the order in which they appear. package{ import mx.containers.VBox; import mx.controls.Label; public class Test extends VBox{ protected override function createChildren(): void { var a:Label = new Label(); a.text= "label one"; this.addChild(a); var b:Label = new Label(); b.text= "label two"; this.addChild(b); var c:Label = new Label(); c.text = "label three"; this.addChild(c); } } }
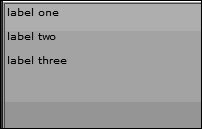
Had this class instead been based on the Canvas class, all three labels would be stacked up on top of each other, as they would all be placed at an x and y of 0. Tip  | You can explicitly declare where you want a child created by using addChildAt() instead of addChild(). Both methods are available to all containers. |
Understanding chrome and rawChildren Flex containers have two distinct sections: the layout area, in which their children are drawn; and the chrome, which consists of all the other elements, such as borders, backgrounds, margins, scrollbars, headers, footers, and so on. In the Panel class, the title bar of a panel is implemented as chrome. The base class flash.display.DisplayObjectContainer does not draw any distinction between child components and chromethey are all accessible using the getChildAt and numChildren properties. However, the mx.core.Container class (the superclass for all Flex containers) overrides several methods, including getChildAt() and numChildren(), to give the appearance that the container's only children are the child components. To gain access to all of the elements, you need to use the rawChildren property. Likewise, to add elements to the chrome (as you will do in the next exercise when you add a Maximize and Restore button), they need to be added to the rawChildren property. With a Panel, any children added with addChild() will be rendered below the title bar. If you want to add elements to the title bar, you must use rawChildren.addChild(). Using addChild on rawChildren to Add Elements to the Chrome In this exercise, you will add two buttons to the chrome of your MaxRestorePanel. 1. | Open the MaxRestorePanel.as file you created earlier in this lesson.
This file contains the skeleton of the new class you wrote earlier.
| 2. | Create a new protected function named createChildren(), which overrides the function from the superclass.
protected override function createChildren(): void { }
As was mentioned in Lesson 9, "Using Custom Events," any method overriding a method from a superclass must have exactly the same signature; therefore, your createChildren() method must be protected and must have the same argument list (in this case, none), and the same return type: void.
| 3. | Inside the new function, call the superclass' createChildren() method.
super.createChildren();
You still need the rest of the Panel's chrome to be created, so you should explicitly invoke the createChildren() method of the superclass, so those elements will still be created.
| 4. | Create the new btStateUp button.
btStateUp = new Button();
In the property definitions at the top of the class, you declared variables for two buttons: btStateUp and btStateDown. This is instantiating a button into the first of these two.
| 5. | Create the new btStateDown button
btStateDown = new Button();
| 6. | Set event listeners on each button. Clicking btStateUp should fire a soon-to-be-written method called doMaximize(); clicking btStateDown should fire a soon-to-be-written method called doRestore().
btStateUp.addEventListener("click",doMaximize); btStateDown.addEventListener("click",doRestore);
| | | 7. | Use the buttons' setStyle() methods to set the embedded graphics as the icons for the buttons.
btStateUp.setStyle("overIcon",buttonUpIcon); btStateUp.setStyle("downIcon",buttonUpIcon); btStateUp.setStyle("upIcon",buttonUpIcon); btStateDown.setStyle("overIcon",buttonDownIcon); btStateDown.setStyle("downIcon",buttonDownIcon); btStateDown.setStyle("upIcon",buttonDownIcon);
You will learn about the setStyle() method in detail in Lesson 16, "Customizing the Look and Feel of a Flex Application." For now, it's worthwhile to understand that you can use the setStyle() method to specify an icon to use for each of the states. The up state is the normal default appearance; the over state is how the button appears when the mouse is over it; the down state is how the button appears when the mouse is clicked on the button. For now, you are setting all three states to be the same, so the button will not change its appearance when the user moves their mouse over it or clicks it.
| 8. | Set the initial visibility of the buttons so that btStateUp is visible and btStateDown is not when the application starts.
btStateUp.visible =true; btStateDown.visible =false;
In a few steps, you will add code to ensure that only one button is seen whenever it's clicked. The previous line ensures that the MaxRestorePanel starts with only a single button visible as well.
| | | 9. | Add the newly created buttons to the rawChildren property.
rawChildren.addChild(btStateUp); rawChildren.addChild(btStateDown);
At this point, the createChildren() method should look like this:
protected override function createChildren(): void { super.createChildren(); btStateUp = new Button(); btStateDown = new Button(); btStateUp.addEventListener("click",doMaximize); btStateDown.addEventListener("click",doRestore); btStateUp.setStyle("overIcon",buttonUpIcon); btStateUp.setStyle("downIcon",buttonUpIcon); btStateUp.setStyle("upIcon",buttonUpIcon); btStateDown.setStyle("overIcon",buttonDownIcon); btStateDown.setStyle("downIcon",buttonDownIcon); btStateDown.setStyle("upIcon",buttonDownIcon); btStateUp.visible=true; btStateDown.visible=false; rawChildren.addChild(btStateUp); rawChildren.addChild(btStateDown); }
| 10. | Create a doMaximize() method, which will set the state property to 1; toggle the visibility of the buttons, so that btStateDown is visible and btStateUp is not.
private function doMaximize(event:Event) :void{ setState(1); btStateUp.visible= false; btStateDown.visible= true; }
This method will call the setState() method you wrote earlier, and pass it the value 1. This tells your Panel it should become maximized. When you set the state to maximized, the btStateUp button is hidden, and the btStateDown button is shown.
| 11. | Create a doRestore() method to set the current state to 0; toggle the visibility of the buttons, so that btStateUp is visible and btStateDown is not.
private function doRestore(event:Event) :void{ setState(0); btStateUp.visible= true; btStateDown.visible= false; }
This method will call the setState() method you wrote earlier and pass it the value 0. This tells your Panel that it should be restored to its initial state. When you set the state to restored, the btStateUp button is shown, and the btStateDown button is hidden.
| 12. | Open the ChartPod.mxml file from /views/dashboard.
| 13. | Set the ControlBar id to controls. Add two buttons inside the <mx:ControlBar> tag. One with an id of btGraph and a label of Graph and the other with the id of btData and the label set to Data.
<mx:ControlBar > <mx:Button label="Graph" /> <mx:Button label="Data" /> </mx:ControlBar>
| | | 14. | Change the root node of ChartPod from <mx:Panel> to <v:MaxRestorePanel>, and add an XML namespace to relate v: to the views directory.
<?xml version="1.0" encoding="utf-8"?> <v:MaxRestorePanel xmlns:mx="http://www.adobe.com/2006/mxml" xmlns:v="views.*" layout="vertical"> <mx:ControlBar > <mx:Button label="Graph" /> <mx:Button label="Data" /> </mx:ControlBar> </v:MaxRestorePanel>
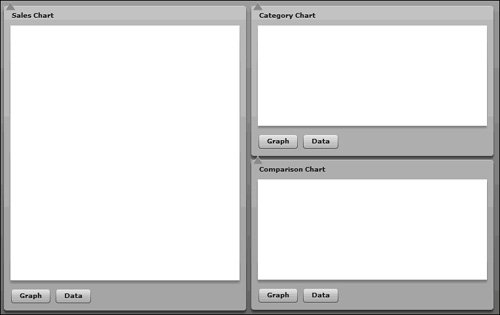
| 15. | Save ChartPod.mxml. Test the Dashboard application.
As the Dashboard application runs, you should see the up and down arrows placed on top of each other in the top-left corner of each Panel. As you click the buttons in the corner, it will toggle them so only one of the two is visible. You might notice that the button is not showing a border or background, like buttons normally do; in the next exercise, you will set the size of the button so it can render itself properly with borders and background. In that exercise, you will also position the buttons appropriately.
 |
|