| At this point, you have created the bulk of the ActionScript 3.0 component. You defined the class, instantiated the children, and added them to the chrome. All that remains is to position them appropriately. For this, you will override the updateDisplayList() method. This method is automatically invoked each time the component is redrawn, such as when it changes size or when the browser is resized. When you override this method, you should first call the super.updateDisplayList() method to ensure that the Panel's layout is also done properly. Each time this method is called, it is passed two attributes, unscaledHeight and unscaledWidth, which are the actual height and width of the component regardless of any scaling that may have been applied. 1. | Open the MaxRestorePanel.as file you created in the previous exercise.
This file contains the class you created earlier in this lesson, with the buttons added to the chrome of the Panel.
| 2. | Override the updateDisplayList() function, which will accept two numeric arguments (call them unscaledWidth and unscaledHeight), and return void.
[View full width] protected override function updateDisplayList(unscaledWidth: Number, unscaledHeight  :Number):void { } :Number):void { }
| 3. | As the first line inside updateDisplayList(), call updateDisplayList() in the superclass and pass in the same two arguments received by your function.
super.updateDisplayList(unscaledWidth, unscaledHeight);
To ensure that the updateDisplayList() method of the superclass (Panel), is run properly, you need to explicitly call it in your override method. The unscaledWidth and unscaledHeight attributes tell the function the exact pixel width and height of your MaxRestorePanel. Because you want to place the buttons near the top-right corner of the Panel, knowing the actual width is required, so the button can be placed relative to the right side.
| | | 4. | Add a conditional statement to set the component's visible property to true if the unscaledWidth parameter is greater than 0. Add an else block to set the visible property to false when it isn't.
if(unscaledWidth > 0){ this.visible= true; } else { this.visible= false; }
When one of your panels is maximized, you'll set the height and width of the other panels to 0. This conditional statement enables you to determine whether the instance of the component has a nonzero size. If so, you will add all the necessary logic to render the component; otherwise, you will simply hide it.
| 5. | Just after the conditional statement added in the previous step, create a handle on the graphics used for btStateUp and btStateDown by using the buttons' getChildByName() method.
var upAsset:DisplayObject = btStateUp.getChildByName("upIcon"); var downAsset:DisplayObject = btStateDown.getChildByName("upIcon");
The getChildByName() method of a component is specified as an instance of the DisplayObject class. This class is a superclass of all Flex components, and implements the properties height and width, amongst others. Because this is the first time you are using the DisplayObject class, you should add it to the imports at the beginning of the class, if it wasn't automatically added when you created the variable.
package views { import flash.events.Event; import mx.containers.Panel; import mx.controls.Button; import flash.display.DisplayObject;
| 6. | Just after the variable declarations for upAsset and downAsset, create a variable named margin, of data type int, with a value of 4.
var margin:int = 4;
The margin variable enables you to have a few pixels between the icon and border of the button. Here, the value of 4 allows for 2 pixels on each side of the button.
| 7. | Call the setActualSize() method for both buttons, passing in the width and height of the icons plus the margin.
btStateUp.setActualSize(upAsset.width+margin, upAsset.height+margin); btStateDown.setActualSize(downAsset.width+margin, downAsset.height+margin);
Because the assets you are using are 14 by 14, this will set the size of the buttons to be 18 by 18giving a 2-pixel border to the top, left, right, and bottom of the button. This allows room for the border to be drawn and to show some area for a background.
| | | 8. | Save the component and run Dashboard.mxml.
The buttons are now appropriately sized. Now, you need to position them.
 | 9. | Just after the two setActualSize() calls, define variables to indicate the width of the button and the distance which it should be rendered from the top and right edges.
var pixelsFromTop:int = 5; var pixelsFromRight:int = 10; var buttonWidth:int=btStateUp.width;
Because both buttons have the same width, it isn't necessary to create a different variable for each button's width. If you were building a system in which each button might have a different width, you would need to explicitly capture each button's width. If you hadn't set the size of the component in the earlier step, btState.width would be equal to 0 (which would not work as you expect).
| 10. | Create a variable which will compute the x coordinate for the buttons by subtracting the unscaledWidth from the buttonWidth; then subtract the pixelsFromRight variable.
var x:Number = unscaledWidth buttonWidth - pixelsFromRight;
This sets the button's position relative to the right edge of the Panel. Because the x coordinate indicates the left edge of the button, subtract the width of the panel (unscaledWidth) from the button's width and then subtract the pixelsFromRight to offset the button from the edge of the Panel.
| 11. | Create a variable y equal to the pixelsFromTop variable.
var y:Number = pixelsFromTop;
| | | 12. | Move both buttons to the newly computed x and y coordinates.
btStateDown.move(x, y); btStateUp.move(x, y);
Both buttons are set to the same coordinate because only one of the two will be seen at any given time.
| | | 13. | Save MaxRestorePanel.as. Run Dashboard.mxml.
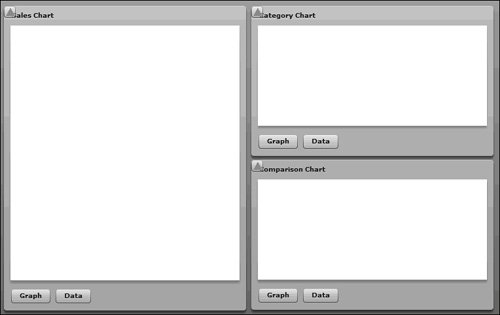
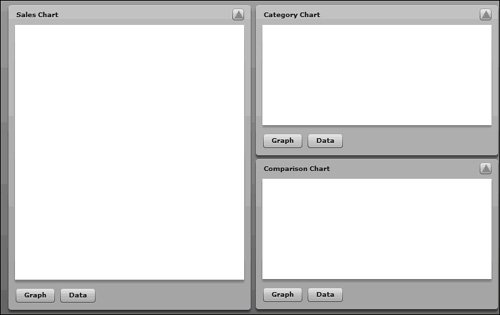
As this runs, you should see that the buttons are rendered in the correct place and properly toggle when clicked. All that remains to make this functional is to have the main application (Dashboard.mxml) listen to each of the components for the maximize or restore events and to toggle the states appropriately.
 Your completed updateDisplayList() method should read like this: Your completed updateDisplayList() method should read like this:
[View full width] protected override function updateDisplayList(unscaledWidth: Number, unscaledHeight :Number):void { super.updateDisplayList(unscaledWidth, unscaledHeight); if(unscaledWidth > 0){ this.visible= true; } else { this.visible= false; } var upAsset:DisplayObject = btStateUp.getChildByName("upIcon"); var downAsset:DisplayObject = btStateDown.getChildByName("upIcon"); var margin:int = 4; btStateUp.setActualSize(upAsset.width+margin, upAsset.height+margin); btStateDown.setActualSize(downAsset.width+margin, downAsset.height+margin); var pixelsFromTop:int = 5; var pixelsFromRight:int = 10; var buttonWidth:int=btStateUp.width; var x:Number = unscaledWidth - buttonWidth - pixelsFromRight; var y:Number = pixelsFromTop; btStateDown.move(x,y); btStateUp.move(x,y); }
| 14. | Open the Dashboard.mxml file.
You can also copy Lesson10/start/Dashboard.mxml to your flexGrocer directory if you choose.
| 15. | Remove the four LinkButton controls and the Spacer control from the ApplicationControlBar. Add two new <mx:Spacer> tags, one between the endDate DateField and the ComboBox, and another between the ComboBox and the RadioButtonGroup, to force the remaining controls to occupy the entire ApplicationControlBar.
<mx:ApplicationControlBar dock="true"> <mx:Label text="Start Date"/> <mx:DateField /> <mx:Label text="End Date"/> <mx:DateField /> <mx:Spacer width="100%"/> <mx:ComboBox dataProvider="{categories}" labelField = "name"/> <mx:Spacerwidth="100%"/> <mx:RadioButtonGroup /> <mx:RadioButton groupName="grossOrNetGroup" label="Gross Sales" data="GROSS" selected="true"/> <mx:RadioButton groupName="grossOrNetGroup" label="Net Sales" data="NET"/> </mx:ApplicationControlBar>
You no longer need the links, as each panel now has a button you can use to maximize it.
| | | 16. | Add an attribute to the first <mx:ChartPod> tag, which will set the currentState to fullSales when the maximize event occurs. Add another attribute to reset the currentState when the restore event occurs.
<v:ChartPod width="100%" height="100%" title="Sales Chart" maximize="this.currentState='fullSales'" restore="this.currentState=''">
Remember, your MaxRestorePanel is the base class for ChartPod, so ChartPod will broadcast the maximize and restore events that you defined in MaxRestorePanel.
| 17. | Handle the maximize and restore events for the other two ChartPods. The restore event handler will be identical for all three, the maximize event handler for the type pod will set the currentState to fullType and the maximize event handler for the comp pod will set the currentState to fullComp.
<v:ChartPod width="100%" height="100%" title="Category Chart" maximize="this.currentState='fullType'" restore="this.currentState=''"> </v:ChartPod> <v:ChartPod width="100%" height="100%" title="Comparison Chart" maximize="this.currentState='fullComp'" restore="this.currentState=''"> </v:ChartPod>
| 18. | Save and run Dashboard.mxml. You should now be able to maximize or restore any of the three pods.
|
|