| You just passed a data set to a HorizontalList control and had an item displayed for each object in the data set. In addition to this functionality, at some point you will want to loop over the data set. For instance, you might need to loop over the data set and display a radio button or check box for each object in the data set. In this task, you will add functionalitywhen the category is clicked, appropriate grocery items are displayed. Using a Repeater to Loop Over a Data Set You can loop over a data set in MXML using a Repeater component. Just as HorizontalList created one item for each object in the data set, the Repeater will loop once for each object in a data set. You have access to the data in the objects when the Repeater is initially looping and when the user is interacting with the application. The general syntax for a Repeater is as follows: <mx:Repeater dataProvider="{data}"> </mx:Repeater>
A Repeater loops over a data set and enables you to access each item of that set. Two properties help you access this data while looping. The currentItem property is a reference to the particular piece of data in the set that you are currently processing, and currentIndex is a zero-based counter that specifies this item's order in the data set. The following code example creates radio buttons for each object in a data set. You will use data from the objects for the radio button label. The code would appear as follows: <mx:Script> <![CDATA[ import mx.collections.ArrayCollection; private var arrayData:Array=[ {name:"banana",cat:"fruit",imgName:"banana.jpg"}, {name:"grape",cat:"fruit",imgName:"grape.jpg"}, {name:"strawberry",cat:"fruit",imgName:"strawberry.jpg"}, {name:"tomato",cat:"vegetable",imgName:"tomato.jpg"}, {name:"broccoli",cat:"vegetable",imgName:"broccoli.jpg"}]; private var dp:ArrayCollection=new ArrayCollection(arrayData); ]]> </mx:Script> <mx:Repeater dataProvider="{dp}"> <mx:RadioButton label="{myRepeater.currentItem.name}"/> </mx:Repeater>
The result of this code would appear as follows: 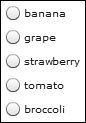
Note that you use the name property from the objects being repeated over for the label of the radio buttons. Also notice that there are five objects in the array, and there are five buttons created by the Repeater. The values of the currentItem and currentIndex properties are meaningful only during the actual looping. For example, after the Repeater has finished looping, currentIndex contains the value -1. Retrieving Data from Repeated Components The next problem to solve is how to use data from the controls created in the Repeater after the looping is finished. You have already learned that currentItem and currentIndex will be of no value except during the looping. For example, how can you retrieve costs associated with each grocery item using the preceding example code? Repeated components have a getrepeaterItem() method that returns the item in the dataProvider property that was used to produce the object. When the Repeater component finishes repeating, you can use the getrepeaterItem() method to determine what the event handler should do based on the currentItem property. Assume that you want to expand the code example by filling a Label control with the price of the grocery item when a radio button is selected. You do this by adding a click event to the radio button and using the event.target.getRepeaterItem() method to get the data. The code would appear as follows: <mx:Script> <![CDATA[ import mx.collections.ArrayCollection; private var arrayData:Array=[ {name:"banana",cat:"fruit",cost:.99}, {name:"bread",cat:"bakery",cost:1.99}, {name:"orange",cat:"fruit",cost:.52}, {name:"donut",cat:"bakery",cost:.33}, {name:"apple",cat:"fruit",cost:1.05}]; private var dp:ArrayCollection=new ArrayCollection(arrayData); ]]> </mx:Script> <mx:Label text="Price Here"/> <mx:Repeater dataProvider="{dp}"> <mx:RadioButton label="{myRepeater.currentItem.name}" click="priceLabel.text=event.target.getRepeaterItem().cost" /> </mx:Repeater>
Although this works, you have learned it is a better practice to call a function on an event. When using a function, the code appears as follows: <mx:Script> <![CDATA[ import mx.collections.ArrayCollection; private var arrayData:Array=[ {name:"banana",cat:"fruit",cost:.99}, {name:"bread",cat:"bakery",cost:1.99}, {name:"orange",cat:"fruit",cost:.52}, {name:"donut",cat:"bakery",cost:.33}, {name:"apple",cat:"fruit",cost:1.05}]; private var dp:ArrayCollection=new ArrayCollection(arrayData); private function displayCost(repeaterItem:Object):void{ priceLabel.text=repeaterItem.cost; } ]]> </mx:Script> <mx:Label text="Price Here"/> <mx:Repeater dataProvider="{dp}"> <mx:RadioButton label="{myRepeater.currentItem.name}" click="displayCost(event.target.getRepeaterItem())" /> </mx:Repeater>
You pass the object retrieved by event.target.getRepeaterItem() to the function as a parameter and then fill the Label control with the cost property of that object. The result of this code would appear as follows: 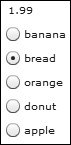
Addressing Components Built by a Repeater Another issue that needs to be clarified when using a Repeater is how to address the repeated components after they have been instantiated in the loop. Up to this point, you used the id property to uniquely identify each object. When you use an id property on a component within a Repeater, you seemingly would have many components with the same instance name. This is not the case because Flex creates an array of these components when they are repeated over. You actually use array syntax to individually address each of the components. For example, if you repeat it over a check box four times, and that check box had an id of myCheck, you address those four controls as myCheck[0], myCheck[1], myCheck[2], and myCheck[3]. The following code uses this array notation to change the label of radio buttons when the user clicks a button. When the button is clicked, a function is called, and two labels are changed: <mx:Script> <![CDATA[ import mx.collections.ArrayCollection; private var arrayData:Array=[ {name:"banana",cat:"fruit",cost:.99}, {name:"bread",cat:"bakery",cost:1.99}, {name:"orange",cat:"fruit",cost:.52}, {name:"donut",cat:"bakery",cost:.33}, {name:"apple",cat:"fruit",cost:1.05}]; private var dp:ArrayCollection=new ArrayCollection(arrayData); private function displayCost(repeaterItem:Object):void{ priceLabel.text=repeaterItem.cost; } private function changeLabels():void{ myButtons[0].label="New Banana"; myButtons[3].label="New Donut"; } ]]> </mx:Script> <mx:Label text="Price Here"/> <mx:Repeater dataProvider="{dp}"> <mx:RadioButton label="{myRepeater.currentItem.name}" click="displayCost(event.target.getRepeaterItem())"/> </mx:Repeater> <mx:Button label="Change Radio Buttons" click="changeLabels()" />
The result of this code would appear as follows: 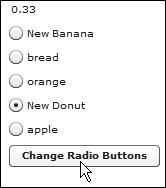
Understanding Performance Differences Between TileList and Repeater Performance should always be considered when developing an application, and you have a performance decision to make when presenting data in a tiled look. Earlier in the book, you used a Tile container. You could place a Repeater inside the Tile container, and the resulting display would look very much like using the TileList, which you learned about earlier in this lesson. Which is the better option? Generally speaking, you should probably use the TileList control because TileList control instantiates objects when they are displayed, whereas a Repeater inside of a Tile container instantiates all the objects in the entire data set, whether they are initially displayed or not. Depending on the size of the data set, this could result in a long delay before the page is displayed in Flash Player. One point to consider in this decision is scrolling. Because the TileList control must instantiate each object as the user is scrolling, you might see better scrolling performance using a Repeater inside of the Tile container when all the objects are initially instantiated. If the data set is quite small, you will most likely not see any performance difference between the two options. Displaying Grocery Items Based on Category In this task, a Repeater will be used to instantiate a custom component numerous times. The data provider of the Repeater will contain all the grocery items that belong to one particular category. | | 1. | In the component CategoryView.mxml in the <mx:Script> block, add a bindable public variable named catSelected, data typed as int.
This variable will be used to store the category ID. That value will then be used to retrieve all the grocery items belonging to that category. Datatyping as int is the best choice because the category ID is always an integer.
| 2. | Also in the <mx:Script> block, create a private function named categorySelect() and data type it as void. In the function, assign the catSelected variable the catID from the selectedItem of the <mx:HorizontalList>, which is the root tag of the component.
private function categorySelect():void{ catSelected=this.selectedItem.catID; }
This will store the category ID value that can later be used to retrieve the corresponding products.
Tip  | You cannot assign an id to the root tag of a component, so you could not have added the id property to the <mx:HorizontalList> tag and used the instance name (instead of this) in the code in the function. The function will work correctly without adding the this prefix, but use it if you feel it makes the code more readable. |
| 3. | In the <mx:HorizontalList> tag, add a click event to call the categorySelect() function, which will assign the selected category's ID to the catSelected variable.
| 4. | Right-click on the views/ecomm folder and choose New > MXML Component. In the New MXML Component dialog box, set the filename to be FoodList.mxml, the base component to a VBox, and remove any width and height values; then click Finish.
| 5. | Add an XML namespace, using the letter v as the prefix, to access components in the views/ecomm folder:
xmlns:v="views.ecomm.*"
| | | 6. | In an <mx:Script> block, import mx.collections.ArrayCollection and then create a bindable, public variable named prodByCategory, data typed as ArrayCollection.
<mx:Script> <![CDATA[ import mx.collections.ArrayCollection; [Bindable] public var prodByCategory:ArrayCollection; ]]> </mx:Script>
This is the property to which you will pass the products of a certain category.
| 7. | Below the <mx:Script> block, insert an <mx:Repeater> tag block. Set the id to be foodRepeater, and also set the width and height to be 100%. Finally, bind the dataProvider to the prodByCategory property.
<mx:Repeater width="100%" height="100%" dataProvider="{prodByCategory}"> </mx:Repeater>
The Repeater will loop once for each product in the result set passed to the component.
| 8. | In the Repeater, instantiate a component named GroceryDetail, which you will begin writing in the next step. Give the component an id of prod and set the width to 80%. Pass the currentItem of the Repeater to a property which you will name groceryItem.
<mx:Repeater width="100%" height="100%" dataProvider="{prodByCategory}"> <v:GroceryDetail width="80%" groceryItem="{foodRepeater.currentItem}"/> </mx:Repeater>
The GroceryDetail component will be instantiated once for each product looped over in the Repeater.
| 9. | Create another component in the views/ecomm folder named GroceryDetail.mxml and use a Canvas tag as the base tag. Remove any width and height values.
This creates the skeleton of the component that will display grocery items.
| 10. | In the <mx:Canvas> tag, set both the horizontalScrollPolicy and verticalScrollPolicy to off to ensure no scroll bars appear.
| 11. | Add an <mx:Script> block and import valueObjects.Product.
The object passed to this component is a Product, so you need to import this class so you can use it as a data type.
| | | 12. | Create a bindable public variable named groceryItem, data typed as Product.
<?xml version="1.0" encoding="utf-8"?> <mx:Canvas xmlns:mx="http://www.adobe.com/2006/mxml" horizontalScrollPolicy="off" verticalScrollPolicy="off"> <mx:Script> <![CDATA[ import valueObjects.Product; [Bindable] public var groceryItem:Product; ]]> </mx:Script> </mx:Canvas>
This is the property that accepts an object passed to the component from the currentItem of the Repeater.
| 13. | In the body of the component, insert an <mx:Image> tag with an id set to pic and the source set to the imageName of the groceryItem. Remember that the images are in the assets folder.
<mx:Image source="{'../assets/'+groceryItem.imageName}"/>
This will display the image of each grocery item in the selected category.
| 14. | Below the image, insert a Label control to display the prodName of the groceryItem. Set the id to prodName, the x position to 100, and the y position to 0.
<mx:Label text="{groceryItem.prodName}" x="100" y="0"/>
The product name will appear with the image. It is important to understand that the x and y values supplied here position the Label relative to the top-left corner of the Canvas location, not the 0,0 position of the Application. So this Label control will be positioned right 100 pixels and down 0 pixels from the top-left corner of where the Canvas is positioned.
| 15. | Below the first Label, insert another Label control to display the listPrice of the groceryItem. Set the id to price, the x position to 100, and the y position to 20.
<mx:Label text="{groceryItem.listPrice}" x="100" y="20"/>
The product price will be displayed after the product name.
| | | 16. | Below the Label controls, add a Button with an id of add and a label of Add To Cart. On the click event, call a function named itemAdded(), passing the groceryItem as a parameter. Also, position the Button at x, y values 100, 40.
<mx:Button label="Add To Cart" click="itemAdded(groceryItem)" x="100" y="40"/>
Clicking the button calls the function that will eventually start the process of adding the product to the shopping cart.
| | | 17. | At the bottom of the <mx:Script> block, create a private function named itemAdded(). The function should accept a parameter named prod, data typed as Product. Because the function does not return a value, data type the function itself as void. In the function, simply trace the prod parameter. The function is highlighted in the completed component:
<?xml version="1.0" encoding="utf-8"?> <mx:Canvas xmlns:mx="http://www.adobe.com/2006/mxml" horizontalScrollPolicy="off" verticalScrollPolicy="off"> <mx:Script> <![CDATA[ import valueObjects.Product; [Bindable] public var groceryItem:Product; private function itemAdded(prod:Product):void{ trace(prod); } ]]> </mx:Script> <mx:Image source="{'../assets/'+groceryItem.imageName}" /> <mx:Label text="{groceryItem.prodName}" x="100" y="0"/> <mx:Label text="{groceryItem.listPrice}" x="100" y="20"/> <mx:Button label="Add To Cart" click="itemAdded(groceryItem)" x="100" y="40"/> </mx:Canvas>
At this point, you will simply trace the product. Later in this lesson, you will add code to the function to place the product in a shopping cart.
Tip | Remember that the Product is an ActionScript value object you built. The reason you can trace it is because you wrote a toString() method that displays just the product name. |
| 18. | In EComm.mxml, some cleaning up needs to be done. Some functionality then needs to be added to display products by category, which is the whole point of this task. Start by removing the creationComplete event from the <mx:Application> tag.
You will be retrieving categorized product information from the data manager component, so this HTTPService will not be needed.
| 19. | Remove the bindable private property groceryInventory. Don't forget to remove the [Bindable] metadata tag with the variable declaration.
This variable was used to store grocery product information. It is no longer needed because this data will now be pulled in from the data manager component.
| 20. | Remove the entire function named prodHandler().
This function-supplied data is now retrieved from the data manager component.
| 21. | Remove the <mx:HTTPService> tag with the id of prodByCatRPC.
The data manager removes the need for this HTTPService.
Tip | In the next step you will be asked to locate a specific VBox instance. Use the Outline view to find named object instances. |
| 22. | Locate the VBox with an id of products. Remove that VBox and the five children it contains.
The main point of functionality added in this task is to display grocery items based upon product selection. These VBox containers will be replaced by a custom-built component to do just that.
| 23. | In the single remaining State named cartView, locate the two <mx:SetProperty> tags.
<mx:SetProperty target="{products}" name="width" value="0"/> <mx:SetProperty target="{products}" name="height" value="0"/>
These tags reference the VBox that was removed, so they must be altered.
| | | 24. | Change the target of the two <mx:SetProperty> tags so they bind to an object named prodTile instead of products.
<mx:SetProperty target="{prodTile}" name="width" value="0"/> <mx:SetProperty target="{prodTile}" name="height" value="0"/>
You will create the prodTile object later in this task.
| 25. | Remove the entire <mx:State> block with a name of expanded.
The details that were shown in this State will be added to the GroceryDetail component later in this lesson.
Now, you will start implementing the functionality of displaying grocery items by category.
| 26. | Locate the instantiation of the CategoryView component in ApplicationControlBar. Add a click event and call a function named displayProdByCategory() :
<v:CategoryView width="600" left="100" cats="{categories}" click="displayProdByCategory()" />
This will call the function that actually displays the products identified when a user clicks one of the categories.
| 27. | In the <mx:Script> block, create a bindable private variable named prodByCategory, data typed as ArrayCollection.
This variable will store the products grouped by category.
| | | 28. | At the bottom of the <mx:Script> block, insert a private function named displayProdByCategory(), data typed as void. In the function, create a variable local to the function named prodArray, data typed as Array. Remember that in the component in which you are now working, the data manager component has an instance name of catProds. Assign the prodArray variable the value returned by calling the getProdsForCat() method from the data manager component, passing the catView.catSelected value as a parameter.
private function displayProdByCategory():void{ var prodArray:Array=catProds.getProdsForCat(catView.catSelected); }
This retrieves an array of products based on the category selected from the data manager component and assigns them to a variable.
The parameter is the value from CategoryView component, which holds the category ID of the selected category. What is done here is a bad practice that will be corrected in the next lesson. It is a bad practice because it requires knowledge of the inner workings of the CategoryView component when it is not necessary.
| 29. | As the second line of code in the function, assign the prodByCategory variable a new ArrayCollection object using the prodArray variable as data for the constructor:
private function displayProdByCategory():void{ var prodArray:Array=catProds.getProdsForCat(catView.catSelected); prodByCategory=new ArrayCollection(prodArray); }
The prodByCategory variable now holds the array of products of a certain category, based on the category the user clicks. In the next step, you will pass the data out to the FoodList component, which you built earlier.
Tip | In the next step you will be asked to locate a specific HBox instance. Use the Outline view to find named object instances. |
| 30. | Locate the HBox with an id of bodyBox. It is near the end of the file just below the ApplicationControlBar.
| 31. | As the first child in this HBox, just above the existing VBox, instantiate the FoodList component. Set the id to be prodTile, and the width and height to 100%. Bind the prodByCategory property of FoodList to the prodByCategory variable from this file.
<v:FoodList width="100%" height="100%" prodByCategory="{prodByCategory}"/>
Remember that FoodList in turn calls the GroceryDetail component that actually displays product information, which at this point is nothing more than product name and price.
| 32. | Debug EComm.mxml. Click a category and a list of products should appear. Click one of the Add To Cart buttons and then return to Flex Builder. In your Console view, you should see the trace of the product added to the cart. Be sure to terminate the debugging session by clicking the red box on the top of the Console view.
Tip | You must debug the application to see the results of trace statements. |
|
|