| You can use Flex Builder to create applications that change their appearance based on the task the user is performing. For example, the e-commerce application starts by showing users the various products they can buy. When they start adding items to the cart, you want to add something to the view so they can get a feel for what is currently in the cart, such as total cost. Finally, they need a way to view and manage the full contents of the shopping cart. In Flex, you can add this kind of interactivity with view states. A view state is one of several views that you define for an application or a custom component. Every MXML page has at least one state, referred to as the base view state, which is represented by the default layout of the file. Additional states are represented in the MXML as modified versions of the base view state or of other states. 1. | Open the EComm.mxml file you used in the previous exercise.
Alternately, you can open EComm_constraint.mxml from Lesson03/intermediate and save it in your FlexGrocer directory as EComm.mxml.
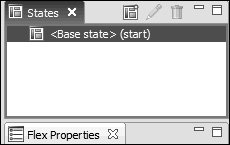
| 2. | If it is not already open, open the States view in Flex Builder 2.
If you don't currently see the States view when you look at Flex Builder in Design mode, you can add it to the view by choosing Window > States. Notice that there is already one state created to represent the default layout of the application.
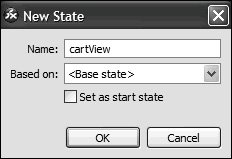
| 3. | Create a new state named cartView, which will be based on <Base state>.
You can create a state by clicking New State at the top of the States view or by right-clicking in the view and selecting the New State option. The cartView state will show users the details of all the items they have added to their cart.
| | | 4. | With the new cartView state selected, click the products container and set its height and width to 0; then, choose the cartBox container and set its height and width to 100%.
For the cart view, the shopping cart will entirely replace the products in the center of the screen; so, you will resize products to take no space and resize cartBox to take all space available.
| 5. | Still with the cartView state selected, drag a DataGrid control from the Controls folder of the Components view and drop it below the View Cart link. Set the ID of the DataGrid to dgCart and set the DataGrid's width to 100%.
In a later lesson, the DataGrid control will be used to show the user the full contents of the cart.
Be careful and make sure you are adding the DataGrid into the cartBox. Your application and code will look a bit different if you accidently add the DataGrid before the cartBox.
If you look at the file in Source mode, you should see that the following code has been added.
<mx:states> <mx:State name="cartView"> <mx:SetProperty target="{products}" name="width" value="0"/> <mx:SetProperty target="{products}" name="height" value="0"/> <mx:SetProperty target="{cartBox}" name="width" value="100%"/> <mx:AddChild relativeTo="{cartBox}" position="lastChild"> <mx:DataGrid width="100%"> <mx:columns> <mx:DataGridColumn headerText="Column 1" dataField="col1"/> <mx:DataGridColumn headerText="Column 2" dataField="col2"/> <mx:DataGridColumn headerText="Column 3" dataField="col3"/> </mx:columns> </mx:DataGrid> </mx:AddChild> </mx:State> </mx:states>
| 6. | Save the file.
Testing the file now shouldn't show any differences because you haven't added any ability for the user to toggle between the states. In the next exercise, you will add that navigation.
|
Controlling View States Each MXML page has a property called currentState. You can use this property to control which state of the application is shown to a user at any given time. 1. | Open the EComm.mxml file that you used in the previous exercise. Switch to Design mode if you are not already there.
Alternately, you can open EComm_states.mxml from Lesson03/intermediate, and save it in your FlexGrocer directory as EComm.mxml.
| 2. | If it is not already open, open the States view in Flex Builder 2 and set the chosen state to <Base state>(start).
You will add functionality to the base view state so that users can navigate to the other states of the application.
| 3. | Choose the View Cart LinkButton control from the cartBox container. In Flex Properties view, set its On click: property to this.currentState='cartView'.
Events such as the button click will be explored in detail in Lesson 5, "Handling Events and Data Structures." The important thing to understand now is that when the user clicks the link, the view will change to the cartView state.
Caution  | The state name is case-sensitive and must exactly match the name as you typed it in the previous exercise. You must use single quotes around the state name when entering it in Design mode. |
Tip  | You can also enable the View Cart button in the ApplicationControlBar by adding the same code for its click event handler as well. |
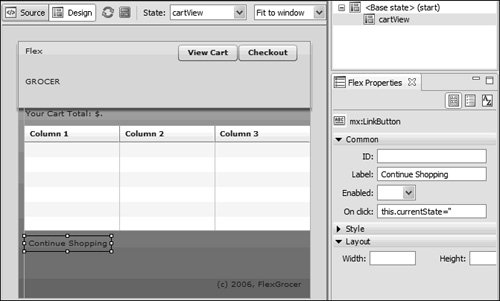
| 4. | Switch to the cartView state. Add a new LinkButton control below the DataGrid, with the label set to Continue Shopping and the click property set to this.currentState=''.
Setting currentState to an empty string resets the application to its initial state.
| | | 5. | Delete the View Cart link from the cartView state.
When the user is viewing the cart, there is no need for a link to the cart. You can delete the link by selecting it in Design mode and pressing Delete.
 The completed cartView state block of the code in Source mode should read as follows: The completed cartView state block of the code in Source mode should read as follows:
<mx:states> <mx:State name="cartView"> <mx:SetProperty target="{products}" name="width" value="0"/> <mx:SetProperty target="{products}" name="height" value="0"/> <mx:SetProperty target="{cartBox}" name="width" value="100%"/> <mx:AddChild relativeTo="{cartBox}" position="lastChild"> <mx:DataGrid width="100%"> <mx:columns> <mx:DataGridColumn headerText="Column 1" dataField="col1"/> <mx:DataGridColumn headerText="Column 2" dataField="col2"/> <mx:DataGridColumn headerText="Column 3" dataField="col3"/> </mx:columns> </mx:DataGrid> </mx:AddChild> <mx:RemoveChild target="{linkbutton1}"/> <mx:AddChild relativeTo="{cartBox}" position="lastChild"> <mx:LinkButton label="Continue Shopping" click="this.currentState=''"/> </mx:AddChild> </mx:State> </mx:states>
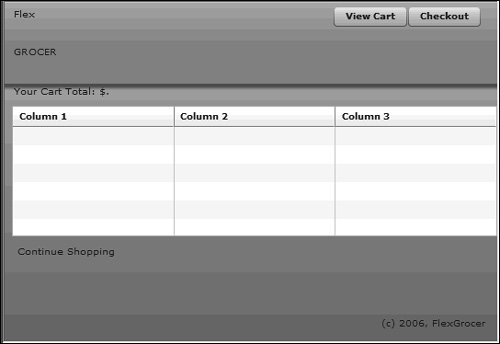
| | | 6. | Save and test the application. You can now navigate between the states by clicking the buttons and links to which you added code.
Your file should resemble the code found in Lesson03/complete/EComm.mxml.
 |
|