| The Data Management Service requires a set of CFCs that implement three design patterns: data transfer object A single object instance, or value object, which you can think of as a single row of data from the database table data access object The code that reads and writes to the data store transfer object assembler The code that manages communication between Flex Data Services and the data access object
Tip  | Data transfer object is Sun's new name for value object, which you may be more familiar with. |
Luckily, you do not have to write those three CFCs for every database table you want to have as a data store for a Flex application. A wizard is available that creates these CFCs for you automatically. Not only that, the wizard also creates an ActionScript class that is the value object needed in the Flex application. 1. | Create a Flex project that will use Flex Data Services. Select the option to compile the application on the server. Click Next.
When an application will use Flex Data Services you must state that when creating the project.

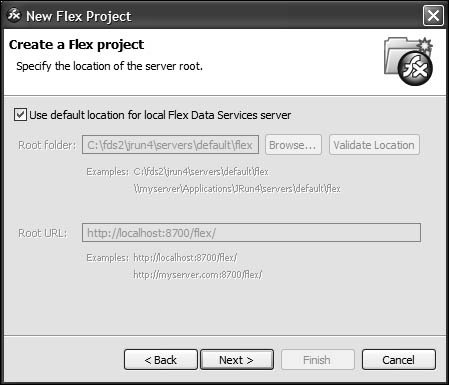
| | | 2. | You can use the default location for the Flex Data Services server. Click Next.
If you do not use the default Flex Data Services installation and change this path, then FDS remembers the new path the next time you create a project that uses FDS.
| 3. | Supply the Project name of DMS, set the Project location to driveroot/fds2/jrun4/servers/default/flex/flex2tfs, and specify the Main application file as DMS_1.mxml. Click Finish to create the project and main application file.
Tip | The complete path does not exist, so you will need to create a directory. Either just type in the complete path and Flex Builder will create the directory, or click the Make New Folder button after you click Browse. |
You now have the project set up to create MXML applications that will run under Flex Data Services.

| | | 4. | Right-click on the DMS project and choose New > Folder. Create a folder named valueObjects.
The valueObjects folder will be the destination for the value object automatically created in the wizard.
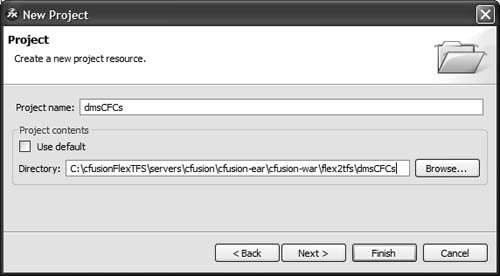
| 5. | From the main menu, choose File > New > Other. Open the Simple folder and select Project. Click Next. Make the Project name dmsCFCs. Uncheck the Use default option and specify the path as driveroot\cfusionFlexTFS\servers\cfusion\cfusion-ear\cfusion-war\flex2tfs\dmsCFCs. Click Finish.
Tip | The complete path does not exist, so you will need to create two directories. Either just type in the complete path and Flex Builder will create the directories, or click the Make New Folder button after you click Browse. |
This creates the project and directory where the CFCs will be created in the wizard. The path to the web root of the ColdFusion server may not be familiar to you. This is the web root when ColdFusion is installed with the multiserver option.
 Tip | If you will be using Flex Builder with ColdFusion files, you would be well served to install CFEclipse to get tag help and other features for ColdFusion files. Go to www.cfeclipse.org/ for more information and plug-in installation instructions. |
| 6. | Show the Remote Development Services (RDS) view by selecting Window > Other Views, then open the ColdFusion folder and select RDS Dataview. Click OK.
This displays the view that exposes DSNs you have access to through RDS.
| | | 7. | Alter the RDS configuration by selecting Window > Preferences and then checking the RDS Configuration option. Click on the localhost RDS server so you can alter its configuration. Change the Port Number option to 8300, and uncheck the Prompt for Password option. Click OK.
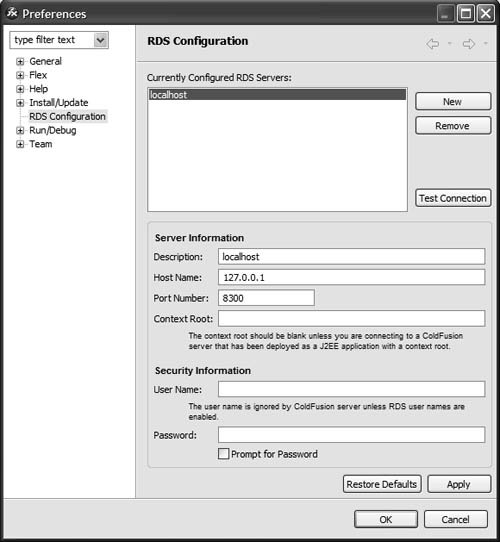 These changes match the configured ColdFusion instance you are using, which runs on port 8300 and has no password for RDS. These changes match the configured ColdFusion instance you are using, which runs on port 8300 and has no password for RDS.
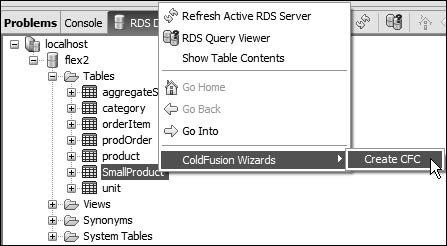
| | | 8. | In the RDS Dataview view, click the plus sign in front of localhost, then flex2, then Tables, until you see the SmallProduct table. Right-click on SmallProduct and choose ColdFusion Wizards > Create CFC.
You are selecting a database table from which to create a set of CFCs.
This will open the dialog box where you will create the needed CFCs and ActionScript value object.
| 9. | Provide the following values in the dialog box (leave all other entries as default):
CFC Folder: | /dmsCFCs | CFC Type: | Flex Data Service Assembler CFCs |
Check the Create an ActionScript value object in addition to the CFC(s) checkbox
AS Folder: | /DMS/valueObjects | AS Package Name: | valueObjects |
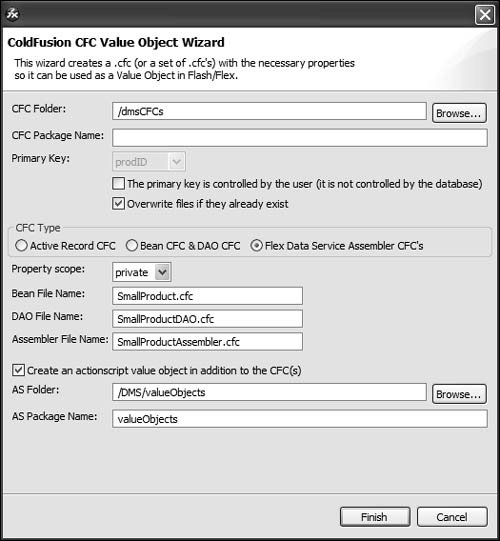 | | | 10. | Click Finish.
You will see the four files created in different editors. Check to see that all the files are in the specified directories.
|
|