| There are times when you might need to apply a design to a Flex application, for which no style will easily fit your needs. In these cases, you need to use skinning. Skinning is used to change the appearance of a component by modifying or replacing its visual elements. Unlike styles, which change values of the existing skins for a component, skinning enables you to actually replace the elements used. This can be done graphically with images and SWF files, or programmatically with class files and the drawing API. Each component is made of several skins to represent the different visual looks of the component. For example, a button has a separate skin for its normal appearance (upSkin), for how it appears when the mouse is over it (overSkin), for when it is pressed (downSkin), and when it is disabled (disabledSkin). Each of the available skins for a component can be found in the styles section of that components entry in ASDocs. Graphical Skins One way to apply skins to a component is to specify new graphical elements to be used in place of the default skins. If you are working with designers who have very specific graphic needs for the look and feel of components, you can use their graphical assets (JPG, GIF, PNG or SWF files) as a replacement skin for any state of any component. Skins are actually applied as a style, they can be done inline, in a <mx:Style> block or CSS file, or via the setStyle() method. For example: Inline: <mx:Button upSkin="@Embed('../assets/myFancyUpSkin.gif')"/> <mx:Style> block or CSS file: <mx:Style> Button { overSkin: Embed("../assets/images/myFancyOverSkin.gif"); } </mx:Style> setStyle() method: <mx:Script> [Embed("assets/myFancyDownSkin.gif")] var ds:Class; function initApp(){ myButton.setStyle("downSkin",ds); } </mx:Script>
Programmatic Skins Rather than use graphical assets for skins, it is also possible to use the drawing API of Flash Player (mostly found in the flash.display.Graphics class) to programmatically draw your own skins. To do this, you create a class file that will define the skin. The main reason why you might choose to use a programmatic skin instead of a graphical one is that you can have much more control over them when they are done programmatically. Instead of embedding graphics of a fixed size, programmatic skins can easily be built to resize themselves, whereas a graphical skin does not resize so elegantly. Programmatic skins also tend to use less memory as they contain no external graphic files. By drawing a skin programmatically, you have access to more flexibility than you would normally have by using styles. For example, a button has styles to allow a gradient fill by using the fillColors style property; however, you can't control the ratio of the fill. Imagine a gradient that was 20 percent red and 80 percent blue. The fillColors property applies an equal amount of each color, whereas the drawing API provides a beginGradientFill() method that not only allows you to specify the array of colors but also the percentages of each (as well as a matrix) to determine the direction of the fade. To create a programmatic skin, you first need to choose a superclass for your new skin class. Flex provides three classes that you can choose from: Superclass | Description |
|---|
ProgrammaticSkin | The ProgrammaticSkin class implements the IFlexDisplayObject, ILayoutClient, and IStyleable interfaces. This is the lightest weight class that can be used as the superclass for a skin. | Border | The Border class extends the ProgrammaticSkin class and adds support for the borderMetrics property. If you are looking to implement a skin with a border that doesn't use a background image, this is the choice for you. | RectBorder | The RectBorder class extends the Border class and adds support for the backgroundImage style. |
The bulk of the work you will do to write a programmatic skin is to override the updateDisplayList() method. If you recall, during Lesson 10, "Creating Custom Components with ActionScript 3.0," you overrode this method when creating the MaxRestorePanel. This method is what is used to draw the visual elements of any class, so to create a new look for a skin, this method will need to be overridden. If you choose to use one of the bordered classes (Border or RectBorder) as a superclass, you will also want to override the getter method for the borderMetrics property, so it returns your custom metrics instead of the default values. In this task, you will create a custom skin for the Button controls in your application. This skin will use an ellipse instead of the default rectangle as the shape for the skin. | | 1. | In Flex Builder, create a new directory named skins as a subdirectory of your flexGrocer directory.
If you followed the default locations for your project, this new directory would be in your flexGrocer directory.
| 2. | Create a new ActionScript class named OrangeOval in the skins package. The superclass for your skin should be mx.skins.ProgrammaticSkin.
package skins{ import mx.skins.ProgrammaticSkin; public class OrangeOval extends ProgrammaticSkin{ } }
Because you don't need a border around your button, the ProgrammaticSkin class is an appropriate superclass for you.
| 3. | Create the skeleton for your overridden updateDisplayList() method.
protected override function updateDisplayList(w:Number, h:Number):void{ }
Remember that an overridden method needs to exactly match the signature of the method in the superclass. Looking at ASDocs, you can find that this is a protected method, returning void, which accepts two numeric arguments.
| 4. | Inside the updateDisplayList() method, create two local variables: An int named lineThickness with a value of 4 and a Number named backgroundFillColor.
var lineThickness:int=4; var backgroundFillColor:Number;
When you draw the shape, these variables will be used with the drawing API.
| | | 5. | Create a switch statement to determine which skin is being drawn. Assign the backgroundFillColor the appropriate value from the following table for each version of the skin.
Skin | Color |
|---|
upSkin | 0xEA800C | overSkin | 0xF8B872 | downSkin | 0xB06109 | disabledSkin | 0xCCCCCC |
switch (name) { case "upSkin": backgroundFillColor = 0xEA800C; break; case "overSkin": backgroundFillColor = 0xF8B872; break; case "downSkin": backgroundFillColor = 0xB06109; break; case "disabledSkin": backgroundFillColor = 0xCCCCCC; break; }
The name property used in the switch statement is the current name of the skin. For a programmatic skin of a Button control, the name property could be any of the skin states. This method will automatically be called each time the button is redrawn (such as when the Button control changes state), and Flex automatically updates the value of the name property.
| 6. | Use the drawing API to clear any previously drawn elements.
graphics.clear();
The ProgrammaticSkin class has a property called graphics, which is an instance of the flash.display.Graphics class. This is the class that contains the drawing API. Because this same updateDisplayList() will be used to draw all four states, you want to remove the previously drawn elements before drawing the current state.
| 7. | Use the beginFill() method of the Graphics class to set the background color to be drawn.
graphics.beginFill(backgroundFillColor);
When the shape for the skin is drawn, this will now fill the shape with the appropriate color determined from the switch statement.
| 8. | Use the drawEllipse() method to draw the skin.
graphics.drawEllipse(0, 0, w, h);
This line does the actual drawing and creates an ellipse from the component's top left (0,0) to the height and width, as specified by the arguments automatically provided to the updateDisplayList() method.
| | | 9. | End the fill.
graphics.endFill();
Flash Player waits until the endFill() method is called before actually drawing the fill on the screen.
| 10. | Save and close OrangeOval.as.
The completed class file should read like this:
package skins{ import mx.skins.ProgrammaticSkin; public class OrangeOval extends ProgrammaticSkin{ protected override function updateDisplayList(w:Number, h:Number):void{ var lineThickness:int=4; var backgroundFillColor:Number; switch (name) { case "upSkin": backgroundFillColor = 0xEA800C; break; case "overSkin": backgroundFillColor = 0xF8B872; break; case "downSkin": backgroundFillColor = 0xB06109; break; case "disabledSkin": backgroundFillColor = 0xCCCCCC; break; } graphics.clear(); graphics.beginFill(backgroundFillColor); graphics.drawEllipse(0, 0, w, h); graphics.endFill(); } } }
| 11. | Open flexGrocer.css.
If you didn't copy this file over earlier in the lesson, you can find it in the Lesson16/assets directory. Save it in your root directory.
| | | 12. | At the bottom of the file, create a type selector for the Button class, which sets the upSkin, downSkin, overSkin and disabledSkin style properties to use ClassReference('skins.OrangeOval');.
Button { upSkin:ClassReference('skins.OrangeOval'); downSkin:ClassReference('skins.OrangeOval'); overSkin:ClassReference('skins.OrangeOval'); disabledSkin:ClassReference('skins.OrangeOval'); }
Programmatic skins can be applied in a CSS file by using the ClassReference directive. This directive takes a class name as the argument.
It tells all buttons to use your new skin class for all four states.
| 13. | Still in the Button type selector, add one more style declaration, setting the color property to white (#FFFFFF);
Button { upSkin:ClassReference('skins.OrangeOval'); downSkin:ClassReference('skins.OrangeOval'); overSkin:ClassReference('skins.OrangeOval'); disabledSkin:ClassReference('skins.OrangeOval'); color:#ffffff; }
The white text makes the button easier to read.
| 14. | Save the stylesheet and run the application.
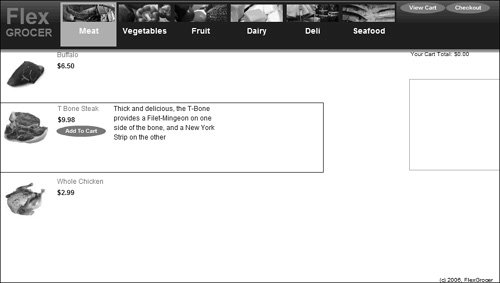 All the Button controls in the application are rendered with the OrangeOval skin. All the Button controls in the application are rendered with the OrangeOval skin.
|
|