| eMbedded Visual Tools comes with two development environments: eMbedded Visual Basic (eVB) and eMbedded Visual C++ (eVC). eVB is, especially at first glance, a lot like its big brother Visual Basic 6, but they aren't interchangeable. If you want to do development for PocketPC devices, you need to install eVB. Installing eVB The installation set comes as two free (except for shipping) CDs from Microsoft. At the time I'm writing this, the installation is also available for download, but the availability and location has changed quite a bit over the last year, so providing a Web location would likely be invalid by print time. A search for "eMbedded Visual Tools" at www.microsoft.com or www.PocketPC.com should get you there pretty easily. Installing from the CD is a straightforward operation. If the setup doesn't autostart, you can run setup.exe from the CD's root directory. You should be prompted with the first eMbedded Visual Tools 3.0 installation dialog (see Figure 1.7). Figure 1.7. The first dialog in the eMbedded Visual Tools installation process. 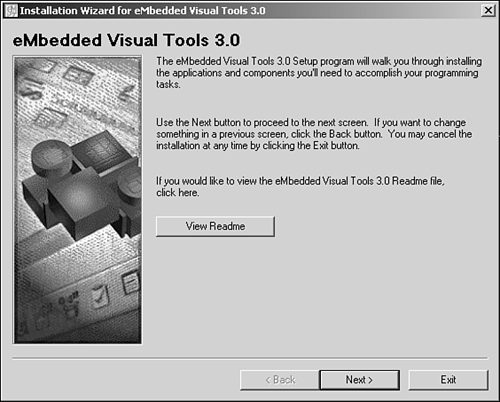 The second dialog is the usual Microsoft EULA (end user license agreement) that you have to accept to continue. The third dialog requires a license key (although because the tools are free, I'm not sure why) and your name. Your company name is optional. The downloadable version of eMbedded Visual Tools comes with a text file that contains the license key. The fourth dialog is important. It allows you to choose eMbedded Visual Tools as well as the software development kits (SDKs) you want to install (see Figure 1.8). Each SDK comes with an emulator to let you run and test your applications to some degree without a device. Figure 1.8. Selecting eMbedded Visual Tools and the Pocket PC SDK for installation. 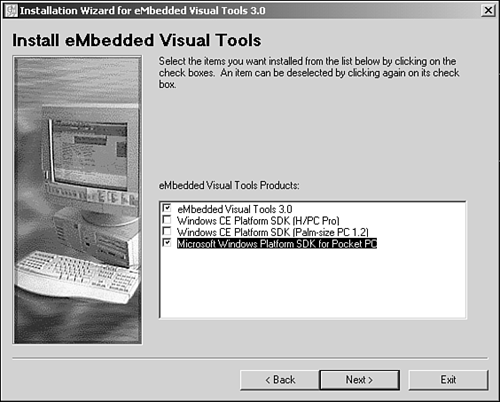 Note While you can install eMbedded Visual Tools on a Windows 9x machine, the emulators require Windows NT 4.0/2000/ME/XP to run.
Next , you'll be asked to provide an installation path for the Windows CE Tools. Interestingly, this is not where the eMbedded Visual Tools will be installed (you don't have a choice there); instead, it's where the SDKs, the controls, and the libraries are located. Most everything you'll need to reference in a project or distribute with an application will be somewhere in this folder. It's a directory that you'll get to know well if you do much Windows CE development, so after installation browse through it to familiarize yourself with its layout and the files included. Next, you'll be presented your Product ID or License Number. It says to write it down, but you can get it at any time through the Help menu in eVB. Next is another important dialog (see Figure 1.9). You get to choose what development environments you want to install. Of course, you'll want to install eVB, and the Common Components are actually necessary to run as well. eVC is large, and you don't have to install it, but keep in mind that if you start doing a lot of API programming (see Chapter 9), you may want to look through some of the header files for external libraries. Installing eVC will give you a lot of those headers. Of course, it also gives you the capability and joy of developing in C++ as well. Figure 1.9. Selecting the eMbedded Visual Tools Components to install. eVB and the Common Components are required. 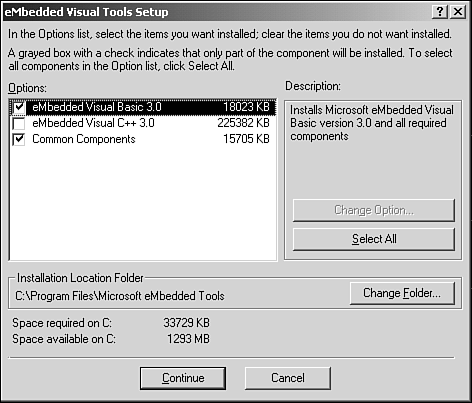 Next, you'll go through a couple of dialogs as the installation copies over files and completes. Next it prompts you for CD 2. This is where all the SDKs reside, so if you decide to add on later, you only need to install from disk 2. If you selected only the Pocket PC SDK, you'll get the first installation screen that says, To continue, click Next. This takes you, again, to a EULA. Accepting the EULA takes you to the next dialog, which is very important. This dialog allows you to enter your user name and organization, but more importantly it allows you to install the SDK for just yourself or for everyone on your machine (see Figure 1.10). Because the Windows NT family of operating systems is security conscious, it's important that you choose well here. If you are installing while logged in as the user account you always use, and therefore your default account has administration privileges, choosing Only For Me is fine. If you use a different user account, be sure you choose Anyone Who Uses This Computer. Figure 1.10. Choosing the account on which to install the SDK. Choosing Anyone Who Uses This Computer is the safest. 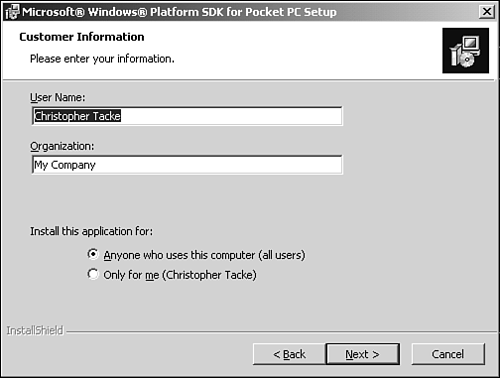  | 