Creating Custom Component Editors
The previous section discussed property editors for components as a method of allowing a more intuitive and robust interface at design time. Component Editors take this further by allowing custom editors for the whole component to be created. Custom component editors also allow the context menu for each component (shown when the component is right-clicked) to be customized, along with specifying the behavior when a component is double-clicked on a form. This section, like the previous one, presents the background and principles required to create custom component editors. Component editors add the possibility of customizing the default behavior associated with editing a component and also allowing additional behavior to be specified. Two classes are available for creating component editors: TComponentEditor and TDefaultEditor . The relationship between the two is shown in Figure 5.7.
Figure 5.7. The TComponentEditor inheritance hierarchy.
Figure 5.7 shows additional information, namely the virtual functions that should be overridden to customize the component editor's behavior. This can be referred to when the virtual functions themselves are discussed later in this section, in Table 5.11 and in subsequent sections with the methods ' names .
As was stated initially, creating a custom component editor allows the default behavior that occurs in response to the component being right-clicked or double-clicked in the IDE to be specified. Table 5.10 lists both mouse events and indicates which of the virtual functions are invoked. The default behavior of each of the classes is also stated.
Table 5.10. TComponentEditor and TDefaultEditor Mouse Responses
| When the component is | Default Action | virtual Functions Invoked |
|---|---|---|
| Right-Clicked | The component's context menu is displayed. | GetVerbCount() is invoked first. This is used to return the number of items to be added to the top of the default context menu. GetVerb() is called next . This allows an AnsiString representing each of the menu items to be returned. PrepareItem() is called before the menu item is shown, allowing it to be customized. ExecuteVerb() is called only if one of the newly added menu items is clicked. Code to execute the desired behavior goes here. |
| Double-Clicked | The default action depends on the class from which the editor is derived. TComponentEditor: If items have been added to the context menu, the first item is executed. TDefaultEditor: An empty event handler is created for OnChange , OnCreate , or OnClick , whichever appears first in the component's list of event properties. If none of the previous events exist for the component, a handler is created for the first event that appears. If the component has no events, nothing happens. | Edit() is invoked. Code to perform the desired action is placed here. |
In Figure 5.7 we can see that TComponentEditor and TDefaultEditor are essentially the same in that they offer similar functionality. Where they differ (as seen in Table 5.10) is in the implementation of the Edit() method. Choosing which of the two classes to derive your custom component editor from should be based on the following criteria.
If you want the component editor to generate an empty event handler for one of three default events or for a particular event, when the component is double-clicked, you should derive it from TDefaultEditor ; otherwise , derive it from TComponentEditor . If you do not create a custom component editor for a component, C++Builder uses TDefaultEditor .
After the decision has been made as to which component editor class to derive from, the appropriate methods should be overridden. Table 5.11 lists the methods from both classes and details the purpose of each.
Table 5.11. TComponentEditor and TDefaultEditor virtual Functions
| virtual Function | Purpose |
|---|---|
| int GetVerbCount(void) | Returns an int representing the number of menu items (verbs, as in doing words) that are going to be added. |
| AnsiString GetVerb(int Index) | Returns an AnsiString representing the menu item's name as it will appear in the context menu. The following conventions should be remembered : Use & to designate a hotkey. Append ... to an item that executes a dialog. Use a - to make the menu item a separator bar. |
| void PrepareItem(int Index, const Menus ::TMenuItem* AItem) | PrepareItem() is called for each verb in the context menu, passing the TMenuItem that will be used to represent the verb in the context menu. This allows the menu item to be customized. It can also be used to hide an item by setting its Visible property to false . |
| void ExecuteVerb(int Index) | ExecuteVerb() is invoked when one of the custom menu items is selected. Index indicates which one. |
| void Edit(void) | Edit() is invoked when the component is double-clicked. What happens is user defined. The default behavior is listed in Table 5.10. |
| void EditProperty(TPropertyEditor* PropertyEditor, bool& Continue, bool& FreeEditor) ( TDefaultEditor only) | Used to determine which event an empty handler is generated for when the component is double-clicked. |
| void Copy(void) | Copy() should be invoked when the component is copied to the Clipboard. This needs to be overridden only if a special format needs to be copied to the Clipboard, such as an image from a graphical component. |
Suitable class definitions for TComponentEditor - and TDefaultComponent -derived component editors are shown in Listing 5.18 and Listing 5.19, respectively.
Listing 5.18 Definition Code for a Custom TComponentEditor -Derived Component Editor
#include "VCLEditors.hpp" class TCustomComponentEditor : public TComponentEditor { typedef TComponentEditor inherited; public: // Double-Click virtual void __fastcall Edit(void); // Right-Click // CONTEXT MENU - Step 1 virtual int __fastcall GetVerbCount(void); // - Step 2 virtual AnsiString __fastcall GetVerb(int Index); // - Step 3 (OPTIONAL) virtual void __fastcall PrepareItem(int Index, const Menus::TMenuItem* AItem); // - Step 4 virtual void __fastcall ExecuteVerb(int Index); // Copy to Clipboard virtual void __fastcall Copy(void); public: #pragma option push -w-inl inline __fastcall virtual TCustomComponentEditor(Classes::TComponent* AComponent, _DesignIntf::di_IDesigner ADesigner) : TComponentEditor(AComponent, ADesigner) { } #pragma option pop public: #pragma option push -w-inl inline __fastcall virtual ~TCustomComponentEditor(void) { } #pragma option pop }; Listing 5.19 Definition Code for a Custom TDefaultEditor -Derived Component Editor
#include "VCLEditors.hpp" class TCustomDefaultEditor : public TDefaultEditor { typedef TDefaultEditor inherited; protected: // Double-Click // CHOOSE EVENT virtual void __fastcall EditProperty(TPropertyEditor* PropertyEditor, bool& Continue, bool& FreeEditor); public: // Right-Click // CONTEXT MENU - Step 1 virtual int __fastcall GetVerbCount(void); // - Step 2 virtual AnsiString __fastcall GetVerb(int Index); // - Step 3 (OPTIONAL) virtual void __fastcall PrepareItem(int Index, const Menus::TMenuItem* AItem); // - Step 4 virtual void __fastcall ExecuteVerb(int Index); // Copy to Clipboard virtual void __fastcall Copy(void); public: #pragma option push -w-inl inline __fastcall virtual TCustomDefaultEditor(Classes::TComponent* AComponent, _DesignIntf::di_IDesigner ADesigner) : TDefaultEditor(AComponent, ADesigner) { } #pragma option pop public: #pragma option push -w-inl inline __fastcall virtual ~TCustomDefaultEditor(void) { } #pragma option pop }; In Listing 5.18 and Listing 5.19, it can be seen that there is little difference between the definitions of the two kinds of component editor. In fact, the techniques for implementing context menu items are identical. The difference between the classes is that you override the Edit() method for a TComponentEditor -derived class's double-click behavior, whereas you override the EditProperty() method for a TDefaultEditor class's double-click behavior.
The following sections take each of the virtual methods in turn and discuss implementation issues. Information presented for the Edit() method is applicable only to TComponentEditor -derived classes, and information presented for the EditProperty() method is applicable only to TDefaultEditor -derived classes. Note that the example namespace modifiers used in the function implementation headers reflect this. TCustomComponentEditor is a hypothetical TComponentEditor -derived class, TCustomDefaultEditor is a hypothetical TDefaultEditor -derived class, and TMyCustomEditor is a class that could be derived from either.
The Edit() Method
The main purpose of overriding the Edit() method is to display a form to the user to allow easier editing of the component's values. A good example of this is the component editor for the TChart component on the Additional page of the Component Palette. To this end, the code required is similar to that presented for TPropertyEditor 's Edit() method in the "Creating Custom Property Editors" section, earlier in this chapter. As before, there are two approaches to implementing such a form. Either the form can update the component as the form itself is modified, or the component can be updated after the form is closed.
There is one extra and very important consideration that must be remembered: Each time the component is updated, the Modified() method of TComponentEditor 's Designer property must be called. This is so that the IDE knows that the component has been modified. Hence, the following is required after code that modifies the component:
if(Designer) Designer->Modified();
An if statement is used in the previous code to ensure that a nonzero value is returned from Designer before we try to call Modified() . If zero is returned, there is little we can do because it means the IDE is not accessible. We know that, for the form to be able to change the component's properties, we must somehow link the form to the component in a similar fashion as for property editors previously. This is reasonably straightforward and requires two things. The first is that a public property should be declared in the form's definition that is a pointer to the type of component the component editor is for. Secondly, this must be pointed to the actual instance of the component that is to be edited. The pointer to the current instance of the component is obtained by using TComponentEditor 's Component property, as follows :
TMyComponent* MyComponent = dynamic_cast<TMyComponent*>(Component);
The pointer obtained can be equated to the form's component pointer property. However, we must also make a reference to Designer available from within the form so that the IDE can be notified of changes that are made to the component. This can be passed as a parameter in the form's constructor. The component can then be modified directly through the property in the form. Suitable code for this approach is shown in Listing 5.20. Don't forget to call Designer->Modified() after the component is modified by the form.
Listing 5.20 Code for a Custom Component Editor Form to Be Called from Edit() That Allows Continual Updating
// First show important code for TComponentEditorForm // IN THE HEADER FILE //---------------------------------------------------------------------------// #ifndef MyComponentEditorFormH #define MyComponentEditorFormH //---------------------------------------------------------------------------// #include <Classes.hpp> #include <Controls.hpp> #include <StdCtrls.hpp> #include <Forms.hpp> #include "HeaderDeclaringTComponentClass" //---------------------------------------------------------------------------// class TMyComponentEditorForm : public TForm { __published: // IDE-managed Components private: TComponentClass* FComponentClass; _DesignIntf::di_IDesigner & Designer; // Other decalrations here for example restore values if 'Cancel' // is pressed protected: void __fastcall SetComponentClass(TComponentClass* Pointer); public: __fastcall TMyComponentEditorForm(TComponent* Owner, _DesignIntf::di_IDesigner & EditorDesigner); __property TComponentClass* ComponentClass = {read=FComponentClass, write=SetComponentClass}; // Other declarations here }; //---------------------------------------------------------------------------// #endif // THE IMPLEMENTATION FILE //---------------------------------------------------------------------------// #include <vcl.h> #pragma hdrstop #include "MyComponentEditorForm.h" //---------------------------------------------------------------------------// #pragma package(smart_init) #pragma resource "*.dfm" //---------------------------------------------------------------------------// __fastcall TMyComponentEditorForm:: TMyComponentEditorForm(TComponent* Owner, _DesignIntf::di_IDesigner & EditorDesigner) : TForm(Owner), Designer(EditorDesigner) { } //---------------------------------------------------------------------------// void __fastcall TMyPropertyForm::SetComponentClass(TComponentClass* Pointer) { FComponentClass = Pointer; if(FComponentClass != 0) { // Store current component values and display them } } //---------------------------------------------------------------------------// // NOW SHOW THE Edit() METHOD #include "MyComponentEditorForm.h" // Remember this void __fastcall TCustomComponentEditor::Edit(void) { // Create the form std::auto_ptr<TMyComponentEditorForm*> MyComponentEditorForm(new TMyComponentEditorForm(0)); // Link the component property MyComponentEditorForm->ComponentClass = dynamic_cast<TComponentClass*>(Component); // Show the form. The form does all the work. MyPropertyForm->ShowModal(); } As in the case of custom property editor forms, the component's current property values can be stored when the form's Component property is linked to the component. This allows the operation to be cancelled and the previous values restored. One thing to pay attention to is the possibility of a NULL pointer being returned from dynamic_cast ; this should not occur, but if it does the form will not be able to modify any of the component's properties. An exception could be thrown to indicate this to the user.
The second approach to implementing the Edit() method is equally simple. A form is displayed as a dialog and, when it returns, the values entered are assigned to the component. A pointer to the current instance of the component being edited is obtained from TComponentEditor 's Component property:
TMyComponent* MyComponent = dynamic_cast<TMyComponent*>(Component);
The code required in the Edit() method in this approach to its implementation is greater because the component property values must be assigned to the form after it is created, but before it is shown. On closing, the form's values must be assigned to the requisite component properties. The code required for the Edit() method is shown in Listing 2.1.
Listing 5.21 Code for a Custom Form to Be Called from the Edit() Method with No Updating Until Closing
#include "MyComponentEditorDialog.h" // Include the header for the Dialog! // Dialog is TMyComponentDialog void __fastcall TCustomComponentEditor::Edit(void) { TMyComponent* MyComponent = dynamic_cast<TMyComponent*>(Component); if(MyComponent != 0) { // Create the form std::auto_ptr<TMyComponentDialog*> MyComponentDialog(new TMyComponentDialog(0)); // Set the current property values in the dialog // MyComponentDialog->value1 = MyComponent->value1; // MyComponentDialog->value2 = MyComponent->value2; // and so on... // Show the form and see the result. if(MyPropertyDialog->ShowModal() == IDOK) { // Then set the new property value(s) // MyComponent->value1 = MyComponentDialog->value1; // MyComponent->value2 = MyComponentDialog->value2; // and so on... if(Designer) Designer->Modified(); // DON'T FORGET! } } else { throw EInvalidPointer ("Cannot Edit: A component pointer is not available!"); } } In the second approach to implementing the Edit() method shown in Listing 2.1, implementation code for the dialog has not been shown. This is because there are no special considerations specific to this approach that need to be highlighted. Also be aware that a dialog wrapper class could be used instead of calling the dialog directly, in which case the dialog's Execute() method would be called to display the dialog.
The EditProperty() Method
The purpose of overriding the EditProperty() method is to specify a particular event or one of a number of possible events that should have an empty event handler generated for it by the IDE when the component is double-clicked. For example, consider a component for serial communications. Typically, the most commonly used event would be one that signals when data has been received and is available, perhaps named OnDataReceived . For this to be the event for which a handler is generated, EditProperty() needs to be overridden as follows:
void __fastcall TCustomDefaultEditor::EditProperty(TPropertyEditor* PropertyEditor, bool& Continue, bool& FreeEditor) { if(PropertyEditor->ClassNameIs("TMethodProperty") && (CompareText(PropertyEditor->GetName(), "OnDataReceived") == 0)) { inherited::EditProperty(PropertyEditor, Continue, FreeEditor); } } The if statement checks two things. First, it checks that the property editor is a TMethodProperty class; in other words, it checks that the property editor is for an event. It then checks to see if the property editor is called OnDataReceived . The CompareText() function is used for this. CompareText() returns when the two AnsiString s passed to it are equal. Note that CompareText() is not case sensitive. If the property editor matches these criteria, the parent EditProperty() method is called, in this case TDefaultEditor 's EditProperty() , which generates the empty event handler for this event. This is called by using the inherited typedef as a namespace modifier, so the previous code could be written as follows:
TDefaultEditor::EditProperty(PropertyEditor, Continue, FreeEditor);
The reason for using the typedef is that if the name of TDefaultEditor ever changed, the implementation code would not be affected. Only the class definition in the header file would need to be changed.
If a choice of events was to be specified, perhaps because the same component editor was to be registered for a variety of components, the if statement would be replaced by if-else-if statements. For example:
if(PropertyEditor->ClassNameIs("TMethodProperty") && (CompareText(PropertyEditor->GetName(), "OnEvent1") == 0)) { inherited::EditProperty(PropertyEditor, Continue, FreeEditor); } else if(PropertyEditor->ClassNameIs("TMethodProperty") && (CompareText(PropertyEditor->GetName(), "OnEvent2") == 0)) { inherited::EditProperty(PropertyEditor, Continue, FreeEditor); } else if(PropertyEditor->ClassNameIs("TMethodProperty") && (CompareText(PropertyEditor->GetName(), "OnEvent3") == 0)) { inherited::EditProperty(PropertyEditor, Continue, FreeEditor); } It also could be replaced by a single if that ORs the possible event occurrences:
if((PropertyEditor->ClassNameIs("TMethodProperty") && (CompareText(PropertyEditor->GetName(), "OnEvent1") == 0) (PropertyEditor->ClassNameIs("TMethodProperty") && (CompareText(PropertyEditor->GetName(), "OnEvent1") == 0) (PropertyEditor->ClassNameIs("TMethodProperty") && (CompareText(PropertyEditor->GetName(), "OnEvent1") == 0)) { inherited::EditProperty(PropertyEditor, Continue, FreeEditor); } In either case, the first matching occurrence will be used.
The GetVerbCount() Method
Few methods are as easy to override as this. Simply return an integer that represents the number of additional menu items that you want to appear in the component's context menu. Don't forget that a separator bar constitutes a menu item. Sample code for three custom menu items would be as follows:
int __fastcall TMyCustomEditor::GetVerbCount(void) { return 4; } The GetVerb() Method
Almost as straightforward as the GetVerbCount() method, this method requires that the AnsiString text for each menu item be returned. Remember that returning a - makes the menu item a separator bar. Sample code is
AnsiString __fastcall TMyCustomEditor::GetVerb(int Index) { switch(Index) { case 0 : return "&Edit Component..."; case 1 : return " 2000 Me"; case 2 : return "-"; case 3 : return "Do Something Else"; default : return ""; } } If you do not specify an accelerator key (using the & symbol), one is determined automatically by the IDE. In fact, all predefined context menu items' accelerator keys are determined by the IDE at runtime. This will avoid clashes with user-defined accelerator keys. Accelerator key definitions for user-defined menu items take precedence over a predefined context menu item's accelerator key definitions. If a clash occurs, the predefined menu item's accelerator key is reassigned to a different letter. Finally, remember that a separator bar is automatically placed between the custom menu items and the predefined menu items, so it is not necessary to add one as the last item. However, doing so will not make any difference because the context menu's AutoLineReduction property is set to maAutomatic (refer to the C++Builder online help for further details).
The PrepareItem() Method
This method, new to C++Builder, need not be implemented, and in fact it generally isn't. What it offers is the option to customize each menu item further. Most notably, it allows custom rendering of a menu item, the capability to disable the menu item ( Enable = false ), the capability to hide the menu item ( Visible = false ), and the capability to add submenu items. This is possible because PrepareItem() has two parameters. The first, Index , serves the same purpose as it does in the preceding context menu functions, namely to indicate which menu item the function call refers to. However, the second parameter is a pointer to the menu item ( TMenuItem ) that will be used to represent the menu item in the context menu. This gives you access to all the facilities that TMenuItem offers. There is a catch, however: The pointer is to const TMenuItem , so it is not possible to modify the menu item through the pointer passed. Instead, a non- const pointer of type TMenuItem should be pointed to the same menu item and the menu item modified through that pointer. For example, maintaining continuity with our previous examples, to custom render the second menu item (the copyright item), we would write the code in Listing 2.2.
Listing 5.22 Basic Code for the PrepareItem() Method
void __fastcall TMyCustomEditor::PrepareItem (int Index, const Menus::TMenuItem* AItem) { switch(Index) { case 0 : break; case 1 : { TMenuItem* MenuItem = const_cast<TMenuItem*>(AItem); // Now that we have a pointer we can do what we like // For example: // 1. To Disable the menu item write - // MenuItem->Enabled = false; // 2. To Hide the menu item write // MenuItem->Visible = false; // 3. To add a bitmap to the menu item write // MenuItem->Bitmap->LoadFromResourceName // (reinterpret_cast<int>(HInstance), // "BITMAPNAME"); // or any other stuff, for example assign an event handler // or even add menu sub-items... } break; case 2 : break; case 3 : break; default : break; } } Pay particular attention to this line:
TMenuItem* MenuItem = const_cast<TMenuItem*>(AItem);
This is where we obtain the pointer with which we can edit the TMenuItem . Also note the third example of adding a bitmap to the menu item:
MenuItem->Bitmap->LoadFromResourceName(reinterpret_cast<int>(HInstance), "BITMAPNAME");
This assumes that a resource file has been imported into the package that contains an image called BITMAPNAME . Otherwise, MenuItem will be unable to load the image. Not being able to load the image is quite disastrous: The IDE will crash, so make sure your names are right. Note also that reinterpret_cast is used to cast HInstance of type void* to type int , as expected by the LoadFromResourceName member function.
Adding Custom Event Handlers to Context Menu Items
Adding custom event handlers to custom menu items involves a two-step process.
First, the required event handler must be written as a member function of the component editor class. Its signature must match exactly that of the event it is to handle. Second, when the PrepareItem() function is called and the non- const MenuItem pointer is obtained, the handler member function can be equated to the appropriate MenuItem event. For example, to create a custom event handler for the menu item's OnAdvancedDrawItem event, declare a function with a name such as AdvancedDrawMenuItem1() (because it refers to MenuItem 1) with the same parameters as OnAdvancedDrawItem in the component editor's class definition. You will probably want to make it protected and virtual , just in case you want to derive another class from this one. The code appearing in the class definition is as follows:
protected: virtual void __fastcall AdvancedDrawMenuItem1(System::TObject* Sender, Graphics::TCanvas* ACanvas, const TRect& ARect, TOwnerDrawState State);
The empty implementation for this would be
virtual void __fastcall TMyCustomEditor::AdvancedDrawMenuItem1(System::TObject* Sender, Graphics::TCanvas* ACanvas, const TRect& ARect, TOwnerDrawState State) { // Custom rendering code here } The second stage, to ensure that our event handler is called for this menu item, is to set MenuItem 's OnAdvancedDrawItem event to this one. Add the following line of code to that shown previously in Listing 2.2 (after MenuItem is obtained):
MenuItem->OnAdvancedDrawItem = AdvancedDrawMenuItem1;
Now, each time OnAdvancedDrawItem() is called, our custom rendering code will be executed. The remaining TMenuItem events can also be overridden: OnMeasureItem , OnDrawItem , and OnClick ; removing the need for code in the ExecuteVerb() method for this item. However, this is not advised because ExecuteVerb() conveniently centralizes the code associated with clicking the context menu. That leaves only the OnMeasureItem and OnDrawItem events. Essentially, OnDrawItem is a simpler (and older) version of OnAdvancedDrawItem . It is called less often and contains less information. Use the OnAdvancedDrawItem instead. However, OnMeasureItem is a useful event that enables the size of the menu item as it appears in the context menu to be modified. The code required in the class definition for this event is as follows:
protected: virtual void __fastcall MeasureMenuItem1(System::TObject* Sender, Graphics::TCanvas* ACanvas, int& Width, int& Height);
A typical implementation for this would be
virtual void __fastcall TMyCustomEditor::MeasureMenuItem1(System::TObject* Sender, Graphics::TCanvas* ACanvas, int& Width, int& Height) { Width = x - Height; // Where x is the required width subtracting Height // allows for Flip Children's sub-menu arrow Height = y; // Where y is the required height } Adding the line of code that follows to the PrepareItem() method in Listing 2.2 in the correct section for this item ensures the event will be called:
MenuItem->OnMeasureItem = MeasureMenuItem1;
One thing to remember is that modifying Width will have an effect on the size of the menu item only if it is bigger than the current context menu width, which is most likely controlled by other context menu items. In other words, the current context menu width will be equal to the width of the widest item. Notice that if a value is assigned to Width , perhaps because an image is going to be drawn inside the menu item, the value that should be assigned will be the desired width minus the default height. The reason for this is to allow for the submenu arrow symbol for the IDE's menu item Flip Children . See Figure 5.8.
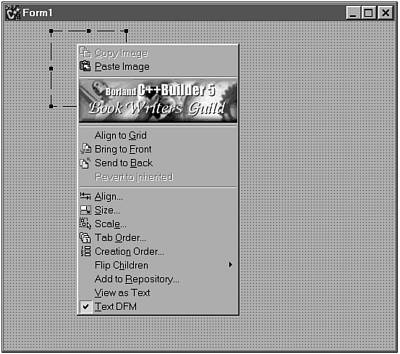
Figure 5.8. Cropped view of the TImageComponentEditor context menu, showing height and width.
The width required for the submenu arrow symbol is equal to the default Height of the Flip Children menu item. This value is added to any Width value that you specify, so to prevent having an unpainted strip down the right side of your context menu item, you must account for it by subtracting it from the width that you specify. Modifying the Height parameter will always have an effect on the height of the menu item, and setting it to will make the item disappear.
The motivation behind defining your own custom event handlers for any of the menu items is so that the rendering of the item can be customized. There is increased scope for this with the new OnAdvancedDrawItem event. The TOwnerDrawState Set variable gives a lot of information about the current state of the item. For example, if the menu item is selected, State will contain odSelected , allowing code such as this to be placed in the event handler:
if(State.Contains(odSelected)) { // Draw the item with a clRed background } else { // Draw the item with a clBtnFace background } Remember when you assign a handler to either OnAdvancedDrawItem or OnDrawItem that you are responsible for the entire rendering process, including displaying the text on the item's canvas. You will need to use the TextRect method of TCanvas to do so. For more information on this, refer to the "Using Images in Property Editors" section earlier in this chapter or to the C++Builder online help. An example custom component editor ( TImageComponentEditor ) that handles the OnAdvancedDrawItem and OnMeasureItem events for editing the TImage class is shown in Figure 5.9. The component editor also implements both Copy to Clipboard and Paste from Clipboard methods.
Figure 5.9. The context menu for TImageComponentEditor .
The possibilities offered by customizing the menu items using these events are endless. For example, it is possible to place your company logo as an image on one of the menu items or make all your custom menu items appear larger with a nicer background, making them stand out from the IDE-defined items. Incidentally, if you place menu items that perform no function, consider placing them after those that do. It can be very irritating after right-clicking a component to have to study the menu for the item needed, especially if it is a common operation. Normally, items used most often should be placed first in the menu.
Adding Submenu Items to Context Menu Items
Adding submenu items (which are TMenuItem s themselves) to a custom context menu item requires that you create the submenu items that you want to add at runtime. The submenu items are then added to the appropriate menu item using the Add() method. Typically, more than one submenu will be added, and the Add() method is overloaded to accept an array of TMenuItem s as well as single TMenuItem s. Because the added submenu items are also of type TMenuItem , they have all the functionality of MenuItem and can be similarly customized. As an example, code to add submenu items to the second menu item will be shown (remember that the index is zero-based ). The number added is arbitrary; this could be made a static const value in the component editor class, for example. A symbolic name, NoOfSubMenusForItem1 , is used in the code snippets for greater clarity.
First, the submenu items must be declared. If more than one submenu is required (as is the requirement here), it is simplest to declare an array of pointers to TMenuItem s. We must be able to access the submenu items throughout our component editor class, so we'll declare the pointer array as a private variable in the class definition:
TMenuItem* SubMenuItemsFor1[NoOfSubMenusForItem1];
The submenu items must be constructed . A good place to do this is in the component editor's constructor. Currently, the constructor is empty and inline. It needs to be changed in both the class definition and the class implementation. The code required is
// In "MyCustomEditor.h" change the constructor declaration to // the following and remove the surrounding #pragma option push // and pop directives __fastcall virtual TCustomComponentEditor(Classes::TComponent* AComponent, _DesignIntf::di_IDesigner ADesigner); // The implementation for the constructor becomes: __fastcall TCustomComponentEditor:: TCustomComponentEditor(Classes::TComponent* AComponent, _DesignIntf::di_IDesigner ADesigner) : TComponentEditor(AComponent, ADesigner) { for(int i=0; i<NoOfSubMenusForItem1; ++i) { SubMenuItemsFor1[i] = new TMenuItem(Application); SubMenuItemsFor1[i]->Caption.sprintf("Sub-Menu %d", i); // Other Sub-Menu initialisation } // Other Sub-Menu initialisation } If the submenus are created in the component editor's constructor, they should be deleted in the component editor's destructor. It is also currently empty and inline, so it must be changed as the constructor was. The code required is
// In "MyCustomEditor.h" change the destructor declaration to // the following and remove the surrounding #pragma option push // and pop directives __fastcall virtual ~TCustomComponentEditor(void); // The implementation for the destructor becomes: __fastcall TCustomComponentEditor::~TCustomComponentEditor(void) { for(int i=0; i<NoOfSubMenusForItem1; ++i) { delete SubMenuItemsFor1[i]; } } With the code in place, it is trivial to add the submenus to menu item 1. Looking back to Listing 2.2, an implementation of the PrepareItem() method, we simply add the following line of code after the non- const pointer MenuItem is obtained:
MenuItem->Add(SubMenuItemsFor1, NoOfSubMenuItemsFor1-1);
From here the submenus can be used as any other menu items on the context menu.
WARNING
Be careful not to assign code to a menu item with submenus in the ExecuteVerb() method. This can have unpredictable results.
The ExecuteVerb() Method
The ExecuteVerb() method is used to place the code that should be executed when one of the custom context menu items is clicked. The basic structure is the same as that for the GetVerb() method; that is, the code is wrapped inside a switch statement. Sample code is as follows:
void __fastcall TMyCustomEditor::ExecuteVerb(int Index) { switch(Index) { case 0 : EditComponet(); break; case 1 : break; // Do nothing - copyright info case 2 : break; // Do nothing - Separator line case 3 : // Do something else ... break; default : break; } } This shows the basic structure required to implement the ExecuteVerb() method. Typically, a menu item will show a dialog when it is clicked, unless the item is there as a line separator or to present textual or graphical information. To that end, the code that should be placed here depends very much on the features of the component being edited. In our example, clicking the first menu item should invoke a form through which to edit the component. This is typical and the most useful for users. The code needed is identical to that shown previously for the Edit() method. If the component editor is derived from TComponentEditor , and the Edit() method already contains the code required to show the component editor form, it makes sense not to repeat that code. The best approach is to place the necessary code in a separate function, in this case EditComponent() , and call that function in both the ExecuteVerb() and Edit() methods. In fact, if the first menu item is used for this function, you need only ensure that the code is called from the ExecuteVerb() method. This is because TComponentEditor already implements the Edit() method to execute the code associated with the first menu item. Consequently, the Edit() method need not be overridden. Regardless of whether code is duplicated , if the code required to invoke a dialog is complex, it is better placed in a separate function.
All the necessary information regarding displaying forms has already been presented, and you are referred there for further information. The fourth method has been left undefined. Depending on the component, it could be anything. However, in all probability it will display a form to the user. The code presented previously for the Edit() method will also be applicable in this situation.
The Copy() Method
The Copy() method is used to copy additional Clipboard formats to the Clipboard, to allow additional functionality that users might expect or find especially useful. This might be something such as the capability to copy an image in a TImage component to the Clipboard so that it can be pasted into a graphics package. The code required to implement this method depends entirely on what data is to be copied, making the implementation of this method highly variable. Therefore, it will not be dwelled on. The principles are shown in the following sample code, which allows an image from a TImage component to be copied to the Clipboard.
#include "Clipbrd.hpp" void __fastcall TImageComponentEditor::Copy(void) { // Step 1 : Obtain a suitable pointer to the component TImage* Image = dynamic_cast<TImage*>(Component); // Step 2 : If successful then proceed if(Image) { // Step 3 : Obtain the required data in a format the // clipboard will recognize WORD AFormat; unsigned AData; HPALETTE APalette; Image->Picture->SaveToClipboardFormat(AFormat, AData, APalette); // Step 4 : Obtain a pointer to the global instance // of the clipboard TClipboard* TheClipboard = Clipboard(); // Step 5 : Copy the data to the clipboard TheClipboard->SetAsHandle(AFormat, AData); } } The first stage is straightforward. A suitable pointer is obtained by dynamic_cast ing the TComponent pointer returned by TComponentEditor 's Component property. If this doesn't work, something is wrong. The second stage involves presenting the data in a way that the Clipboard will recognize. The data formats that the Clipboard supports are listed in the online help (it is also possible to register custom Clipboard formats; however, this is beyond the scope of this discussion). After this is done, a pointer to the global instance of the Clipboard is obtained. Calling the global Clipboard() function returns this pointer. A new instance of TClipboard should not be created. Finally, the data can be copied to the Clipboard. A simpler implementation of the function is as follows:
void __fastcall TImageComponentEditor::Copy(void) { TImage* Image = dynamic_cast<TImage*>(Component); if(Image) { Clipboard()->Assign(Image->Picture); } } The more complex approach was shown because it is more general, and the techniques are transferable to other copy operations.
It is important to note that this Copy() function does not interfere with the IDE's copying and pasting of components on forms using the normal menu and key shortcut methods. This function offers additional copying capabilities and must be invoked manually. It could, therefore, be placed as a menu item on the component's context menu. It is also perfectly conceivable that a Paste() method be defined and implemented. The definition for such a method would be
virtual void __fastcall Paste(void);
The corresponding implementation is
void __fastcall TImageComponentEditor::Paste(void) { TImage* Image = dynamic_cast<TImage*>(Component); if(Image) { Image->Picture->Assign(Clipboard()); } } | |
| Top |
- Integration Strategies and Tactics for Information Technology Governance
- A View on Knowledge Management: Utilizing a Balanced Scorecard Methodology for Analyzing Knowledge Metrics
- Technical Issues Related to IT Governance Tactics: Product Metrics, Measurements and Process Control
- Managing IT Functions
- Governance Structures for IT in the Health Care Industry