Using Movie Maker s Finish Movie Section
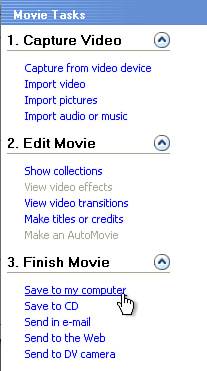
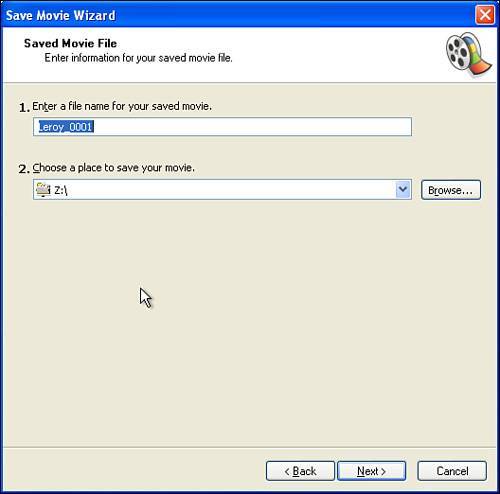
Using Movie Maker's Finish Movie SectionYou need to decide how you want to save and share your movie, so let's get started in the Tasks pane's Finish Movie section in Movie Maker. When you choose a format, Finish Movie launches the Save Movie Wizard and presents you with easy optionsas well as more detailed settings, if you want a specific formatto save your movie. With Finish Movie, you can save your movie for playback on a computer or a CD. You'll probably want to save your movie to your computer first. In addition, it's a good idea to make a backup copy on a CD or a miniDV tape. With Finish Movie, you can also format a movie to send to others via email, the Web, or a miniDV tape (using your miniDV camcorder). An email movie is a smaller file that you send via email. A Web-formatted movie is also (typically) smaller than the version you save to your computer. Let's try a movie editing exercise, using the clips you edited together in Chapter 3, "Editing Basics: Movie Maker and More." In this practice exercise, you should use the Finish Movie option Save to My Computer, which allows you to save your movie to either your computer's internal drive or an external hard drive. (If you don't see any options under Finish Movie, click the arrow next to Finish Movie to see the different sections under Finish Movie.) You should use the Save to My Computer option if you plan to make a DVD later (see Figure 4.1). Figure 4.1. Saving a movie to your computer using the Tasks pane. Using the Save Movie WizardSelecting Save to My Computer (or any of the other options under Finish Movie) launches the Save Movie Wizard, as shown in Figure 4.2. Figure 4.2. Naming and saving a movie by using the Save Movie Wizard. (This wizard is quite similar to the Capture Video Wizard you used in Chapter 3.) You need to enter a name for your movie and tell the Save Movie Wizard where to save it. Saving Formats and VersionsYou can choose to save multiple formats and versions of a movie:
Selecting Movie SettingsThe Movie Settings screen gives you one option: Best Quality for Playback on My Computer (Recommended). You should select this option, which saves your movie as a .WMV file. Determining File SizeYou can look at the text at the bottom-right of the screen to see the file size. Movie Maker also tells you how much space you have available on the hard drive you selected, so you can determine whether you have room to save your movie. Reducing File SizesIf you don't have enough space, you can use Show More Choices to tell Movie Maker a specific file size to save your movie to. However, if you make your movie file size smaller, the movie quality is reduced. It's best not to specify a drastic reduction in file size. (However, if you want, for instance, to fit your movie on a 650MB CD, this feature is very helpful because you could enter the desired file size here and have Movie Maker calculate the settings to make the file size you want.) Specifying Other SettingsYou can save a file to dozens of different formats by using the Show More Choices option and scrolling through the pop-up menu, which has a long list of movie formats. You can even save your movie to put on a PocketPC. For this exercise, you should use the setting Best Quality for Playback on My Computer (Recommended). Saving a MovieThe final step in the process is for Movie Maker to save your movie, which takes awhile, depending on the length and size of the movie file. Completing the Save Movie WizardWhen your movie is saved, you have a chance to play the saved movie. You should check the check box if you need to see the saved movie or uncheck it if you don't want to watch it now. Then you click Finish. Creating Additional Formats and VersionsAt this point, you should save any additional formats if you want to play back your movie in other environmentsfor instance, in email. You could also start on a new (shorter?) version of your movie at this point. You can come back to do this another time, or you can return to the project now and edit it further, repeating these steps to save to a different format or edit to another length. Saving to CDMaking a CD of your movie is a very good idea. You need an internal or external CD burner to make a CD of your movie. Making a CD accomplishes two goals:
The best practice is to save two copies of your completed movie project to protect your valuable edited movie and all the work you've put into making it. Even if you have unlimited disk space (but who does?), digital files on computers are fragilethey can be accidentally erased by human beings or affected by a computer crash. A good practice is to save one copy on your hard drive (for easy editing later) and one copy on a CD for backup. To save a movie to a CD, you put a blank CD in your CD burner. If you are using an external CD burner, you need to make sure the CD burner is connected to your computer. Then you follow the steps in the Save Movie Wizard to burn a copy of your movie to a CD. Remember that most recordable CDs are 650MB, so if you are saving your movie to a CD and you plan to put it on a single CD, you need to make sure your file is no larger than 650MB. Sending in EmailTo send a movie in email, you select the option Send in e-mail under Finish Movie in the Tasks pane, to launch the Save Movie Wizard. The wizard saves a smaller movie file size, opens your email program, and attaches your movie. You fill in the address of the person you're sending to and click Send. It's good email etiquette to send only small files, so be courteous! Sending to the WebTo send a movie of a movie to the Web, you select the option Send to Web under Finish Movie in the Tasks pane, to launch the Save Movie Wizard. The Save Movie Wizard asks you how you connect to the Web to determine the right size movie file to create, depending on the speed of the connection. After the wizard saves your movie, it asks you where to put your movie online. If you have Web hosting, you enter that information on this screen.
Tip The Save Movie Wizard also offers to help you buy hosting online by opening a Mediashare account with Microsoft's partner Neptune. For complete information, visit www.neptune.com. See the sidebar "Putting Your Movie on the Web," in this chapter, for a list of free hosting sites. Sending to a DV CameraYou can use the Send to DV Camera option when you want to do the following:
If you're saving your movie to your miniDV camcorder, remember to put a blank tape in. If you have to use a previously recorded tape, you need to make sure the Record/Save tab is in the Record position. You want to avoid the tragic mistake of recording over any valuable footage on a previously used tape! To watch your movie on TV, you connect your camcorder to your TV, using the proper cables. The cables to connect your camcorder to the TV probably came with your camcorder when you purchased it. (If not, they are usually readily available at an electronics store.) |