Publishing Project Information to the Web
Suppose that one of your managing stakeholders asked you to publish key project information on her department's intranet Web page. You can do this by exporting a Microsoft Project view to HTML format.
To convert Microsoft Project information to HTML format, follow these steps:
-
In Microsoft Project, open the project that contains the information you want to publish to the Web.
You do not have to display the exact information being published to the Web; you'll specify this in the export process.
-
Click File, Save As Web Page.
The Save As dialog box appears.
-
In the Save In list, select the drive and folder where your HTML files are stored. This might be the folder for your intranet Web server. Make a note of the full path to the file, including server name, folder name , and filename.
-
In the File Name box, enter a name for the Web page you're creating.
-
Make sure that Web Page (*.html, *.htm) appears in the Save As Type box.
-
Click Save.
The Export Wizard opens.
-
On the Welcome page, click Next.
-
On the Map page, click New Map and then click Next.
-
On the Map Options page, click the Tasks , Resources, or Assignments check box to indicate the type of data you're exporting. Under HTML Options, click Export Header Row/Import Includes Headers (see Figure 16-19). Click Next.
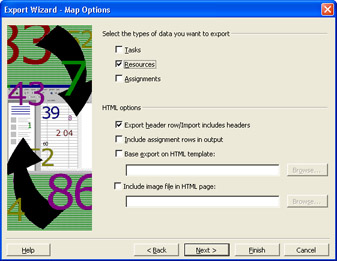
Figure 16-19: Specify whether you're including tasks, resources, or assignments to your new Web page.The Mapping page opens.
-
In the Export Filter box, click All Tasks, All Resources; or apply any appropriate filter for the information you want to publish.
-
Click the Base On Table button and then choose the table that contains the fields of information you want to publish to the Web, for example, the Entry table. This procedure fills in the From: Microsoft Project Field and To: HTML Table Field columns . The Preview area shows what the HTML table will look like. Click Next.
-
On the End of Map Definition page, click Save Map if you will be publishing this information to the Web on a periodic basis.
-
Click Finish.
Your specified project information is now saved as an HTML file. You can view it in a Web browser to see how it looks. Microsoft Project adds title and project information (see Figure 16-20).
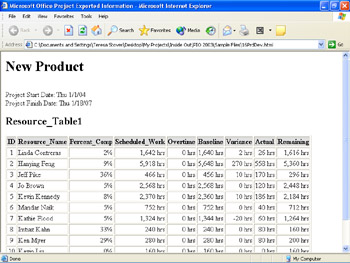
Figure 16-20: eview the project HTML Web page in a Web browser.
After you save your newly built HTML Web page, you or the Web master can upload it to your Web server.
| |
You can use Web Parts to develop Web page components that convey key project information efficiently to your team or organization. Web Parts are self-contained, reusable components that consist of types of information varying from sophisticated dynamic Web page content embedded in a frame to concise text messages in HTML. Generally, most features and content that can be seen on a Web page can be included as a Web Part.
Web Parts group and position all key information logically and consistently; the information is accessed through hyperlinks . In addition, Web Parts can be enhanced and customized to suit your organization's needs.
Because you can use just about any type of Web page as a Web Part, you can save Microsoft Project information as a Web page and then include it as a Web Part.
| Cross-References | For more information about building a Web page using Web Parts, refer to the Project Software Development Kit (SDK) and navigate to the "Creating Web Parts" section. To access the SDK, go to http://msdn.microsoft.com/project , click Microsoft Office Project 2003, and then click SDK Documentation. |
| |
EAN: 2147483647
Pages: 268