Hack 39 Outdoor Fill Flash
| < Day Day Up > |
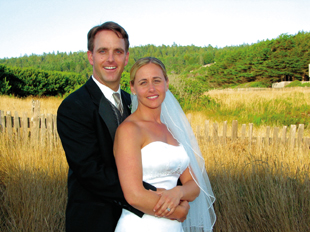
| It might seem crazy at first, but one of the best times to turn on your flash is when you're taking outdoor portraits on a bright, sunny day . Working with your camera's flash can be counterintuitive. Often, you'll capture more compelling indoor pictures when you turn off the flash, and get great shots when you activate it outdoorsquite the opposite of what you'd expect. In fact, I'd go so far as to say that the one killer tip that will improve your pictures more than any other is to turn on your flash for outdoor portraits. As shown in Figure 4-1, the flash helps balance the lighting of the subjects with the ambient light outdoors. Figure 4-1. An outdoor portrait, brightened by fill flash While there's a lot of light available when you're shooting portraits outdoors, it isn't always coming from the angle you want. Here's a little lighting tip to keep in your back pocket: light coming from the side accentuates texture, and light coming from the front flattens it. So, keeping this in mind, what type of light do you think your mother would like you to use when taking her portrait? Side lighting with lots of texture? Most likely not. How about some front lighting that softens the appearance of wrinkles and pores , please ? For outdoor portraits, many photographers take this pearl of wisdom and position the model so that the sun is shining directly in her face. Hmmm...Mom's not going to like that much, is she? So, how do you get around this apparent photographic paradox? The answer is to find a comfortable spot for her to stand in the open shade under a tree is lovelywith a complementary background that doesn't include any distracting elements. Now, turn on your flash. With most cameras , you do this by looking for the button with a little lightning bolt on it. As you press the button, you will cycle through all the available flash settings. Use the setting called Fill Flash or Manual On. Make sure you're standing within eight feet of Mom. That distance is the range for those convenient , yet somewhat wimpy built-in camera flashes. If you stand too far away, the light will peter out before it ever reaches your beloved, and you won't reap the benefits of this technique. Now, fire at will. Your camera will balance the background lighting with that of the flash, rendering a perfectly exposed portrait. And what direction is the main light coming from? You got it: the front. Dear Mom will immediately designate you as her favorite child (but please don't tell the others). If you want to fiddle with this technique, here are a few more hot tips:
Using your flash outdoors might be counterintuitive, but the results are smashing. You just have to give it a try. |
| < Day Day Up > |
EAN: 2147483647
Pages: 161