PHP and Files
| I l @ ve RuBoard |
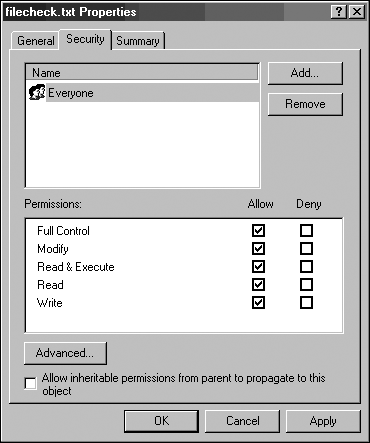
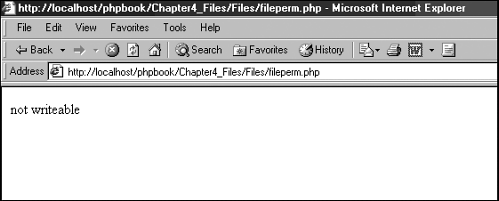
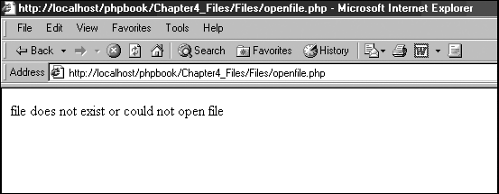
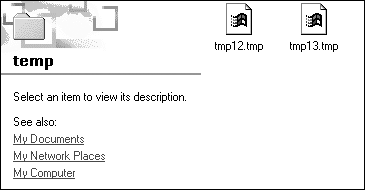
| Using the PHP functions for files and directories does not vary much from either Linux or Windows, but there are some issues you must be aware of when you use files. File PointersWhen an application (such as PHP or Microsoft Word) opens a file, the file's contents are made ready to be either read, written, or deleted. As soon as the file is open , the application keeps track of where it is reading or writing data within the file by using a file pointer. NTFS and File PermissionsPHP has a host of file functions, which we'll look at later in this chapter. Among them are functions for checking and setting file permissions. If you use an NTFS file system, these functions won't work correctly. The NTFS file system uses a role-based method (share-level access is the analog in Windows 95/98/ME) to set file permissions, such as for Administrators. PHP's file permission functions don't pick up such permissions and in turn can't set them. Note that FAT32/16 has no role-based file permission system like NTFS. Although it's still possible to set file permissions on a per-file basis (such as setting a Word document to read-only) with FAT32/16, PHP cannot pick up or set such permissions. To illustrate these principles, I have created a simple file called filecheck.txt (but you could use any file). If you right-click the file, select Properties, and select the Security tab, you can see its permissions, as shown in Figure 4.1. As you can see, the file is both readable and writeable . You can test the file with the code shown in Listing 4.1. (Don't worry too much about what's going on here; I will cover the functions later in this chapter.) Figure 4.1. NTFS file permissions. Listing 4.1 fileperm.php <?php //open the file $myfile = @fopen("weblangs.txt", "r") or die ("file does not exist or could not open file"); //is the file writeable if (!is_writeable ($myfile)) { print "not writeable"; } //close the file @fclose($myfile); ?> If you inspect the results of running this code (see Figure 4.2), you see that the code reports that the file is not writeable, when the NTFS file permissions tell you that it is. As we mentioned above as a general rule, the PHP file permission checker and setter functions don't work with NTFS. You must set them manually. Figure 4.2. PHP displaying incorrect file permissions. Note that when using the fopen function we call it using @fopen . The @ symbol prevents the reporting of any errors; all of PHP's functions can be called in this manner. When is this of any use? Well we can display our own error messages, one method of which is to use the die statement. The die statement displays the error message and then stops the script from running any further. The first line of the code is shown in Listing 4.2. Listing 4.2 openclosefile_error.php $myfile = @fopen("weblangs.txt", "r") or die ("file does not exist or could not open file"); It reports an error if a file on a FAT32/16 or NTFS file system is not set to readable. Opening and Closing FilesWith these issues in mind, you can start looking at how to use PHP with files. First you must open a file, as shown in Listing 4.3. Listing 4.3 openfile.php <?php //open file $myfile = @fopen("weblangs.txt", "r") or die ("file does not exist or could not open file"); ?> In this script if the file does not exist, or a problem is encountered when opening the file (such as those described in the preceding section), the script reports an error (as shown in Figure 4.3). Figure 4.3. Displaying a file not found error message. If you create a simple text file called weblangs.txt (the content can be anything you like; in this case I have used a selection of names of web scripting languages) in the same directory as the script, the script will not return a file not found error. One more thing you must add to the script is to close the file when you have finished using it (see Listing 4.4). Using this function is good housekeeping; however, note that PHP closes files for you when the script ends. Listing 4.4 openclosefile.php <?php //open file $myfile = @fopen("weblangs.txt", "r") or die ("file does not exist or could not open file"); //close file @fclose($myfile); ?> Creating FilesOften you might need to temporarily create a file to store data in. PHP gives you a quick way to create these temporary files. You use the tempnam function, as shown in Listing 4.5. Listing 4.5 createtempfile.php <?php //create temp file $tempfile = tempnam ("C:\temp\", "tmp"); ?> The tempnam function allows you to set the path of where you will create your PHP file (in this case, C:\temp\) and what file extension the file will have (in this case, .tmp). Because you can specify the file extension, you can create text files, XML files, and so on. Any temporary files you create will persist, so you need to remove them from your system to preserve resources. Be sure you delete all temporary files when you have finished with them. Also note that you could not type C:\temp\ in your script, because the \ character is seen as an escape character within strings in PHP. You must provide a character to escape this behavior, as in the following: C:\temp\ If you check your destination directory after running this script (in this case, C:\temp\), you should see that a .tmp file has been created (see Figure 4.4). PHP names these files for you, such as temp12.tmp. Figure 4.4. The contents of a directory after PHP has created temp files in it. The second method you can use is to create files when attempting to open them. (You get to name files you create yourself.) PHP has some handy flags that the fopen function uses (which you saw earlier) ”namely, the w+ flag (see Listing 4.6). Listing 4.6 createfile.php<?php //open file $myfile = fopen("tempfile.txt", "w+") or die ("file does not exist or could not open file"); //close file @fclose($myfile); ?> This creates tempfile.txt as a readable and writeable file. The fopen function has several flags of this type, as shown in Table 4.1. Table 4.1. @fopen Flags and Results
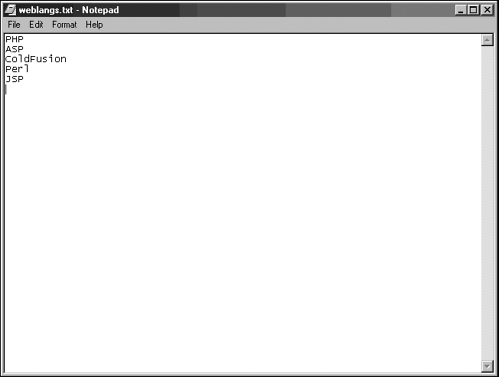
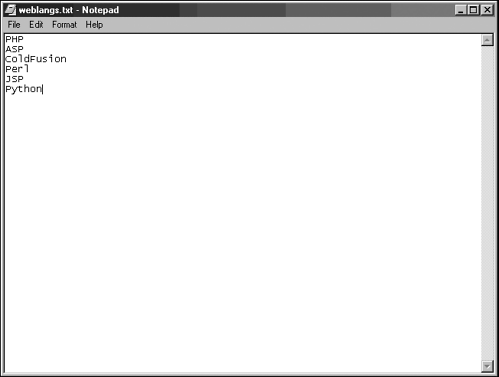
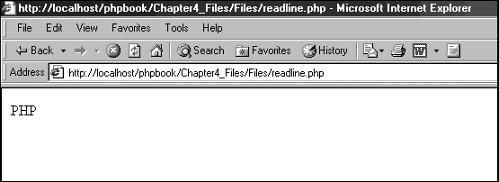
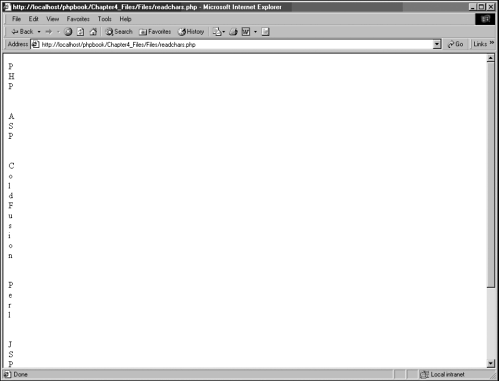
You can also add what's known as the b modifier, in which you add a b to end of the flags listed in Table 4.1 (with no space between the modifier and the flag). The b modifier is for OSs (such as Windows) that differentiate between binary and text files. If you are working with a binary file in your PHP script, add the b modifier to your fopen flags, for example, fopen("weblangs.txt", "rb") . Writing a Line to a FileLet's next look at how to add a line to a file. We'll start with a file that has the lines shown in Figure 4.5. Figure 4.5. The test file. To create a new line in this file, you would use the code shown in Listing 4.7. Listing 4.7 writeline.php <?php //open file $myfile = @fopen("weblangs.txt", "a") or die ("file does not exist or could not open file"); //insert line fputs ($myfile, "Python\r\n"); //close file @fclose($myfile); ?> This code uses the fputs function to insert a new line (in this case, the word Python). If you compare Figure 4.5 to Figure 4.6, you can see that a new line has been inserted. Figure 4.6. The test file with a new line added by your PHP script. The fputs function adds a string of data to your file. This data will always have a size in bytes. The fputs function adds data according to its size in bytes. You can control this in the fputs function by setting the maximum number of bytes you want to pass. When working with strings you will very rarely need to set the maximum number of bytes you want to read into a file as strings are often small in size. However sometimes strings can be large (for example, a string containing data from a database table and so on), in this case you may wish to break the data in the string up into smaller chunks and add each chunk at a time, the fputs function lets us do both. Reading a Line from a FileReading a line from a file is pretty straightforward. You cycle through the file's contents and read it line by line using the fgets function. The fgets function does not strictly read files line by line; it reads a string's bytes from a file until it reaches a line-end sequence. Listing 4.8 shows you how the fgets function works. Listing 4.8 readline.php <?php $line_count = 1; // starting value of file count $line_num = 0; //line number to search for //open file $file_to_read = @fopen("weblangs.txt", "r") or die ("file does not exist or could not open file"); while (!feof($file_to_read)) { //get file line $file_line = fgets($file_to_read , 50); //see if current line number in file equals desired file number if ($line_count == $line_num) { //display file line print("$file_line"); break; } $line_count++; } //close file @fclose($file_to_read); ?> This example cycles through a file and reads it line by line until the desired line number is reached. You start by specifying the line you want to find: $line_num = 1; //line number to search for As the code runs through the file, it counts the lines in the file. Because the search begins at the start of the file, you set the counter to . Each time the code goes through a line in the file, the counter is incremented: $line_count = 0; // starting value of file count Running through the file is accomplished with the while statement and the fgets function. In the while statement, the while loop runs until the end of the file is reached. The feof function is used to indicate to the while loop that the end of the file has been reached: while (!feof($file_to_read)) { You need to obtain each line number and see if it matches the line number you want: //get file line $file_line = fgets ($file_to_read , 50); //see if current line number in file equals desired file number if ($line_count == $line_num) { When the desired line number is reached, it is printed, and the search stops: //display file line print($file_line); break; If you run the script, you see line one of the file, as shown in Figure 4.7. Figure 4.7. The contents of the test file displayed line by line. Reading All Lines from a FileYou can also read all the lines from a file using the script shown in Listing 4.9. Listing 4.9 readall.php <?php print (readfile("weblangs.txt")); ?> Here, the readfile function simply reads a file's contents. You can either store the result to a variable or display it. The readfile function can also read files from HTTP and FTP sources. Reading Characters from a FileYou can read characters from a file using the same methods used to read lines from a file: Open the file, iterate through it, and then close it (see Listing 4.10): Listing 4.10 readchars.php <?php //open file $file_to_read = @fopen("weblangs.txt", "r") or die ("file does not exist or could not open file"); //cycle through file contents do { //obtain each character in file $file_char = fgetc($file_to_read); //print each character in file print("$file_char<BR>"); } while (!feof($file_to_read)); //close file @fclose($file_to_read); ?> Instead of reading lines, this script reads characters using the fgetc function: //obtain each character in file $file_char = fgetc ($file_to_read); You can then print each character as you obtain it: //print each character in file print("$file_char<BR>"); If you run the script, you should see the contents of the file broken up by character, as shown in Figure 4.8. Note that obtaining characters one by one can introduce a lot of overhead when you're working with large files. In such cases, other means should be considered . Figure 4.8. The test file read character by character. |
| I l @ ve RuBoard |
EAN: 2147483647
Pages: 99
