Restoring Files
Like backing up, restoring is a matter of specifying what, whence, whither, and how. You can do this by invoking the Restore Wizard (click its button on the Welcome tab or choose Restore Wizard from the Tools menu) or by pointing and clicking on the Restore tab of the Backup window. There's no significant advantage to one method over the other.
To restore files by working directly on the Restore tab of the Backup window, start Backup and click the Restore tab. (See Figure 29-14.) The process of restoring files is quite similar to the process of backing up files.
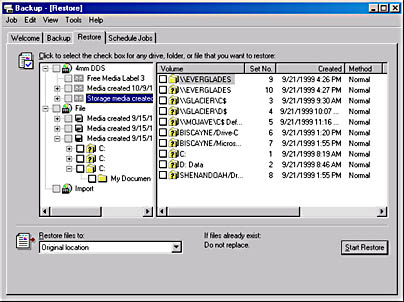
Figure 29-14. To see the contents of a folder marked with a question mark, right-click its icon and choose Catalog.
- Specify the files or folders you want to restore.
The hierarchy in the left pane is organized at the highest level by media type (tape or file). Within each media type, the left pane contains an entry for each tape or each file; in either case, Backup identifies the tape or file by the media name you specified during backup. You can expand the outline until you see the drives, folders, and files that you want to restore. Mark these for restore by clicking the check box.
NOTE
A question mark on a folder icon indicates an item for which Backup has not yet read the catalog, or file list, from the backup media. You can force Backup to read the catalog by right-clicking a questionable folder and choosing Catalog from the shortcut menu. If you expand such an icon or mark it for restore without first cataloging its contents, Backup reads the catalog.
- Specify where you want the restored files to go. In the Restore Files To box, choose one of these options:
- Choose Original Location to restore the selected files to the same folder or folders they were in when they were backed up.
- Choose Alternate Location to restore the files to a different folder. The folders and files you select will be restored to subfolders within the folder you specify in the Alternate Location box, maintaining their original folder structure.
- Choose Single Location to restore all selected files from all selected folders to a single folder, which you specify in the Alternate Location box.
- Open the Tools menu and choose Options. On the Restore tab of the Options dialog box, select one of the three options to specify what you want Backup to do when you restore a file that already exists in the selected folder on your computer.
- Click Start Restore. In the Confirm Restore dialog box, click OK.
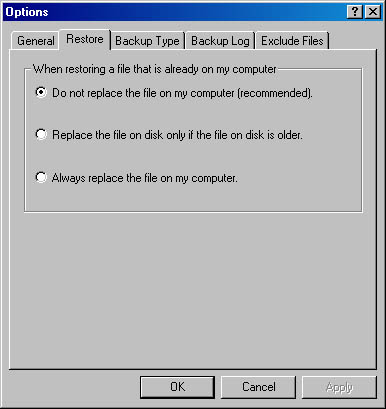
The default and recommended choice is not to restore any file that's already on the target disk. But you can opt to have the program restore when the backed-up copy is newer than the existing copy. Or you can have the program always restore. What you can't do is ask for a yes/no prompt every time the question arises. If you want some files always to be overwritten and some files never to be overwritten, you'll need to perform separate restore operations for each category of file. Click OK to close the Options dialog box.
Backup then begins restoring your files, prompting you to insert the correct media if necessary, and keeping you informed of its progress with dialog boxes similar to the ones it uses for backup operations.
NOTE
You should always restore files that you have backed up from an NTFS volume to a Windows 2000 NTFS volume. If you restore them to a FAT or FAT32 volume—or even to an NTFS volume on a computer running Windows NT 4—you'll lose some or all of the NTFS security features, including permissions, encryption, and ownership information.
EAN: 2147483647
Pages: 317