Working Offline
Most of the time, you'll use Internet Explorer while you're connected to the Internet. However, Internet Explorer is perfectly capable of displaying Web pages even when you're not connected—provided the pages themselves are available offline. Working offline allows you to browse when you don't have an Internet connection (for example, while you're traveling or when another family member is using the phone line), and it allows you to reduce the time of your Internet connection, which is particularly valuable in areas that charge for Internet use on a per-minute basis. Or if you're frustrated with the speed of your Internet connection, you can have Internet Explorer visit your favorite Web sites at night and then deliver the goods for you to read offline the following morning.
To switch Internet Explorer from online to offline mode, choose Work Offline from the File menu. This action doesn't terminate the current connection. However, the next time you take an action that would ordinarily cause Internet Explorer to create a connection to the Internet, that connection doesn't take place. Instead, Internet Explorer searches local storage for the requested Internet resource.
TIP
If you use a dial-up connection to connect to the Internet, you can begin an offline session by clicking the Work Offline button in the Dial-Up Connection dialog box.
If Internet Explorer can't find a document that you want to read offline, it displays the dialog box shown in Figure 18-8. You can then either click Connect to let the program search online, or you can click Stay Offline. Clicking the latter button is effectively the same as clicking Cancel in other dialog boxes: the dialog box closes and Internet Explorer's display remains unchanged.
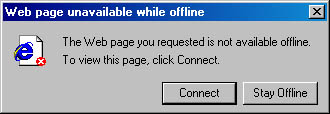
Figure 18-8. If Internet Explorer can't find your document in offline mode, you can click the Connect button to look for it online.
While reading a page offline, you can click any of its links to hop to a different document. If the document to which you hop is also available offline, everything works in this mode exactly as it would online. If not, you see the dialog box shown in Figure 18-8.
TIP
If a linked document isn't available offline, the mouse pointer that appears when you point to the link changes from a hand to a hand plus a barred circle.
To switch back to online mode, simply choose Work Offline a second time. This doesn't immediately connect you to the Internet, but it clears the check mark beside the command. The next time you ask Internet Explorer to fetch a Web page, it connects rather than searching locally.
Making Pages Available Offline
Pages become available offline in one of three ways:
SEE ALSO
For more information about the cache, see "Controlling the Cache."
- Automatically, as part of the cache. Internet Explorer stores pages that you have visited recently in a cache. One purpose of the cache is to make it possible for you to work with documents offline; when you request a page, Internet Explorer first looks in the cache. (Another purpose of the cache is to speed up access to Web pages while you're online.)
This approach is hit-or-miss, however. As the cache fills up with newer pages, older pages are deleted—so a page you want might not be available any more. And the cached information might not be current; ordinarily, it gets updated only when you view it while you're online.
SEE ALSO
For more information about saving files, see "Saving a Web Page to Disk."
- When you save a Web page. Using the Save As command on the File menu, you can save the current page in a folder. In the Save As Type box, if you select either Web Page, Complete, or Web Archive, Single File, Internet Explorer saves all the files you need to view the page offline, including graphics, frames, and style sheets. To view the page later, use the Open command on the File menu to browse to the saved file's location.
- When you make a favorite page available offline. Pages included on the Favorites menu have a Make Available Offline option. If you select this option (as described in the following sections), the page is always available offline. Optionally, you can tell Internet Explorer to connect to the Internet periodically and synchronize the stored offline version with the latest Internet version (in other words, download an updated version of the page if one exists).
The last method offers the greatest flexibility and possibilities for automation.
NOTE
Internet Explorer version 4 included subscriptions and channels. Although the sometimes confusing monikers and sometimes confusing procedures for using them are no longer used in version 5, the functionality of these features remains. Both names refer to a type of offline file that is periodically updated. If you upgraded from a system running Internet Explorer version 4, the channels now appear in the Favorites list rather than occupying a separate Explorer bar.
Adding a Page to Your Offline Web Pages List
Pages that you make available offline must be in your Favorites folder. You can add the page to your offline Web pages list (that is, make it available offline) when you create the favorite or at any time later.
To add a page to your Favorites folder and make it available offline:
- Display the page, and then choose Add To Favorites.
- In the Add Favorite dialog box, select Make Available Offline.
- Change the name and location of the favorite if you like. For more information, see "Adding an Item to Favorites."
If you click OK at this point, your offline Web page will have the following properties:
- Internet Explorer synchronizes (updates) the page only when you use the Synchronize command—not on a predetermined schedule.
- When you synchronize the page, Internet Explorer doesn't include any pages reached by the links on the page.
- Internet Explorer assumes that you don't need to supply a name and password to access the page.
If you want to change any of these settings, click the Customize button in the Add Favorite dialog box to start the Offline Favorite Wizard.
To change other properties, go ahead and set up the favorite page and then visit the favorite's properties dialog box, as described in the following section. For more information, see "Changing Offline Web Page Settings," below.
To make an existing favorite available offline:
- Open the existing favorite page's properties dialog box. (Right-click its entry on the Favorites menu or on the Favorites bar and choose Properties from the shortcut menu.)
TIP
Don't bother with the shortcut menu's Make Available Offline command. It launches the Offline Favorite Wizard—forcing you to step through several pages even if you don't want to change any default settings—and it doesn't offer many of the options that are available in the properties dialog box.
- On the Web Document tab of the page's properties dialog box, select Make This Page Available Offline.
If you click OK at this point, your offline Web page will have the same properties listed above. You can change these settings and others by visiting the Schedule and Download tabs, as described in the following section.
TIP
As an alternative to this procedure, choose Organize Favorites from the Favorites menu, select a favorite page, and select the Make Available Offline check box.
Changing Offline Web Page Settings
The properties dialog box for an offline Web page is the place where you can set up a synchronization schedule, determine exactly what gets downloaded, and set up e-mail notification of changes. Do one of the following to view the properties dialog box:
- Right-click its entry on the Favorites menu or on the Favorites bar and choose Properties from the shortcut menu.
- Choose Organize Favorites from the Favorites menu, select the page, and click Properties.
Setting Up a Synchronization Schedule
By default, Internet Explorer synchronizes your locally stored copy of an offline Web page with the original version only when you choose Synchronize from the Tools menu. Using the Schedule tab in the properties dialog box, you can set up a schedule for synchronizations. At the appointed times, Internet Explorer connects to the Internet (if you're not already connected) and updates the offline page by downloading the current version of the online page.
To set up a synchronization schedule:
- On the Schedule tab of the page's properties dialog box, select Use The Following Schedule(s).
- If the schedule you want to use isn't in the list, click Add.
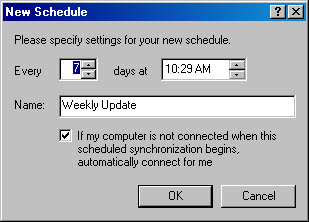
- Specify the number of days between updates and the time you want the updates to occur, and give the schedule a name. Select the check box if you want to connect to the Internet at the appointed time. (If you don't select the box and you're not already connected to the Internet, the connection dialog box waits for your go-ahead.) Then click OK.
- Select the check box next to each named schedule you want to use for this page.
The New Schedule dialog box appears.
TIP
Creating Complex SchedulesThe New Schedule dialog box lets you set up schedules that update, at most, once per day. To update more frequently, you can create several schedules. But there's a better way: Set up a daily schedule, and then, on the Schedule tab, select the schedule and click Edit. In the schedule's properties dialog box that appears, click the Schedule tab. Here you can schedule updates on any of several intervals or upon certain events, on certain days of the week or month, and create multiple schedules. And by clicking the Advanced button, you can schedule updates as often as every minute and set an ending time for scheduled updates. For more information about advanced scheduling options, see "Using Offline Files."
TIP
Preventing Synchronization While TravelingIt can be annoying when Internet Explorer attempts to make a dial-up connection while you're away from a phone line. To prevent such interruptions, on the Schedule tab of the properties dialog box for the offline page, select the synchronization schedule and click Edit. Then, on the Settings tab, select Don't Start The Task If The Computer Is Running On Batteries.
Setting Up Download and E-Mail Notification Options
Visit the Download tab in the properties dialog box (shown in Figure 18-9) in the following circumstances:
- You want to change the level to which Internet Explorer downloads linked pages.
- You want to change the kinds of items that Internet Explorer downloads—for example, to exclude images or add sound and video. (Click the Advanced button.)
- You want to impose a maximum download size for the page.
- You want to receive e-mail notification when the page changes. (Enter your e-mail address and the name of your mail server; this feature works only with SMTP-based mail systems, which excludes many Internet mail accounts.)
- The page requires a user name and password for access. (Click the Login button.)
The default is zero, which means you get only the offline page—but not any pages that are reached by links on the original page. You can specify up to three levels, but be aware that the amount of material that Internet Explorer will have to download increases exponentially as you select deeper levels of links.
If you choose to include linked pages, you can limit the download to include only links to other pages at the same site (this prevents downloading pages linked to banner ads, for example) or only links to HTML pages. (Click Advanced to set the latter option.)
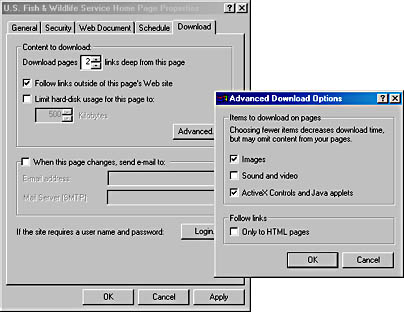
Figure 18-9. The Download tab lets you determine what gets downloaded. Clicking Advanced displays the Advanced Download Options dialog box.
Updating Offline Web Pages Manually
You don't have to wait for the scheduled update time to check on the status of a favorite Web page. To update it manually, right-click its entry on the Favorites menu or on the Favorites bar and choose Synchronize from the shortcut menu.
You can also perform a manual update of all your offline Web pages (and offline files) at once by choosing Synchronize from the Tools menu. Select the pages you want to update, and then click Synchronize.
SEE ALSO
For more information about synchronizing offline pages and files, see "Using Offline Files."
Removing Files from Your Offline List
To remove an entry from your Offline Web Pages list:
- Open the Tools menu and choose Synchronize.
- Select the page you want to remove, and then click Properties.
- On the Web Document tab, clear the Make This Page Available Offline check box.
The Items To Synchronize dialog box appears, and it lists all your offline Web pages.
TIP
To temporarily stop synchronizing a particular offline page, clear its check box in the Items To Synchronize dialog box. Windows retains the settings you make here so that you don't need to clear the check box each time you synchronize.
EAN: 2147483647
Pages: 317