Customizing the Calendar
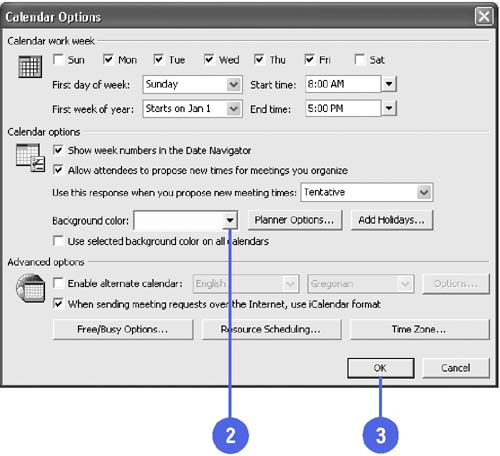
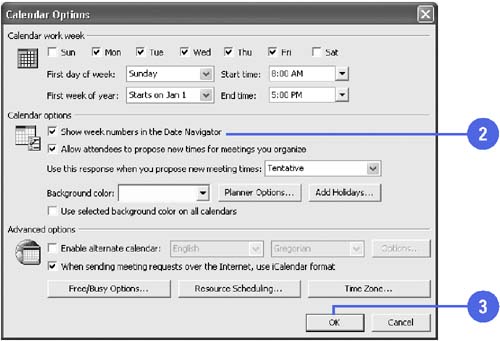
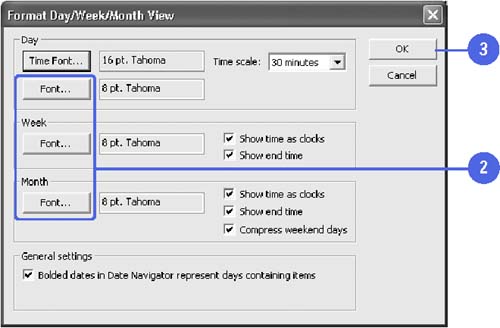
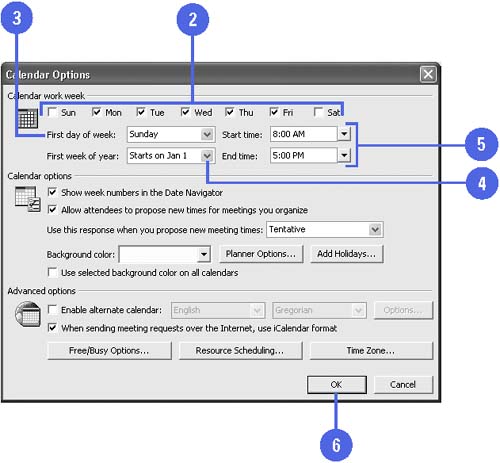
| As with other folders in Outlook, you can customize Calendar to suit your needs. For example, you can change the background color or the text font if you like. You can also set Calendar to display week numbers (from 1 to 52) to the left of each week in the Date Navigator. If you change the background color of the Calendar, it only applies to Day and Work Week views. The Week and Month views use system colors. Another way to customize the Outlook Calendar is to change the work week settings. For example, if you are in the medical field and you work three twelve- hour shifts a week, Wednesday through Friday, you might want to change the work week in your Calendar to reflect this. You can change the days included in the work week, the start day of the work week, the start and end times of the work day, and the first week of the work year. Change the Background Color
Show Week Numbers
Customize the Font
Set Work Week Options
|

- The Four Keys to Lean Six Sigma
- Key #4: Base Decisions on Data and Facts
- Making Improvements That Last: An Illustrated Guide to DMAIC and the Lean Six Sigma Toolkit
- The Experience of Making Improvements: What Its Like to Work on Lean Six Sigma Projects
- Six Things Managers Must Do: How to Support Lean Six Sigma