| The capability to move and copy text from one place to another is one of the most appreciated features of word processing programs. The term cutting and pasting actually refers to both moving and copying text. When you move text, you remove ( cut ) it from one location in your document and paste it in another. When you copy text, you leave the text in its original location and paste a duplicate of it somewhere else. The location that contains the text you want to move or copy is called the source , and the place you want to paste it is called the destination . The destination can be in the same document, another Word document, another Office document (such as an Excel spreadsheet or a PowerPoint presentation), or a document created in another Windows application. When you cut or copy text, it is placed on the Windows Clipboard, a temporary storage area available to all Windows applications. Issuing the Paste command copies the text from the Windows Clipboard into your document. (It actually stays on the Windows Clipboard until you perform the next cut or copy, so you can paste the same text multiple times if you like.)  | A major limitation of the Windows Clipboard is that it can hold only one selection at a time. Each time you cut or copy another block of text, it replaces the text that was previously on the Windows Clipboard. As you'll see in "Moving and Copying Multiple Items" later in this hour , Office offers a way around this restriction with the Office Clipboard. |
Moving Text When working with documents, you often need to restructure the text. Rather than delete text and retype it, you can move a word or phrase within a sentence , reorganize the flow of sentences within a paragraph, or change the order of some paragraphs. Follow these steps to move text: -
Select the text that you want to move. (Use any method described in "Selecting Text" earlier in this hour.) -
Click the Cut button on the Standard toolbar (see Figure 2.21) or press Ctrl+X . The text disappears from its current location. Figure 2.21. Click the Cut button to remove the selected text from its current location. 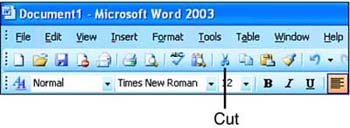 -
Navigate to the destination, and place the insertion point exactly where you want the text to appear. | | If the destination is in a different document that is currently open, click the document's taskbar button to switch to it, and then navigate to the place where you want to insert the text. If the destination document isn't open, open it now (see "Opening Documents" in Hour 3). |
-
Click the Paste button in the Standard toolbar (see Figure 2.22) or press Ctrl+V . The text is pasted into the destination, and existing text to the right of the insertion point moves over to make room for the inserted text. Figure 2.22. Click the Paste toolbar button to paste the text into the destination. 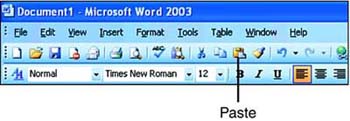  | If you're trying to move text and the Cut toolbar button is dim, you forgot to select the text you want to move. The Cut and Copy toolbar buttons become active only when you have text selected. |
Copying Text If you want to insert a block of text that you've already typed somewhere else, it's much faster to copy it than to type it from scratch. Follow these steps to copy text: -
Select the text that you want to copy. -
Click the Copy button on the Standard toolbar (see Figure 2.23) or press Ctrl+C . The original text remains in its current location. Figure 2.23. Click the Copy button to make a copy of the selected text. 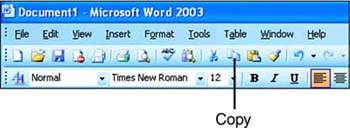 -
Navigate to the destination, and make sure that the insertion point is exactly where you want the text to appear. -
Click the Paste button in the Standard toolbar or press Ctrl+V . The text is pasted into the destination, and existing text to the right of the insertion point moves over to make room for the inserted text. | | If you want to copy an entire file into the current document, click at the location where you want to insert the file, choose Insert, File, select the file in the Insert File dialog box, and click the Insert button. |
Moving and Copying with Drag-and-Drop If you are handy with the mouse, you may find it easiest to move and copy text with drag-and-drop . This feature enables you to select text and then drag it to its destination. Drag-and-drop is best suited for moving or copying small amounts of text a short distance. To move text with drag-and-drop, follow these steps: -
Select the text that you want to move or copy and release the mouse button. -
Point to the selected text. The mouse pointer becomes a white arrow. -
To move the text, drag it to the destination. As you drag, the mouse pointer changes to indicate that you're performing a drag-and-drop (see Figure 2.24). Drag until the dashed insertion point attached to the mouse pointer is in the right place, and then release the mouse button. Figure 2.24. A special drag-and-drop mouse pointer shows where the text will be inserted. 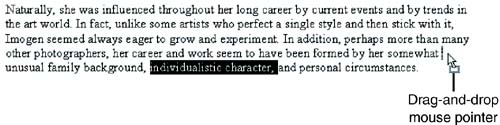 -
To copy the text, Ctrl+drag it to the destination (hold down the Ctrl key as you drag). The drag-and-drop mouse pointer gains a plus sign to indicate that you're performing a copy, not a move (see Figure 2.25). When the dashed insertion point is in the right place, release the mouse button and then the Ctrl key. (If you release the Ctrl key before the mouse button, Word performs a cut instead of a copy.) Figure 2.25. The drag-and-drop mouse pointer includes a plus sign when you're copying text.  -
Click anywhere to deselect the text. If you accidentally drop the selected text in the wrong place, click the Undo button on the Standard toolbar. Moving and Copying Multiple Items With the traditional cut-and-paste procedure, you can cut or copy only one selection at a time. The Office Clipboard enables you to "collect" up to 24 selections of cut or copied data from any application and then paste them in any order into any Office document. The Office Clipboard can handle all of the standard data types, including text, numbers , graphic images, and so on. To practice using the Office Clipboard, follow these steps: -
Select a block of text in a Word document, and click the Cut or Copy button on the Standard toolbar. Repeat this action by cutting or copying another block of text in the document. The Clipboard task pane automatically appears with two Word icons to represent the two items that you've cut or copied (see Figure 2.26). In addition, the Clipboard icon appears at the right end of the Windows taskbar. Figure 2.26. Each item you cut or copy appears as an icon in the Clipboard task pane. 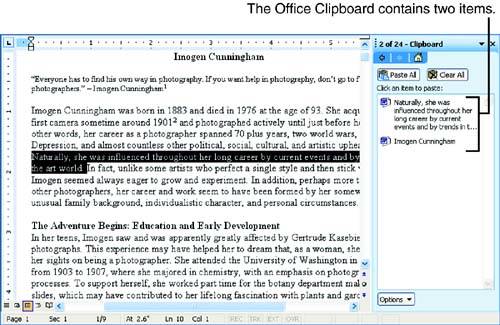 -
Cut or copy a few more items to the Office Clipboard, click in a location where you want to insert one of the items on the Office Clipboard, and then point to one of them. A down-arrow button appears at the right edge of the item (see Figure 2.27). Figure 2.27. Point to an item to display its down arrow. 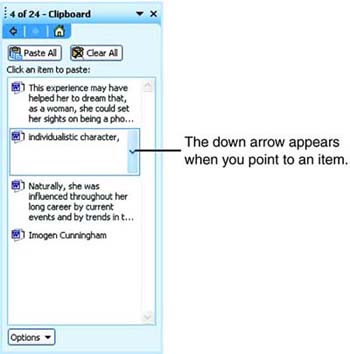 -
Click the down arrow to display a drop-down list, and then click Paste to insert the item in your document (see Figure 2.28). (You can also just click the item to insert it.) Figure 2.28. Choose Paste to paste the item into your document at the location of the insertion point. 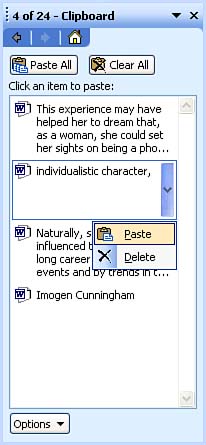 -
Paste some of the other items in the Clipboard task pane if you like, and then click the Close button in the upper-right corner of the task pane. If you want to paste all of the items in the Clipboard task pane at once, click the Paste All button at the top of the task pane. To remove all of the items from the Clipboard task pane, click the Clear All button. (To remove an individual item from the task pane, click its down arrow and choose Delete.) | | You can bring up the Clipboard task pane at any time by choosing Edit, Office Clipboard. If you don't want the Clipboard task pane to appear automatically, click the Options button at the bottom of the task pane and clear the check marks next to Show Office Clipboard Automatically and Show Office Clipboard When Ctrl+C Pressed Twice. |
When the Clipboard task pane is visible, you can cut or copy items from any Windows application to the Office Clipboard. Items that you've cut or copied from applications other than Word have different icons. In Figure 2.29, the Office Clipboard holds five items: one from Paint Shop Pro (a graphics program), one from a PowerPoint presentation, one from an Excel spreadsheet, one from a Web page, and one from a Word document. Figure 2.29. You can cut or copy items from any Windows application. 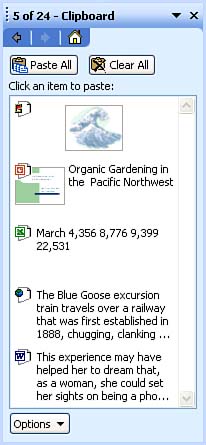 Options for Formatting Pasted Text When you paste text, a Paste Options button appears next to the pasted text as soon as you issue the Paste command (see Figure 2.30). Figure 2.30. The Paste Options button shows up as soon as you issue the Paste command. 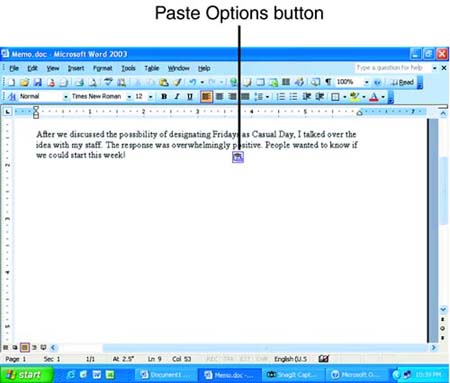 To display various paste options, click the down arrow that appears to the right of the bottom when you point to it. The commands in this list will vary depending on the program you are pasting from, the formatting of the text surrounding the pasted text, and the type of content you're pasting. The list shown in Figure 2.31 appears when you're pasting text into a paragraph. As soon as you choose a command from the list, the button disappears. Figure 2.31. The items in the Paste Options list vary depending on what you are doing. 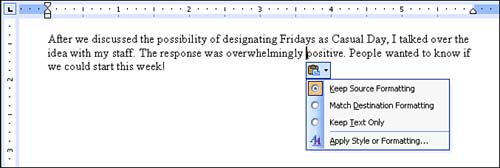 If you don't use the Paste Options button when it appears, it disappears automatically when you take the next action (such as typing, selecting, or deleting text). If you want to "manually" hide the Paste Options button, press the Escape key. To turn off this feature entirely, follow these steps: -
Choose Tools, Options to display the Options dialog box. -
Click the Edit tab. -
Clear the Show Paste Options Buttons check box. -
Click OK .  |