Sams Teach Yourself Microsoft Office Word 2003 in 24 Hours
Authors: Steele H.
Published year: 2003
Pages: 208-210/315
Buy this book on amazon.com >>

Using the Clip Organizer

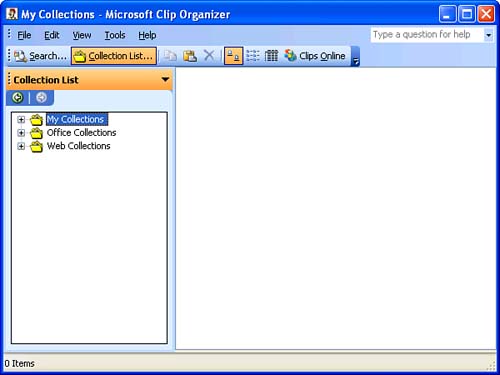
The Clip Organizer, shown in Figure 16.12, comes with Microsoft Office. It is accessible from Word's Clip Art task pane, but it is not specific to Word. You can open it at any time by choosing Start, All Programs, pointing to Microsoft Office, then Microsoft Office Tools, and then clicking Microsoft Clip Organizer. You can use the Clip Organizer as a "binder" of sorts to collect all your images in one place. For example, if you have a corporate logo, or a scanned image of your signature that you typically place at the end of your letters , you might add these images to the Clip Organizer so that they are readily available in the Clip Art task pane.

Figure 16.12. You can use the Clip Organizer to catalog all of your clip art, as well as other types of media files.

graphics/16fig12.jpg

To display the Clip Organizer, click the Organize Clips link at the bottom of the Clip Art task pane. The first time you do this, the Add Clips to Organizer dialog box appears to ask whether you want it to catalog all of the media files it finds on your computer. It won't move or rename them; it will just catalog the ones it finds under the My Collections folder. In addition, it will use their filenames to generate a list of keywords you can use to search for the clips in the Clip Art task pane. If you'd like to go ahead and catalog your clips, click the Now button. (Even if you don't catalog existing clips, you can still use the Clip Organizer to create new collections, add images to existing collections, and so on.)

Because the Clip Organizer isn't a part of Word, it is not covered here in detail. To learn more about the Clip Organizer, choose Help, Clip Organizer Help in the Clip Organizer, and search for help on new collections or add clips .


Deleting Images

To delete an image from your Word document, click it to select it and then press the Delete key. When an image is selected, small black squares or white circles (called selection handles ) appear around its edges (see Figure 16.13). The color and shape of the selection handles vary depending on whether the image is in the same layer of the document as the text, or floating above the text. (You'll learn more about this in the next hour .)

Figure 16.13. To delete an image, select it and then press Delete.

graphics/16fig13.jpg


Drawing Shapes

Sometimes you don't need a complex image in your documentyou just need something simple, such as an arrow or a box. Word's Drawing toolbar lets you quickly draw all manner of arrows, rectangles, ovals, callouts, banners, and so on. (You can also create text boxes, which are discussed at the end of this section.) Figure 16.14 shows one example of a drawing you can create with Word's drawing tools. After you have inserted a drawing object, you can modify the image in a variety of ways, as you'll see in the next hour .

  1. Click the Drawing button on the Standard toolbar (see Figure 16.15).

    Figure 16.15. The Drawing toolbar contains a wide variety of tools for creating and manipulating drawing objects.

    graphics/16fig15.jpg

  2. The Drawing toolbar appears docked at the bottom of the Word window by default. In Figure 16.15, it has been moved and is floating over the Word window.

  3. Click the drawing tool that you want to use. The tools for basic shapes (lines, arrows, boxes, and so on) are available directly on the toolbar. If you want a more unusual shape, click the AutoShapes button, point to the category that you want to use, and click the shape in the submenu. (In Figure 16.15, the Stars and Banners submenu is displayed.)

  4. As soon as you click a drawing tool, an empty drawing canvas appears, along with the Drawing Canvas toolbar. The drawing canvas, which you'll learn more about in the next hour, can help you keep all of the shapes in your drawing together. (Don't worry, you'll also learn how to turn off the drawing canvas if you're used to earlier versions of Word that didn't use it.) Point with the crosshair mouse pointer to the upper-left corner of the spot where you want the shape to go, and drag diagonally down and to the right (see Figure 16.16). Or, in the case of lines and arrows, simply point to the location where you want the line or arrow to begin and drag to the location where you want it to end. (If you or someone else has already turned off the drawing canvas, you will draw your shape on the document itself.)

    Figure 16.16. Drag over an area within the drawing canvas to create the shape.

    graphics/16fig16.jpg

  5. Release the mouse button to finish drawing the shape (see Figure 16.17). The shape will be surrounded by two or more selection handles (white circles) and, in the case of two- or three-dimensional shapes, with one rotate handle (a green circle).

    Figure 16.17. The object you drew is automatically selected.

    graphics/16fig17.jpg

Figure 16.14. This software architecture drawing is an example of what you can create with Word's drawing tools.

graphics/16fig14.jpg

graphics/lightbulb_icon.gif

If you plan on drawing several objects using the same tool (for example, you want to draw several lines), double-click the button in step 3. It will stay turned on as long as you want to use it. When you're finished, click it again to turn it off. (This does not work for the tools in the AutoShapes menu.)


graphics/lightbulb_icon.gif

If you are using the Rectangle tool and want to draw a perfect square, hold down the Shift key as you drag. This also works with the Oval tool to get a perfect circle, the Star tool to get a perfectly proportioned star, and so on.


To delete a drawing object, click it to select it. When you see the selection handles, press the Delete key.

One drawing object that deserves special attention is the text box. The Text Box tool on the Drawing toolbar lets you draw a rectangular box in which you can type text. Putting text in a text box gives you control over the position of the text in your document because you can drag the text box around just as you do other drawing objects (see the next hour). In Figure 16.14 earlier in this hour, the text labels in the diagram were all created with text boxes. (Their borders were removed, and some of them were placed on top of other drawing objects.)

To create a text box, click the Text Box tool, drag to create a rectangle of about the right size, and then release the mouse button. An insertion point appears in the box to let you type text, and the Text Box toolbar appears in your Word window (see Figure 16.18).

Figure 16.18. When a text box is selected, an insertion point appears in it to let you type.

graphics/16fig18.jpg

After you've typed your text, you can apply all the usual font and paragraph formatting to it. In addition, you can format the box itself, adjusting the appearance of the borders, changing the fill color , and so on. (You'll learn these techniques in the next hour.)

graphics/lightbulb_icon.gif

In addition to creating text boxes with the Text Box tool, you can type text into any drawing object (with the exception of lines and arrows) by right-clicking it and choosing Add Text in the context menu. An insertion point appears in the object. Type the text as you would in a text box.


Sams Teach Yourself Microsoft Office Word 2003 in 24 Hours
Authors: Steele H.
Published year: 2003
Pages: 208-210/315
Buy this book on amazon.com >>

Similar books on Amazon