The Splash Screen
| We are finally ready for the splash screen. Many systems display a logo screen when they start that disappears after a couple of seconds. It's like a "hello" to the user . Here's how to build one of these splash screens. (You should breeze through this because it's very similar to the form you just created. We'll add the three things necessary for a new window: the window, a canvas, and then a data block.) Go back to your friend Object Navigator and do the following:
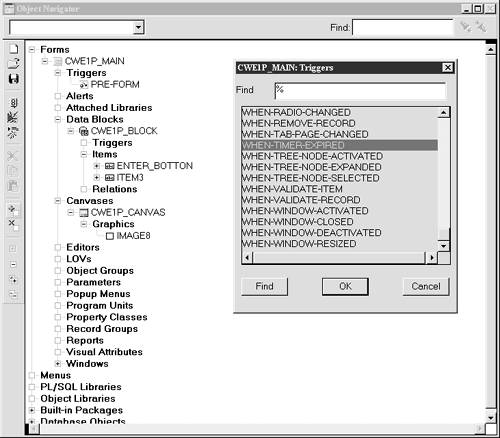
Here's what your Object Navigator screen should look like: Bear with me. Here are the next steps. Open the property palette of CWE1P_ SPLASH_CANVAS (under CANVAS ) and do the following:
OK, you probably need a break, so take a short one, and then we'll get back to work. Adding Image and Text to the CanvasWe now have to create a canvas that will have the graphical image and some text. There are some rules here, so just follow along and you'll be all set:
Your canvas should now look like this: Displaying the GraphicNow what you have is an area that can be used to display the splash image that you'll be loading with a trigger, and then hiding with another trigger. Isn't it amazing that something that will appear for only a few seconds has so many instructions? Here we go. You'll be adding the PL/SQL code to grab and display the graphic and to fill in the little box at the bottom center:
Note I can't stress this enough: Watch your syntax! The little things like single quotes, semicolons, and so forth will trip you up. I have sometimes spent a lot of time debugging, when all the problem turned out to be was a missing single quote at the end of 'hat.bmp. You will find that Forms will accept bad syntax, compile it, and run it for you, even though it is nonfunctional. All I can tell you is to check the Forms messages in the lower left-hand corner as you test your programs. The messages are usually small, and therefore easily overlooked, but they are your best source of information if your splash screen doesn't appear quite right. So along with the admonition to save, save, save! let me add, check your syntax! Building a TimerAre you ready for the timer part? Let's build a form timer that will control how long your splash screen will display. This is just another bit of PL/SQL code that you'll add right where you left off: Good! Just a couple more steps and we'll test the thing. As you've probably imagined, we now have a trigger that will fire, but we need something to recognize the firing, and then do something about it. Those are our next two, and last, steps for the splash screen. What we have to do is create another trigger that will go off when our timer trigger fires, and then, within our new trigger, tell it where to go next. So here's what we have to do:
OK, you're saying, but how does Forms know which is the first form to display when the user starts the application? This is incredibly low-tech: It's just the first one in the data block list , so make sure your splash block is first! (To change the sequence, you can just drag and drop if necessary. But this is the only low-tech part of this process, so don't get too comfortable!) Also make sure that all the subordinate items are where they belong. When working on very large systems, it's easy to get out of sync and create things in the wrong place, so double-check your work. Let's test. The first time you compile, you'll probably get this message: This usually means that when you placed the item on the canvas, it was outside the borders. Positioning can be tricky, so just go back to your splash canvas and move the item block or image block until you get it in the right place: Now test your work: Select Program Run Form Client/Server and log on to any database: If everything is now working, your splash screen will appear, followed in five seconds by your main screen: Since nothing is active yet, just click on the upper right X to get back to Object Navigator. Congratulations! Let's move on and make this thing come to life. |


EAN: 2147483647
Pages: 84