Section 5.4. Implementing, Managing, and Maintaining Network Security
5.4. Implementing, Managing, and Maintaining Network SecurityNetwork security is critically important to ensure the integrity and continuing operations of your organization's network. Administrators must follow standard administration procedures to ensure that network security is properly implemented, managed, and maintained. This means implementing security baseline settings on new servers, auditing security settings as appropriate, and allowing access to resources only where such access is required. As part of maintaining network security, administrators must also be proactive in monitoring network protocol security and troubleshoot problems as they occur. 5.4.1. Implementing Secure Network Administration ProceduresThe way computers and users are authenticated on the network and authorized to access resources depends on the network security you've configured. Although authentication and authorization have a similar goal to restrict access to a network, they are used in different ways. Authentication is used to prove user and computer identities. On networks with computers running Windows 2000 or later, the primary authentication protocol is Kerberos. Previous versions of Windows use NTLM for authentication, which can be configured for use in authentication on Windows 2000 or later networks as well. Authorization is used to control access to resources. Authenticated users and computers will have different levels of authority, depending primarily on the groups of which they are members and the permissions they've been specifically assigned. Both Kerberos and NTLM are used for authorization. Other aspects network security, including data integrity and confidentiality, are dependent on the secure communications and storage techniques implemented on the network. IP Security (IPSec) can be used to secure communications using encryption. Encryption can also be used to securely store data. For nonrepudiation, when you need to determine exactly who sent and received a message, you can use Kerberos and IPSec. For implementing and managing network security, Windows Server 2003 makes extensive use of security templates. Security templates are:
The general process for implementing network security using templates is to create and configure the templates you plan to use, and then to apply the template to implement the desired security configuration. At any time, you can analyze a computer's security settings by comparing the current settings to that of a particular security template and thereby pinpointing any discrepancies that may exist. Based on the discrepancies, you may elect to reapply a security template or modify settings as appropriate to enhance a computer's security. 5.4.1.1. Understanding security templatesTo better understand how security templates are used, you need to understand how they are structured and what they contain. They contain customized sets of group policy definitions that are used to apply essential security settings. These settings can affect the following:
Security templates are stored in the %SystemRoot%\Security\Templates folder and accessed using the Security Templates snap-in. All Windows Server 2003 installations include a standard set of security templates, which can be imported into any Group Policy Object (GPO). The standard templates include:
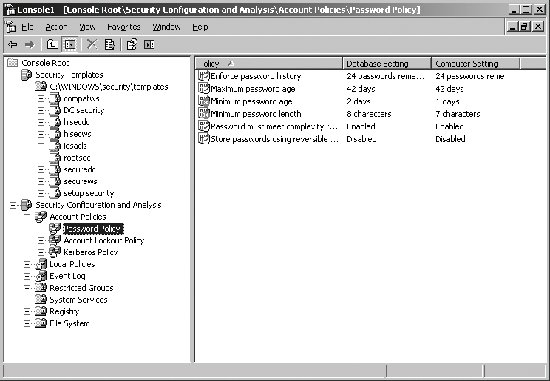
Every GPO has separate computer configuration and user configuration settings. Security templates affect only computer configuration settings, which are located under Computer Configuration in a GPO. 5.4.1.2. Accessing the security toolsWhen you are configuring computer security, you'll use both the Security Templates snap-in and the Security Configuration And Analysis snap-in. Use the Security Templates snap-in to view and create security templates. This snap-in can be added to an existing console or to any custom console you create. Use the Security Configuration And Analysis snap-in to apply templates and to compare the settings in a template to the existing settings on a computer. Applying a template ensures that a computer conforms to a specific security configuration. Comparing settings pinpoints any discrepancies between what is implemented currently and what is defined in a security template. This is useful to determine whether security settings have changed over time. To access these tools and work with the standard templates, follow these steps:
5.4.1.3. Creating security templatesThe standard templates provide a solid starting point for security configurations, based on intended use. If the default security templates don't meet your needs, you can modify the settings. Generally, rather than modifying the standard templates directly, you should create a copy of the template and then modify the copy. You can create a copy of a template and then modify it by completing these steps:
You can create a new template without initial settings by completing the following steps:
5.4.1.4. Applying security template settings and analyzing securitySecurity Configuration And Analysis uses a working database to store template security settings and then applies the settings from this database. For analysis and comparisons, the template settings are listed as the effective database settings and the current computer settings are listed as the effective computer settings. Prior to applying a template, you may want to create a rollback template. A rollback template is a reverse template that allows you to remove the settings applied with a template (except those for access control lists on files and in the Registry). You can create a rollback template using the secedit command-line utility. Type the following: secedit /generaterollback /cfg filename /rbk filename /log filename where /cfg filename sets the name of the security template for which you are creating a rollback template, /rbk filename sets the name of a security template into which the reverse settings should be stored, and /log filename sets the name of an optional log file to use. In the following example, you are creating a rollback template for the hisecdc security template: secedit /generaterollback /cfg hisecdc.inf /rbk rev-hisecdc.inf /log rollback.log After you've prepared the template you want to use and created a rollback template as necessary, you can create a database and apply the template by completing the following steps:
If you want to compare a computer's current security settings to a particular template, complete the following steps:
5.4.1.5. Recovering from the improper application of a templateIf you created a rollback template prior to applying a security template, you can recover the computer's security settings to its previous state. To apply a rollback template, follow these steps:
The only settings that cannot be recovered are the access control lists on files and in the Registry. Those settings can only be recovered to the post-installation state by applying one of the default installation templates. However, you would then need to apply the appropriate security template to the system to ensure security is set at the proper level. 5.4.1.6. Implementing the principle of least privilegeTypically, when administrators are installing new systems, they'll install and configure these systems by following a baseline configuration document or an automated procedure, such as an operating system image, that implements a baseline configuration. The idea behind a baseline configuration is to allow administrators to easily implement a common configuration. Because different computers have different intended uses, there are often multiple baselines, which are implemented depending on the intended purpose of the computer. When implementing network security, administrators can use baselines as well to ensure standard network security configurations are applied as appropriate for the role of a computer on the network. Security baselines are implemented using security templates. Security templates can help you ensure that the Principle of Least Privilege is applied throughout your organization. The Principle of Least Privilege is a guiding principle meant to ensure that no user has more privileges or access than they need to do their job. This principle includes modifying privileges and access as appropriate when users change jobs within the organization, and removing privileges and access when individuals leave the organization. This principle extends to cover all users, including temporary, contract, and permanent employees as well as administrators and other IT staff. No one should have more privileges or access than is required to do their job. Security templates are a starting point to ensure least privilege access to information and resources. To ensure least privileges, administrators should be logged on using normal user accounts when performing routing tasks. When performing administrative tasks, administrators can log on under the context of a user account that has administrative privileges or use the RUNAS command. 5.4.2. Monitoring and Troubleshooting Network Protocol SecurityTo ensure that communications remain secure, administrators must make network protocol security monitoring part of the routine tasks they perform. The most important protocols to monitor are IPSec and Kerberos. 5.4.2.1. Understanding IP SecurityIP Security (IPSec) is used to authenticate and encrypt traffic between two computers. IPSec is also used to block or allow traffic. With Active Directory domains, IPSec is applied using Group Policy. However, Active Directory is not required to implement IPSec. IPSec policy is most often implemented when you need to secure communications on an internal network. For Active Directory-based Group Policy, IPSec policies are stored under Computer Configuration\Windows Settings\Security Settings\IP Security Settings On Active Directory. For computers in workgroups, you can configure local group policy under Computer Configuration\Windows Settings\Security Settings\IP Security Settings On Local Computer. An IPSec policy defines packet filters that enforce security by blocking, allowing, or initiating secure communications. Although multiple IPSec policies can be defined, only one such policy is applied at a time. When you apply an IPSec policy to one GPO, you can edit other GPOs and assign the policy within those GPOs as well. Active Directory has three default IPSec policies:
To assign and enforce one of these policies, follow these steps:
To determine whether IPSec policy is applied to a computer, complete these steps:
In the MMC, click the IP Security Policies On . . . node. In the right pane, you'll see a list of IPSec policies defined in the domain. Under Policy Assigned, you'll see an entry of Yes if a policy is being applied. If a policy is not applied, you'll see an entry of No in the Policy Assigned column (see Figure 5-35). Figure 5-35. Determine whether IPSec is applied to a computer using IP Security Policy Management.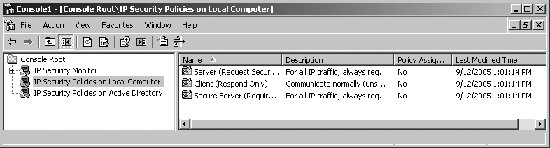 5.4.2.2. Monitoring and troubleshooting IP SecurityYou can monitor IPSec policy to ensure that it is working correctly using IP Security Monitor. To access this snap-in in a console, complete these steps:
By default, IP Security Monitor connects to the local computer. If you want to monitor IPSec on another computer, right-click the IP Security Monitor node and then click Add Computer. Expand the computer node and then select the Active Policy entry to see the active IPSec policy on the designated computer (if any). As shown in Figure 5-36, the policy summary includes: Figure 5-36. View active IPSec policies being applied using IPSec Monitor.
Nodes under Main Mode and Quick Mode show current filters, security methods, statistics, and security associations. High failure rates (relative to the level of IPSec activity) under the Statistics node can indicate IPSec configuration problems. Click the Refresh button to update the details. Detailed IPSec information can be obtained at a command prompt by typing: netsh ipsec static show all If computers cannot make an IPSec connection, check to see whether the number of Authentication Failures increases. If so, authentication is the issue, and you should ensure that the computers' shared secrets match, the certificates are correct, and the computers are members of the appropriate domain. If computers cannot make an IPSec connection, check to see whether the number of Negotiation Failures increases. If so, check the security method and authentication settings for incorrect configurations. 5.4.2.3. Monitoring and troubleshooting KerberosIn Active Directory domains, Kerberos is the primary authentication protocol. In Group Policy, you'll find Kerberos policies under Computer Configuration\Windows Settings\Security Settings\Account Policies\Kerberos Policy. Kerberos policies available are:
Tip: In Active Directory domains, Windows Time services are used to automatically synchronize system clocks. Kerberos problems can be diagnosed using Netdiag. To perform multiple diagnostic tests on Kerberos type the following at a command prompt: netdiag /test:kerberos /debug The results of each test are given as Passed or Failed. Of particular interest is the following line at the beginning of the output: Testing Kerberos authentication... Passed And the following lines at the end of the output: Domain membership test . . . . . . : Passed Machine is a . . . . . . . . . : Primary Domain Controller Emulator Netbios Domain name. . . . . . : CPANDL Dns domain name. . . . . . . . : cpandl.com Dns forest name. . . . . . . . : cpandl.com Domain Guid. . . . . . . . . . : {3EF32F2E-C326-4343-8434-434342542543} Domain Sid . . . . . . . . . . : S-1-5-21-490342342-1024332424-622343242 Logon User . . . . . . . . . . : Administrator Logon Domain . . . . . . . . . : CPANDL Kerberos test. . . . . . . . . . . : Passed Find DC in domain 'CPANDL': Found this DC in domain 'CPANDL': DC. . . . . . . . . . . : \\corpsvr21.cpandl.com Address . . . . . . . . : \\192.168.0.25 Domain Guid . . . . . . : {1C143232-C243-4234-8234-42F343243242} Domain Name . . . . . . : cpandl.com Forest Name . . . . . . : cpandl.com DC Site Name. . . . . . : Default-First-Site-Name Our Site Name . . . . . : Default-First-Site-Name Flags . . . . . . . . . : PDC emulator GC DS KDC TIMESERV GTIMESERV WRIT ABLE DNS_DC DNS_DOMAIN DNS_FOREST CLOSE_SITE 0x8 Cached Tickets: In this example, Kerberos is operating normally and has passed all the appropriate tests. If something were wrong, this would have been reported and you could pinpoint the source of the problem. |
 Run. Type mmc in the Open field, and then click OK.
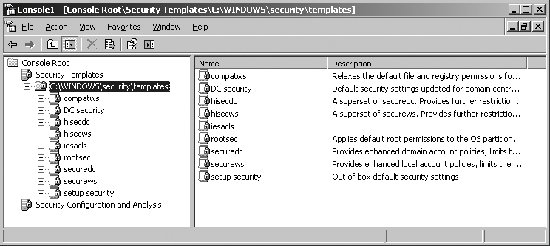
EAN: 2147483647
Pages: 95