Understanding Web Part Pages
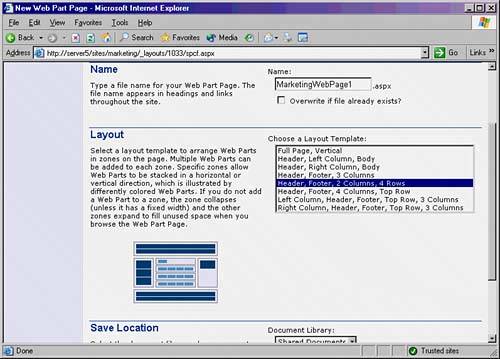
| A Web Part page allows you to create a page that can have multiple types of information displayed to your users all at the same time. You can have a stock ticker, a document library, a list of links, a discussion group, and many other sources of content all directed to the end user simply by creating a Web Part page and adding the Web Parts to it. Creating a Web Part PageTo create a Web Part page in Windows SharePoint Services, follow the these steps:
CAUTION Choose wisely when considering what types of zones to add to your Web Part page. Web browsers with less screen resolution, such as 1024x768 or less, may not see all the data in the zones, and it may make your site visually unappealing. Be sure to test different combinations of zones and Web Parts on different client resolutions to find what works best for your site. The final step in the creation of the Web Part page is actually adding the Web Parts to the page itself. After it is created, the page opens with the zones that you chose, as shown in Figure 21.5. Add the Web Parts you feel necessary. Figure 21.5. Adding Web Parts to a newly created Web Part page.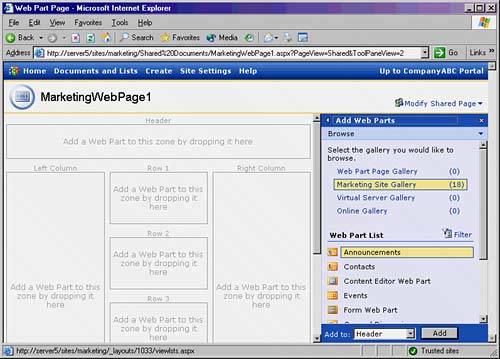 Working with Web Part Page ZonesEach Web Part page, and SharePoint site home page, for that matter, contain distinct bounded regions where Web Parts can be added to. These regions are known as zones. The zones control how Web Parts are displayed to the end user, and there can be many zones on a particular page, as illustrated in Figure 21.5. When creating a Web Part page or a SharePoint site, it is important to understand the differences between the zones. The different types of zones are as follows:
NOTE Zone width, height, and other criteria can only be modified from a Windows SharePoint Services compatible editor such as Microsoft Office FrontPage 2003. It is important to understand how zones work because they are an integral part in the Web Part pages that you will create in your SharePoint site. |
EAN: 2147483647
Pages: 288