Disk Management
| < Day Day Up > |
| All versions of Windows covered on the A+ Certification Exams feature disk management tools for checking for disk errors, and all but Windows NT 4.0 also include disk defragmentation tools. These tools are covered in the following sections. Using ScanDisk and CHKDSKAll versions of Windows covered on the A+ Certification Exams provide integrated error-checking programs for fixing disk problems. Windows 9x/Me use ScanDisk; Windows NT 4.0/2000/XP use CHKDSK . In Windows Explorer/My Computer, both are referred to as error checking. To run error checking from the Windows GUI
Using ScanDiskAfter the ScanDisk process starts, you can select either Standard or Thorough testing. Thorough testing takes longer but checks the disk surface for errors as well as files and folders. Use the Options button to select whether to check the entire drive, to perform write testing, or to fix bad sectors in system and hidden files. Check the Automatically Fix Errors box to have ScanDisk fix disk and file errors it detects without user intervention. Click Advanced to specify how to handle cross-linked files, lost file fragments , and other problems. Click Start to begin the test process. A progress bar indicates the progress of testing.
ScanDisk performs the following tasks :
If ScanDisk is run from the command prompt while the Windows 9x GUI is active, the Windows version of ScanDisk will be run. If ScanDisk is run from the command prompt without the Windows GUI being active, a text-mode version of ScanDisk will be run. You can also start Windows 9x/Me's ScanDisk by choosing Start, Programs, Accessories, System Tools, ScanDisk.
To see the options available when you run ScanDisk from the EBD or from the command prompt when the Windows GUI is not active, type Scandisk/? and press Enter. See the CD Supplement for a detailed list of ScanDisk syntax and command examples. Using Windows NT 4.0/2000/XP CHKDSKWith Windows NT 4.0/2000/XP CHKDSK, you can also select whether to automatically fix file system errors and attempt the recovery of bad sectors. If you select the option to automatically fix file system errors, CHKDSK will be scheduled to run at the next restart. This is necessary because CHKDSK requires exclusive access to the drive. CHKDSK performs a three-phase test of the drive. You can also run CHKDSK from the command prompt. See the CD Supplement for detailed command syntax and usage examples for CHKDSK . By default, CHKDSK runs automatically at boot time if a drive is dirty (has errors); to adjust this behavior, run CHKNTFS with appropriate options from the command prompt. Use CHKNTFS/? to see the options you can use. Using DefragOver time, the empty space available on a hard disk becomes fragmented as temporary and data files are created and deleted. When a file can no longer be stored in a contiguous group of allocation units, Windows stores the files in as many groups of allocation units as necessary and reassembles the file when it is next accessed. The extra time needed to save and read the file reduces system performance. Starting with Windows 9x, Windows includes a disk defragmentation tool.
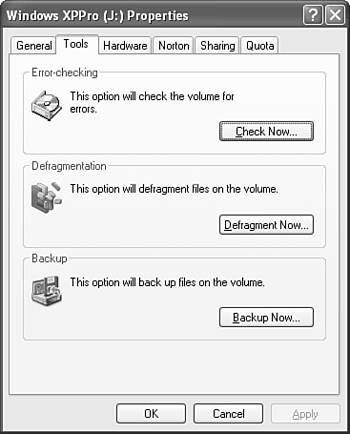
In addition to running Defragment from the System Tools menu, you can also run it from within Windows Explorer/My Computer:
tip
There are no configuration options for Windows 9x/Me Defragment. However, you can switch to a full-screen view and display a legend during the operation. The Windows 2000/XP defragmenter features an Analyze button that determines whether defragmentation is necessary (see Figure 18.23). Figure 18.23. Disk Defragmenter's analysis indicates this drive needs to be defragmented. |
| < Day Day Up > |
EAN: N/A
Pages: 310