Creating Frames in HTML Most folks' frames needs are more than satisfied by HTML Assistant Pro, as shown in the preceding example. But if you want greater control over your frames, you want to edit the HTML source directly, in either HTML Assistant Pro or in another tool.  If you don't know how to edit HTML, see Chapter 26, "Editing HTML." | -
In Composer, compose the content pages to be displayed in the frames. Try to organize and format them, if possible, in a way that minimizes the need for visitors to scroll them in their frames. (Keep in mind that you can always fine-tune them later, after seeing how they look in their frames.) -
In any HTML editor, create a new HTML file, including the required structure tags and the title for your frames page: <HTML> <HEAD> <TITLE>Frames Demo</TITLE> </HEAD> <BODY> </BODY> </HTML> -
Replace the <BODY> tags with <FRAMESET> tags, as shown in the following code. (Note that in a frame definition page, the <FRAMESET> block replaces the <BODY> block, and you cannot include a <BODY> block anywhere in the file.) <HTML> <HEAD> <TITLE>Frames Demo</TITLE> </HEAD> <FRAMESET> </FRAMESET> </HTML> The <FRAMESET> tags enclose the entire definition of the frames. All further coding is inserted between these tags. -
The frames page is split into two columns without any rows. Therefore, in the <FRAMESET> tag, you add the COLS attribute. Suppose that you want the first column to be narrow (30 percent of the window) and the second column to take up the remainder of the window. </FRAMESET>  In the <FRAMESET> tag in the example, COLS="*,70%" or COLS="30%,70%" would have the same effect as the entry shown. | -
Having defined the frames, you define their content by adding the <FRAME SRC> tag and the filenames of the content files (in quotes). In the columns on the page, the files are displayed in the same order (from left to right) in which they appear in the <FRAMESET> block (from top to bottom). In the following example, the page file MULTI.HTM is displayed in the first (left) column: <FRAMESET COLS="30%,*"> <FRAME SRC="MULTI.HTM"> <FRAME SRC="DESCRIP.HTM"> </FRAMESET> -
Review the completed code of the frame definition page: <HTML> <HEAD> <TITLE>Frames Demo</TITLE> </HEAD> <FRAMESET COLS="30%,*"> <FRAME SRC="MULTI.HTM"> <FRAME SRC="DESCRIP.HTM"> </FRAMESET> </HTML> -
Choose File, Save, and save the new frame definition page. Be sure to save it in the same folder as its content files (the ones created in step 1). -
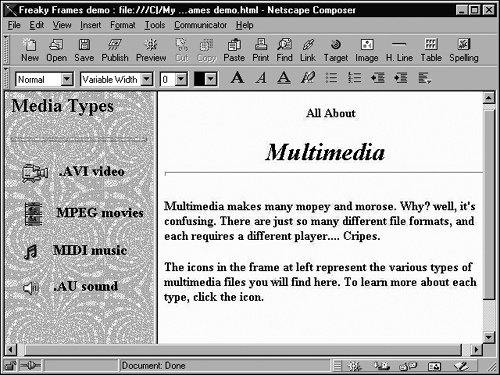
Test your new page by opening the frame definition page in your browser (see Figure 27.7). Figure 27.7. Step 8: Test the page in a browser.   |
