Choosing a Lens
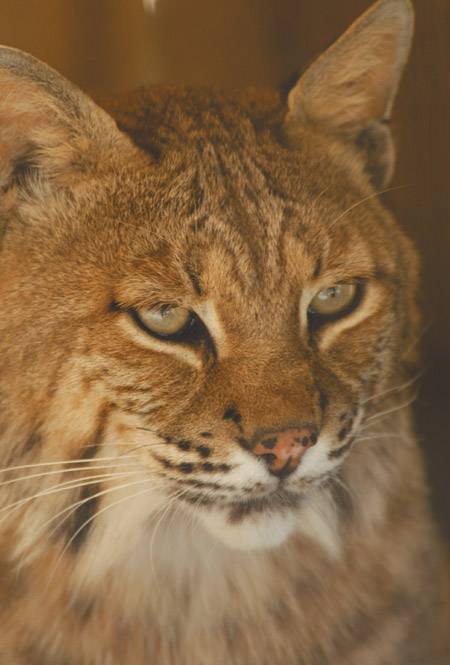
| A good photographer can compensate for a camera body that lacks some features, but there's no way to overcome the poor image created by a cheap lens. Photography is all about the image, and there's nothing worse than having a very expensive camera connected to a low quality lens. No matter how much you spend on your camera body, if the light coming through the front of the camera is distorted by a poorly made piece of glass, you're going to get an image that's sure to disappoint. The variety of lenses on the market is stunning and the range of choices can make it difficult to choose the right lens for a given situation. A quick overview of some terms can steer you toward the perfect choice. Understanding Focal LengthA lens's focal length is provided in millimeters and is a measure of how much of a scene a lens can view. It's easier to think of it as the amount of magnification applied to a subject with larger numbers indicating more magnification. A standard lens (from about 35mm to 85mm) creates an image that closely approximates the view of the human eyes (Figure 1.10). These lenses are great for portraits, shots of details on a building, close-ups of animals, and more. Most photographers consider standard, or "normal," lenses their workhorses. Figure 1.10. Popular "normal" lenses today tend to be zooms that cover the middle range, like this Nikon 18-70mm. They make good all-purpose lenses, with the ability to cover both wide-angle scenes and those needing a short telephoto. (Photo by Reed Hoffmann)
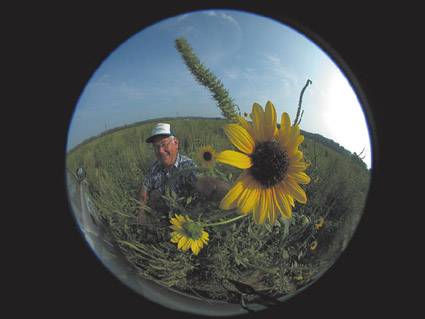
Lenses break down into a these categories: wide angle, standard, telephoto, and super telephoto. A lens might be 24mm (wide angle) or 200mm (telephoto), for example. In 35mm cameras (and in cameras listing the equivalent), lenses from 10mm to around 35mm are wide angle. These lenses are great for landscape shots, portraits of people or places that need to show a lot of what's going on, or special effects for exaggerating the sizes of objects or their distances (Figure 1.11). A wide-angle lens is the one you'll want for photographing a range of lions on the African plain, or for the portrait of a family reunion (Figure 1.12). Figure 1.11. A fisheye lens lets you make a very different type of photo, circular with black sides and distortion at the edges. (Photo by Reed Hoffmann)
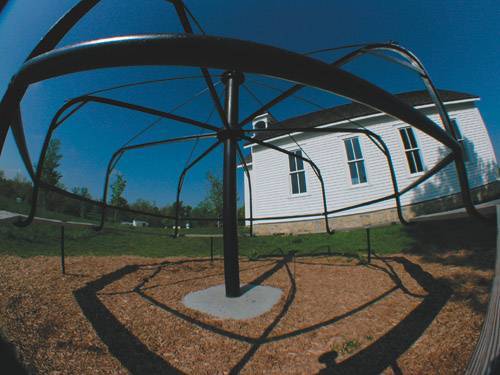
Figure 1.12. You can make beautiful photos with extreme wide-angle lenses, but be aware of the curvature that will happen at the edges of the frame. (Photo by Reed Hoffmann)
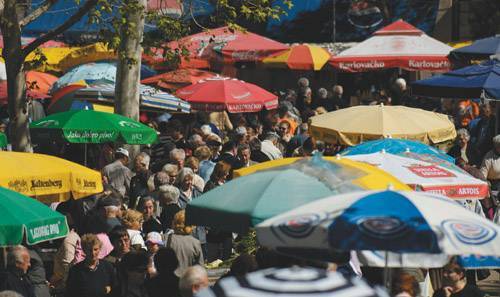
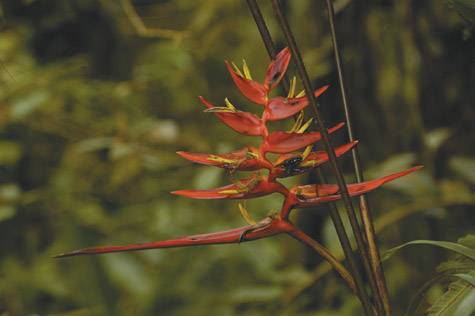
A telephoto lens (85mm to around 200mm) works like a telescope for your camera, making things look larger than life (Figure 1.15). These lenses are perfect for capturing distant objects so that they don't look like tiny specs and for near-distance photography where you want to isolate small details (Figure 1.15). Figure 1.15. A telephoto lens was used to compress this market scene in Eastern Europe and add to the feel of color and crowding. (Photo by Reed Hoffmann)
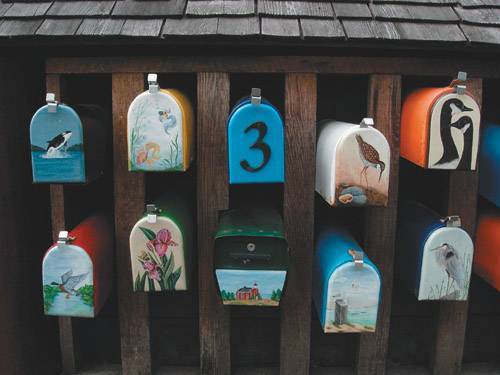
Figure 1.13. These colorful mailboxes represent the character of Vancouver and were shot with a short, normal lens. (Photo by Reed Hoffmann)
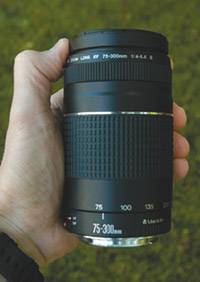
Figure 1.14. Many people find a compact telephoto zoom lens, like this 75-300mm from Canon, to be the perfect second lens to carry. (Photo by Reed Hoffmann)
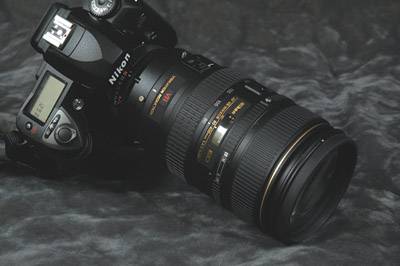
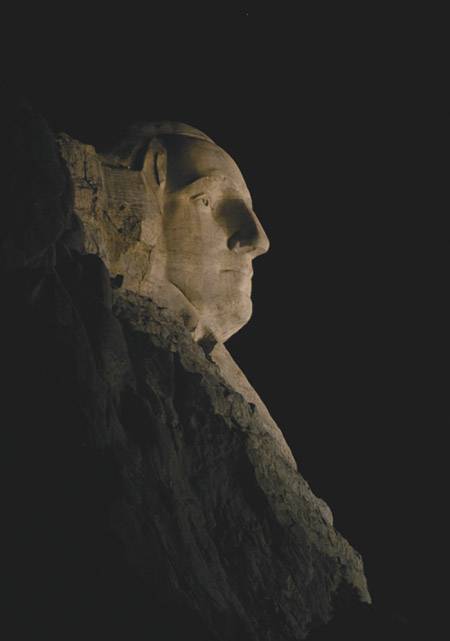
A super-telephoto lens (anything longer than 200mm) is a specialized lens designed to photograph super-distant objects (Figure 1.16). Super-telephoto lenses tend to be heavy and expensive, so most photographers usually carry them only when the subject warrants their use. Figure 1.16. Super telephotos tend to be those longer than 300mm, like this Nikon 80-400mm Vibration Reduction zoom, and give the photographer much more "reach." (Photo by Reed Hoffmann)
It's important to get a lens or lenses that are the right focal length for the types of photographs you plan to make. It's hard to shoot an eagle nesting in a tree with nothing but a wide-angle lens, and it's equally hard to capture a panoramic shot with a super telephoto.
Deciding on a Zoom or Prime LensMost people have heard of a zoom lensit's one that lets you change focal lengths by turning a dial on the lens or pulling and pushing on the lens barrel (depending on the design.) Zoom lenses are versatile because they let you carry around a range of focal lengths without needing a bagful of lenses. The opposite of a zoom lens is called a prime lens, and it has only one focal length. Because there are fewer moving parts in a prime lens, most prime lenses can be built to a higher quality than a zoom lens. Prime lenses are often less expensive than zooms (though less versatile), and usually produce a slightly better image at the same focal length. If your shooting style works with prime lenses (if you're OK moving toward and away from your subject rather than zooming), then you can sometimes save money picking a prime instead of a zoom. The Importance of the Lens ApertureInside a lens is a small diaphragm that allows light to pass through to hit the digital sensor. The opening in the diaphragm is called the aperture and is referred to with a number that's known as the camera's f-stop. A low f-stop indicates a wider opening that lets in more light; a high f-stop indicates a smaller opening that lets in less light. When the lens is set to a low f-stop, some of the photograph will be out of focus. When that lens is at a high f-stop, more of the picture will be in focus (Figures 1.18 and 1.19). Figure 1.18. A long telephoto, in this case 400mm, lets the photographer get close-ups of wildlife without having to put themselves or the animals in danger. (Photo by Reed Hoffmann)
Figure 1.18. Using a small aperture, in this case f/11, means the depth of field will be increased, allowing more detail in the foreground and background. (Photo by Reed Hoffmann)
Figure 1.19. Using a wide aperture, in this case f/2.8, means the depth of field will be minimal, keeping the sharpness just to the subject and blurring the background. (Photo by Reed Hoffmann)
This has to do with the way beams of light travel before hitting your imaging sensor, and involves complex physics and optics. Suffice it to say that at a low-numbered f-stop there's a bigger opening for light to get in, allowing light rays to come from different angles and creating blurriness in your photo. When you've got the camera at a high-numbered f-stop, there is a smaller opening, which forces all the light rays to hit the same point, so less blur. In other words, when you use a lower f-stop, less of your photograph will be in focus; use a higher number, more will be in focus. If you take a picture with your camera set to f/2.8, there might be only two inches of depth of field. (The exact depth of field depends on the particular lens and the distance to your subject.) Focus on someone's nose, and their ears will be slightly blurry, their shoulders even more blurry, and the background completely out of focus. Take that same lens and that same subject and set your lens to f/22 and, when you focus on your subject's nose, not only will it be in focus, but so will the ears, shoulders, and anything in the distance. From a practical standpoint this means that the f-stop is crucially important in capturing the photograph you want. Let's say you're looking to take a photo of a local merchant, but the only background is ugly and distracting. Selecting a low f-stop will blur the background, leaving just the person in focus. But if you want to capture not only that person but also the stall behind the person and the bustling nature of the market, you'll choose a higher f-stop. TIP f-stop is pronounced "eff stop" and is written f/XX where XX is the number of the aperture setting. Because this number has to do with optical science it's often not a whole number. What you end up getting is a number such as f/2.8 (pronounced "eff two point eight") In addition to its aperture, your camera also has a shutter, which is a small Venetian blind-like mechanism that opens and closes to let in light. The amount of time the shutter is open is usually measured in fractions of a second. A photo might be taken in 1/125th of a second, for example. The less time the shutter is open, the more your pictures will seem to "stop" motion, freezing your subject. The longer it's open, the more likely your photos will have a motion blur. The tricky thing is that the shorter the amount of time the shutter is open, the more light you need to take your photo (because light has less time to hit your sensor). In a dark scene, you can take a photo with a longer exposure time to let in more light, but moving subjects will appear blurry. Any movement you make while the shutter is open for a long time will blur your photograph. This is also the case when using a higher f-stop, because the aperture lets in less light at a higher setting than it does at a lower setting. Shutter speed and f-stop correlate. Each time you move your aperture setting one number higher, you'll need to double the amount of time the shutter is open, and vice versa. As a result, even if you're shooting in daylight, if you set your camera to, say, f/22 (to get an entire landscape in focus, for example) you may need to stabilize the camera with a tripod or similar support. TIP Remember that tripods save the day. You don't have to worry so much about your shutter speed if you've got your camera mounted on a stable tripod. Blurry pictures, be gone! It's all a big game of compromises and pocketbooks. If you've got deep pockets, you could get the top-of-the-line lenses in every category, but you'll probably need an assistant to carry everything for you. See "Deciding of the Perfect Gear for You" below for some recommendations based on what the pros carry. Special ConsiderationsMany manufacturers use special coatings on the lenses and special designs to prevent light from causing distracting lens flares or other distortions. The companies usually use letters in the name of the lens to indicate this. You might see that a company makes a 50mm f/1.4 and a 50mm f/1.4 APO lens (which is short for "apochromatic," meaning "doesn't distort your images"), with the latter one being more expensive and higher quality. A very recent development is the use of an internal gyroscope designed to compensate for hand-shake or other blur-inducing movement. At first I was skeptical, but now I've come to love these systems, often called Vibration Reduction (VR) or Image Stabilization (IS). They allow photographers to shoot in much lower light (Figure 1.20). Naturally stabilized lenses cost more. Figure 1.20. This shot wouldn't have been possible without the lens's built-in vibration reduction feature. Hand-held, the photo was shot at 1/6 of a second with a Nikon 70-200mm f/2.8 zoom. (Photo by Reed Hoffmann)
Deciding on the Perfect Gear for YouI bet you thought I'd end this discussion of cameras and lenses with advice on exact models to buy. Sorry, but there's no single solution for travel photography. Any choice you make will involve compromise. If you take several expensive lenses, you'll carry around more weight than is comfortable or practical. If you pick only one or two lenses, you might have to settle for designs that don't have APO coatings or don't have a low f-stop number. Most professionals have an arsenal of expensive cameras and lenses used in the studio and on professional jobs. If pros are traveling and want to bring along their cameras, they'll usually turn to a second set of cameras and travel lenses with more range but more compromises too. The goal is to pick a few good lenses that can do the job of the working lenses, but with less weight. In the next chapter I'll discuss different packing styles for the travel photographer. First, to give you some idea of what cameras and lenses to take when on your trip, let's look inside the bag of a Blue Pixel photographer. Remember, what works for one person doesn't work well for another, but this a good starting point for lens shopping. TIP Armed with an idea of the type of photographs you'd like to take and the areas to which you're traveling, a good photography store salesperson should be able to suggest specific lenses to fit your needs. Nothing beats the ability to get your hands on some lenses and try them out.
| |||||||||||||

EAN: 2147483647
Pages: 79