WORKING WITH GRADIENTS
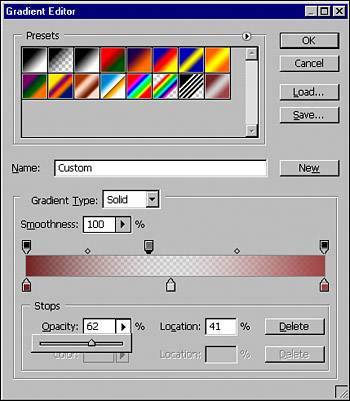
| A gradient is a blend of two or more colors, either in a straight line or as concentric rings of color. Gradient options are modified primarily in the Options bar. This, in conjunction with the Color and Swatches palettes, allows you to customize the colors and blending (see Figure 5.20). Figure 5.20. Three different gradients used in a canvas. You can fill the entire canvas or just select areas with gradients. You also have control over the colors within a gradient and how wide or narrow the gradient should be.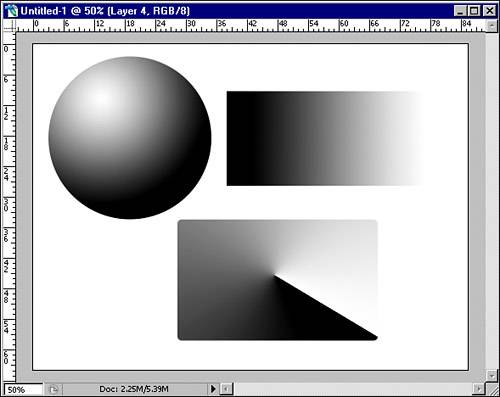 Nested with the Fill tool in the toolbox is the Gradient tool (see Figure 5.21). When the Gradient tool is selected, the Options bar displays one of the default gradients if a gradient hasn't been used before, or it displays the last gradient used. Some of the gradients loaded by default are affected by your chosen foreground and background colors. To choose a different gradient, you have several options. In the Options bar, you can click the pop-up menu to display the gradients currently loaded. You can click one of these gradient icons to use it in your image. To create your own gradient, you locate in the Options bar the preview of the gradient. Then you click in the middle of the preview to edit the gradient. The Gradient Editor dialog appears. The gradients loaded are shown in the presets area. You can click the Load button to load another library of gradients. (Photoshop ships with several different gradient libraries.) Or you can create your own gradients and save them to a gradient library file (.grd). Figure 5.21. The Gradient tool depends on the Options bar to change the way gradients are made. Creating a Custom GradientTo create a custom gradient, you click in the Name field and type a name for your gradient. After naming your gradient, you click the New button. A duplicate of the previous gradient is created but with the new name. Make sure your Gradient Type is solid. Below you see the gradient ramp. The smaller squares that appear to be attached to the ramp by small wires are called stops. The handles attached to the top of the gradient ramp are called opacity stops. Below the ramp, they are called color stops. When you double-click the square of one of the color stops, the Color Picker appears, and you can choose a color for that color stop.
When the Color Picker appears for you to choose one of the gradient colors, you can instead choose a color from your color libraries. But remember that the use of spot colors (Pantone, for example) can result in extra charges from your service provider. Instead of clicking the other color stop, you click in an empty area underneath the gradient ramp; a new color stop appears. You can double-click to choose a color (try a light gray) for your middle color stop. After you choose your color, you can change the color of your last color stop to another dark or light brown color. Your gradient might look like something in Figure 5.22. Figure 5.22. If you mistakenly created a stop where you didn't want one, drag the stop up or down off the gradient bar until the stop disappears. This applies to both color and opacity stops.
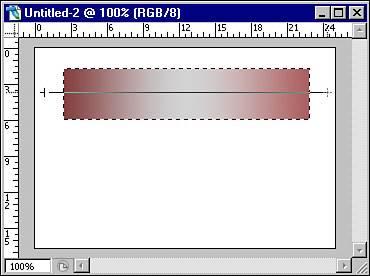
Working with Opacity StopsYou can create as many color or opacity stops as you want. These stops cause the desired shift of colors you'd expect from a gradient. To create or modify an opacity stop, you click in an area above the gradient ramp or click an existing opacity stop. In the Stops area at the bottom of the Gradient Editor dialog, the Opacity control becomes active. You change the percentage by moving the slider or typing in a value for the opacity. Working with MidpointsWhen selecting an opacity or color stop, small diamonds appear on either side of the stop. These diamonds are midpoints, and sliding them alters the transition of the gradient in either direction toward the next gradient color. After you have mixed your gradient in the Gradient Editor, you can click OK, and your gradient is displayed in the Options bar, and it will be active the next time you use the Gradient tool. Drawing GradientsTo use the Gradient tool, you click, hold, and drag a line across the canvas or a selection you have made in your document. The gradient is created inside the canvas or selection (see Figure 5.23). If you hold down the Shift key while dragging the line for the gradient, you constrain your straight line to a perfectly vertical, horizontal, or 45-degree angle. Figure 5.23. Even if you have designated a selection area, you can start and finish your gradient line outside it. This stretches the band of the gradient further and usually hides some of the outside colors and shades in the gradient. You can also drag your gradient outside the canvas border for a similar effect when filling the entire canvas with a gradient.
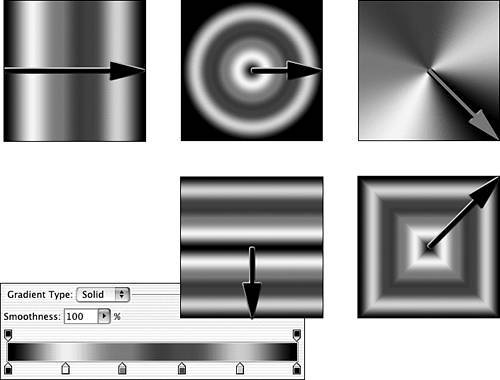
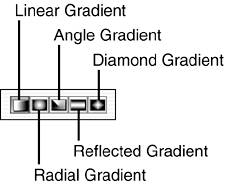
As you practice with the Gradient tool, you learn to anticipate where to start and finish your line so the gradient looks the way you want it to. Using the Five Gradient ToolsThe appearance of a gradient depends both on which tool is selected in the Options bar and on how you drag the tool through the selection or layer. Here are the basic capabilities of the five gradient tools (shown in Figure 5.24):
Figure 5.24. The five gradient variations all apply the selected gradient; they just apply it in different directions.
|
EAN: 2147483647
Pages: 426