COMPRESSING PDF FILES
| To reduce file size, Acrobat gives you the option to compress contained images using either ZIP or JPEG compression algorithms. Without getting too technical, the difference between these two is that ZIP compression maintains an image's quality integrity. This type of compression is sometimes referred as lossless. JPEG compression degrades the image quality and is referred to as lossy. JPEG compression achieves smaller files than ZIP but not without sacrificing quality. Acrobat also enables you to choose None, leaving your embedded images uncompressed. This option makes your PDF files larger. As a general rule you should try to avoid JPEG compression, especially if you are working on documents intended for print. If your document is to be displayed on screen only you may get away with a limited amount of JPEG compression without any visible loss of quality.
The reason you should not compress your PDF images using JPEG compression is that the JPEG algorithm compresses images even if they've already been compressed. Because JPEG is a lossy algorithm, this means that every time you save your file the embedded images are being recompressed and more data is being lost. Now, here's the tricky part: If you plan to use JPEG compression, do not compress your images until you have the final version of your document ready. This means that when you create your PDF you shouldn't apply any type of compression. To do this, open the Compression panel in the Save Adobe PDF dialog when you save your file from its originating application to PDF. While in the Compression panel, select Do Not Downsample for all types of images and also disable the Compress Text and Line Art check box (see Figure 44.5). This produces a larger PDF file, but you will have the chance to compress it later when you finish editing it in Acrobat. Figure 44.5. If you plan to edit your PDF in Acrobat do not apply any compression to it when creating it.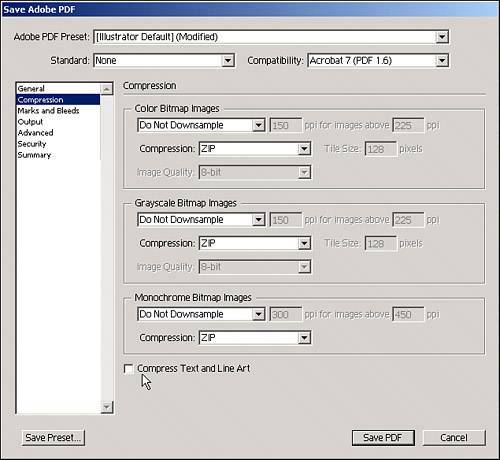 After you have the final version of your document you can use the PDF Optimizer (described in Chapter 42) to apply compression to your images. |
EAN: 2147483647
Pages: 426