FACILITATING FORM NAVIGATION
| To make your forms easier to navigate, you can assign a particular tabbing order and even assign keyboard shortcuts. These features enable users to select individual form elements by pressing Tab or a specific key combination. Not all browsers support form navigation control keys, but for those that do, it can be quite a time saver for your form users. Tabbing ChainsYou can define a tabbing chain for any set of form elements on the same page, as shown in Figure 39.22. The tabbing chain simply indicates in what order the form elements are selected when users press the Tab key repeatedly. Labels, text fields, password fields, text areas, submit buttons, reset buttons, check boxes, radio buttons, pop-up menus, and list boxes all support tab indexing. Figure 39.22. You can set a tabbing chain to specify the order in which your fields will be selected when the user presses the Tab key. A small boxed number appears to indicate each element's order in the chain.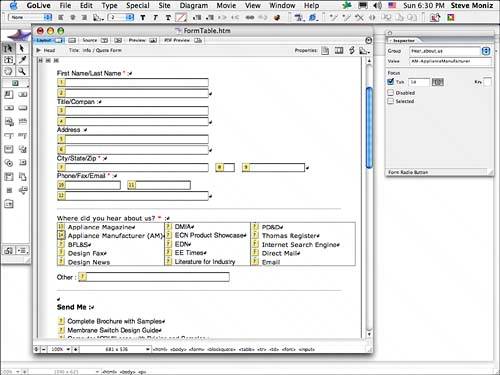 Here's how to create a tabbing chain automatically:
To create a tabbing chain manually, select each of the form elements in the desired tabbing order and enter a number in the Tab text field of the Inspector for each element (see Figure 39.23). Figure 39.23. The First Name/Last Name field has been set to be the first in the tab order with a tab index value of 1.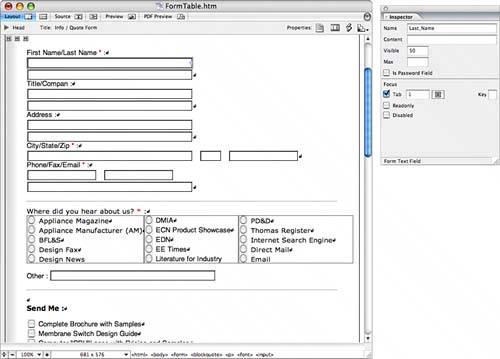 To change an existing tabbing chain, follow these steps:
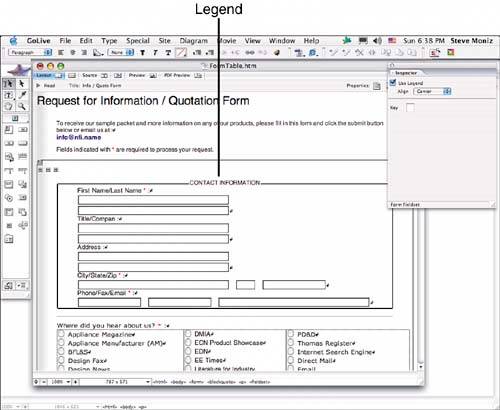
Creating a FieldsetThe Fieldset icon creates a bounding box that visually groups form elements, making your forms more user friendly, as shown in Figure 39.24. A legend may be used to indicate a title for the group of elements or to give a reason why the elements are to be seen as a set. Figure 39.24. Fieldsets help break up forms into logical groups of information. To create a fieldset, follow these steps:
|
EAN: 2147483647
Pages: 426
- Context Management of ERP Processes in Virtual Communities
- Data Mining for Business Process Reengineering
- Intrinsic and Contextual Data Quality: The Effect of Media and Personal Involvement
- Healthcare Information: From Administrative to Practice Databases
- Development of Interactive Web Sites to Enhance Police/Community Relations