| CSS enables you to format the text on your website using three fundamental methods: redefining HTML code with element styles, creating class styles, and creating ID styles that apply to unique elements such as floating layers. After you create CSS styles, you can then apply them to your content based on HTML tags such as the paragraph tag or use inline styles to format selected text. After you assign the CSS styles to your text, you can then change the styles and watch the text change on your page, visually formatting your page. If you are familiar with hand-coding CSS styles, view the source code in the CSS Editor's source code tab or split the view and look at source code at the same time you create your styles. The latter option is great if you want to learn about the code, or if you want to break down existing code you didn't create. Whether or not you create internal or external style sheets depends on whether you want your formatting to be applied to a single page or to multiple pages in your site. Internal style sheet code appears in the Head section of your document, and external code is saved in an external text document. See "Creating External Style Sheets," later in this chapter, for more information. Working with the CSS Editor The CSS Editor is where you define and control all the cascading style sheets in your document, as shown in Figure 37.1. The CSS Editor contains many tabs when you are defining styles, each tab containing a number of options for formatting your web content. The choices you make in the various tabs of the CSS Editor insert the appropriate code in the Head section of your document when creating internal style sheets: Figure 37.1. The CSS Editor enables you to define CSS elements selectively. 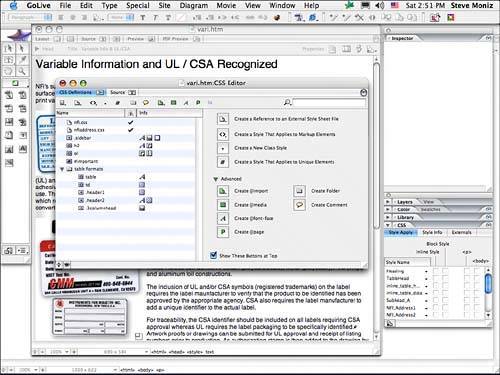
To create a CSS style, follow these steps: 1. | Click the Open CSS Editor button in the upper-right corner of the Layout Editor to open the CSS Editor, as shown in Figure 37.2.
Figure 37.2. The CSS Editor. 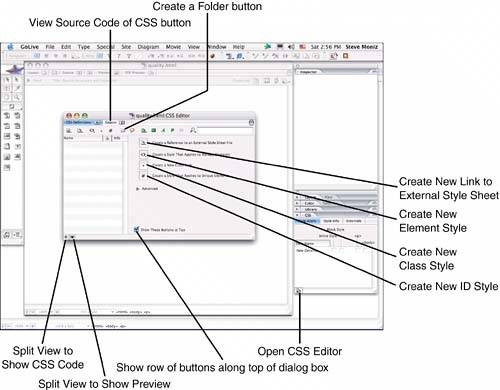
| 2. | Click either the Create New Element Style button, the Create a New Class button, or the Create a New ID style to create a new CSS style, as shown in Figure 37.3.
Choose Create New Element Style if you want to redefine the formatting for an existing HTML tag. For example, if you want to make text formatted with the <h1> tag bold and red, use this method. Choose Create a New Class if you want to define the formatting for text and use your own unique names for the style. For example, create a class style called subhead and then you can select text and click the subhead style in the CSS Styles palette to format it. Choose Create a New ID if you want to create a style that can be used only once in a document. The ID styles are also used by Layers to define their properties, so if your document contains layers, you will also find CSS ID Styles defined.
Figure 37.3. Create a new Style (the H1 Element Style is shown here). 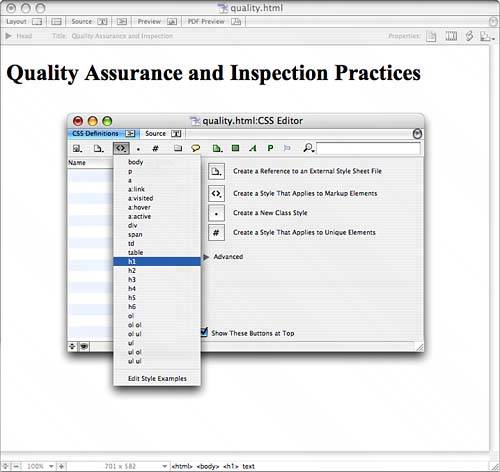
| 3. | Under the Name column in the large window on the left side of the CSS Editor, enter the HTML code you want to redefine if you're redefining an element style, such as the H1 tag shown in Figure 37.4. If you're creating a Class style, enter a name of your choosing for the style. If you're creating an ID style, enter a name of your choosing.
Figure 37.4. Enter the name of the HTML code you want to redefine. 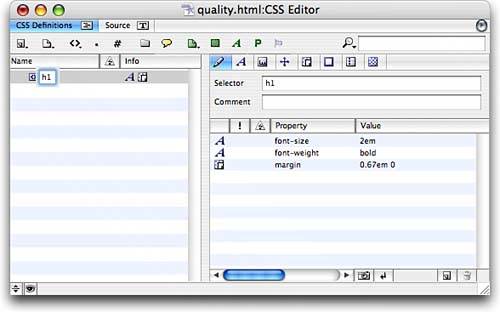
| 4. | Click the Font Properties tab of the CSS Editor to define the font properties, as shown in Figure 37.5. The following are the options available on the Font Properties tab:
Figure 37.5. The Font Properties tab of the CSS Editor. 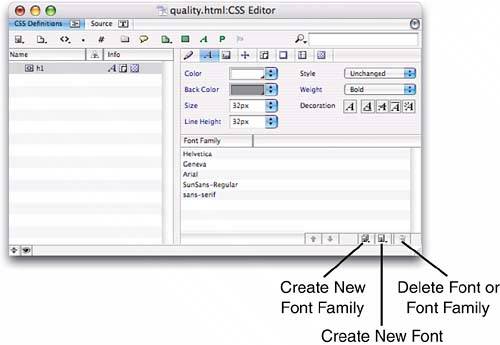
| 5. | Click the Text Properties tab of the CSS Editor to define the text properties, as shown in Figure 37.6. The following list explains the options available on this tab:
- Text Alignment: Select standard alignment values of Left, Center, Right, or Justify.
- Font Variant: The only variant you can set is Small Caps, and this feature doesn't always work with certain fonts and certain browsers.
You can view the source code for the CSS styles by clicking the Source tab in the CSS Editor or by clicking the Source Code toggle in the lower-left corner of the CSS Editor.
- Transformation: Transform the text to all uppercase, all lowercase, or with the first letter of each word capitalized.
- Font Size Adjust: Control whether the HTML + or size values affect the text. For example, if the HTML code contains a font size of +1 and you set this value to 10, the font size increases by 10 of whatever unit you set your font size. This is useful only for existing code because the use of the font tag isn't necessary when coding with CSS.
- Text Indent: Indent the first line of text in a paragraph by whatever value you enter here. Stick to pixel values for the most consistent results across platforms and browsers.
- Word Spacing: Indicate an extra amount of space to be inserted between words. Use this value in concert with the Letter Spacing value to make letter-spaced words easier to read.
- Letter Spacing: Insert extra space between each character. This feature, along with the Word Spacing feature is most useful for headlines and subheads.
You can view sample text that depicts how your styles will work in the Inspector palette by clicking the eye icon in the lower-left corner of the CSS Editor to show the sample text in split view.
- Vertical Align: Vertically align text within a paragraph of mixed type sizes. This feature applies only to inline Class styles or to HTML tags that are used inline like the (b)old, (i)talic, or font tags.
Figure 37.6. The Text Properties tab of the CSS Editor showing the source code in split view. 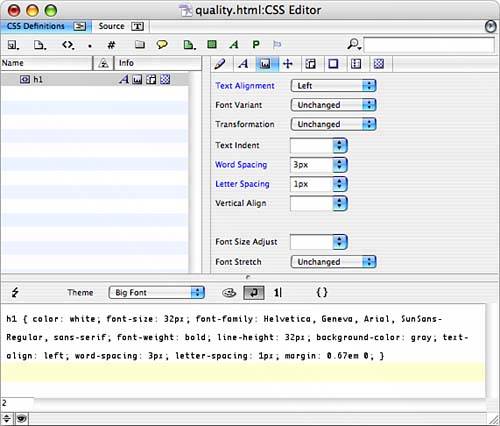
| 6. | You can set block properties to define a block of a specific width and height. Blocks enable you to define a section of your page by indicating a width and height, as well as other features like background colors and borders. Making the block float left or right can create static left and right blocks with content that flows between the two, as shown in Figure 37.7. The Block Properties are also used to control specifically ID styles for floating layers. See the section titled "Creating ID Styles," later in this chapter, for details. The following list explains the options available on this tab:
- Width and Height: Use to set the width and height of the block that contains your CSS elements. These values are typically set in pixels, but you can choose from any of the available measurement units in the pop-up menu.
- Float: Choose Left or Right from the pop-up menu to align your block with the left or right margins. Text that follows this CSS style automatically flows around the block.
- Clear: The Clear option doesn't work with all browsers. It emulates the clear attribute of the BR tag when used with images that are left and right aligned. The Clear feature makes anything that follows the block appear below it depending on whether the block is set to left or right and whether the stuff that follows it is aligned left or right.
- Visibility: The default visibility is visible for all browsers. If you want the content of the block to be invisible, choose hidden. The space that the block occupies is still accounted for when you choose hidden, as shown in Figure 37.8.
Figure 37.8. Visibility set to Hidden as it appears in a browser. 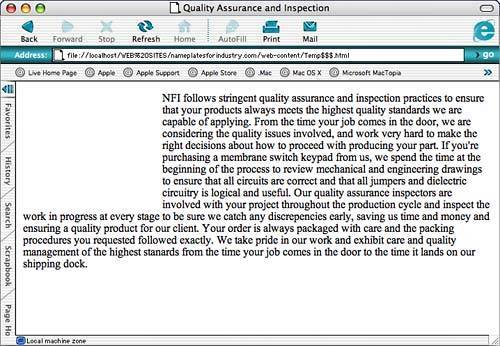
- Position, Clipping, Min and Max: Unless you're really feeling adventurous, leave the Position, Clipping, and Min and Max settings unchanged. The Position settings can be changed in the Layers Inspector when you're creating layers. The Clipping and Min and Max settings are not well-supported in all the browsers and produce varying results.
Figure 37.7. Block Properties can create stationery blocks on your web page as well as floating layers. 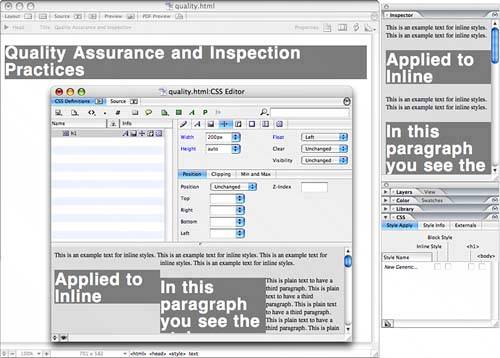
| 7. | Use the Margin and Padding Properties tab of the CSS Editor to set the margins and padding values for your CSS style, as shown in Figure 37.9. The following list explains the options available on this tab:
- Margin: Set the outset from the text to the edge of the block width and height set in Block Properties, effectively creating an offset for your block when it is set to float left or right, as shown in Figure 37.10.
Figure 37.10. The Margin setting keeps the flowing content away from the block. 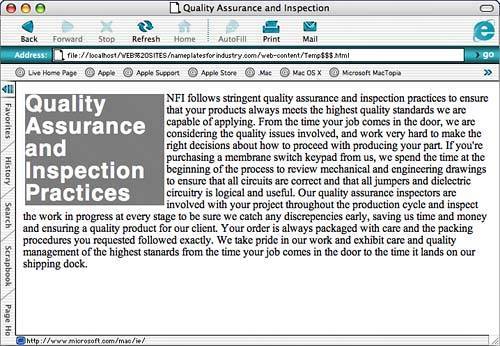
- Padding: The Padding values control the amount of space inside the block (inset), from the block edge to the content of the block, including background color, as shown in Figure 37.11.
Figure 37.11. The Padding setting insets the content within the block. 
Figure 37.9. The Margin and Padding Properties tab of the CSS Editor. 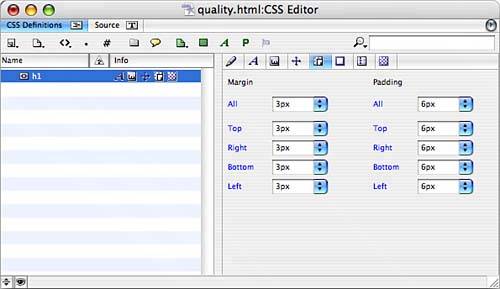
| 8. | Set the Border and Outline properties to add a unique border to your block, as shown in Figure 37.12. The Border setting adds a border inside your block, and the Outline setting adds a border outside the block in the padding area specified in the Margin and Padding Properties tab. At this writing the Outline feature is not supported by the latest browsers, though GoLive displays it in the Inspector palette and preview split view:
- Border: Enter a value for the thickness of your line, along with a color and line style from the pop-up menus.
- Outline: Enter a value for thickness and specify a color and style from the pop-up menus.
Figure 37.12. Add borders and outlines to your blocks. 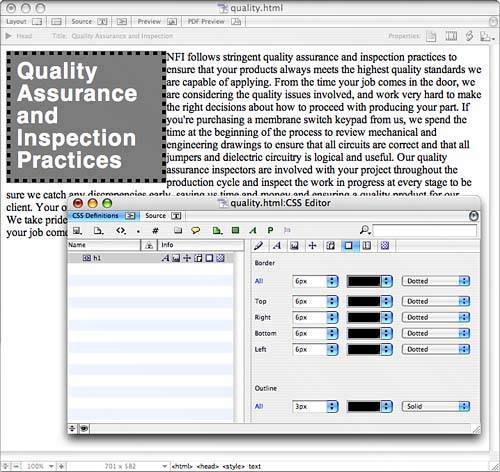
If you specify a border that has gaps, like a dashed border, the background color of your block appears in the gaps for some browsers and not for other browsers.
| 9. | The List Item and Other Properties tab of the CSS Editor contains a hodgepodge of styles that don't necessarily fit into any of the tab categories. List items are the <li> tags used in ordered and unordered lists to insert hanging numbers or bullets. You can use the List Item choices to customize the way these lists appear, as shown in Figure 37.13:
For bulleted lists, select a List Image from the pop-up menu by first selecting URL; then browse to link to a small image that you want to act as a bullet. You can apply this CSS style to the OL or UL tag. From the List Style pop-up menu, select a typical list item for either the bulleted or numbered list. - List Position: Choose Inside if you don't want the bullet or number to hang outside the left margin. Choose Outside to hang the list element outside the left margin.
- White Space: White space is one of those CSS attributes that's never quite worked the way it was supposed to, and that's still the case, unfortunately. When you choose Preformatted from the pop-up menu, it's supposed to let you keep the extra spaces in your text, as the PRE tag does in HTML. If you choose No Wrap, it should work just like the NOWRAP table tag attribute and prevent your text from wrapping the width of the browser window.
Use the None setting for the Display property in the CSS Editor to preload images. Insert some images that you want to appear on subsequent pages on a page of your website. Define a Class style called something like noshow. Set the Display attribute to None and then apply the noshow style to the images you want to preload. The images load when the first page loads and remain in the cache for subsequent pages, making your site appear faster.
- Display: The display property defines whether an element includes line breaks above and below, is included inline with other elements, is treated as part of a list, or is displayed at all. Choose None from the pop-up menu to make an element not display, such as an image.
- Cursor: The cursor property changes the cursor to one you specify from the pop-up menu when your cursor hovers over the text that is formatted with the CSS style defined.
Figure 37.13. Customize the appearance of bulleted and numbered lists. 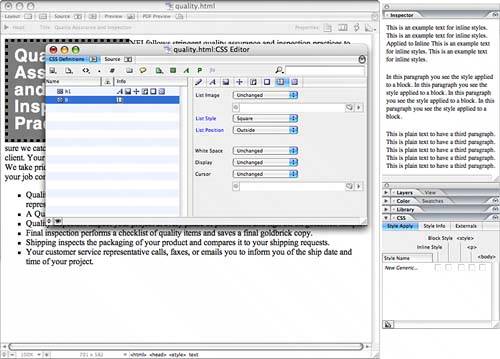
| 10. | Change to the Background Properties tab in the CSS Editor to set the background of your web page by applying the style to the body tag. You can also set the background properties of individual elements on your page, such as table cells, layers, and text elements, as shown in Figure 37.14:
Figure 37.14. The Background Properties tab in the CSS Editor. 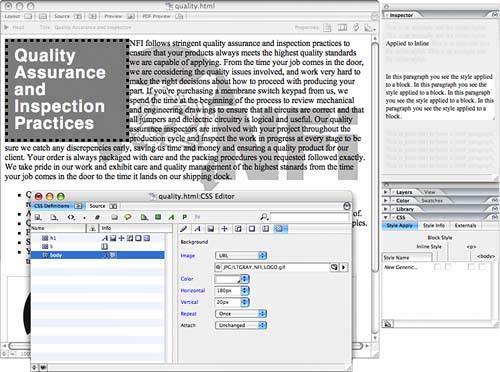
| 11. | Close the CSS Editor when you finish setting all the formatting for your styles.
|
|