Automatically Controlling a Control's Size and Position Before starting our discussion of specific controls, we will examine two properties that assist with managing the position and sizing of controls on forms. These properties apply to a large number of controls, including the basic controls discussed in Chapter 11. The Anchor and Dock properties manage the position and sizing of controls as the user changes the size of a form. These two properties are examined in the following sections. Anchoring Controls When you place a control on a form, its position on the form is specified by setting its Location property, which defines the distance from the left edge of the form to the left edge of the control (the X subproperty) and the distance from the top edge of the form to the top edge of the control (the Y subproperty). The control's size is determined by its Size property, which defines the width and height of the control, specified by its Width and Height subproperties. If the user resizes the form, the size of the control remains constant, as does its position relative to the upper-left edge of the form. Note Technically, a control's Location property contains a Point object, which in turn contains X and Y subproperties. In code, this might look like Button1.Location = New Point (25, 275), defining the X subproperty as 25 and the Y subproperty as 275. This would cause Button1 to appear 25 pixels from the left edge of the form and 275 pixels from the top edge of the form. Similarly, the Size property contains a Size structure, which specifies the size of a rectangular region by using Width and Height properties.
Depending on your application, you may want a control to be resized or repositioned as the user resizes the form. Visual Basic .NET now provides an Anchor property, which allows you to specify any (or all) of the four edges of a form to which you want a control to be anchored. Normally, a control's Anchor property is set to Top, Left, which means that the control's distance from the top and left edges of the form will remain constant, no matter how the form is resized. Changing the Anchor property to some other combination of edges, such as Top, Bottom, Left, will cause the control's distance from those edges to remain constant as the form is resized. The control's Location and Size properties are adjusted as necessary to accomplish this. To change a control's Anchor property, you click the drop-down arrow next to the property in the Properties window. You will see a box, shown in Figure 12.1, where you can click pointers to the four edges of the form. The top and left pointers will already be selected, representing the default Top, Left value of the property. Figure 12.1. When setting the Anchor property, you can visually select any combination of the form's edges to which a control will be anchored. 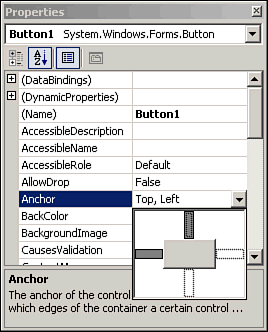 Note If the combination of edges specified by the Anchor property includes a pair of opposite edges (Left and Right, or Top and Bottom), the control must be resized for the respective distance to those edges to remain constant.
One use of the Anchor property is to keep the size of an image constant relative to the size of the form containing it. Figure 12.2 shows a form containing a PictureBox control whose Anchor property has been set to all four edges (Top, Bottom, Left, Right). The PictureBox control's SizeMode property has been set to StretchImage, which causes the image displayed in the control to be resized to match the size of the control. In Figure 12.3, the form has been resized to be larger; note how the Image control has been resized to maintain its anchoring to all four corners. Figure 12.2. This form contains an Image control whose Anchor property binds it to all four corners. 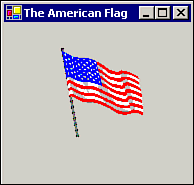 Figure 12.3. The form has been made larger; the Image control has resized itself so that the distance from it to all four edges of the form remains constant. 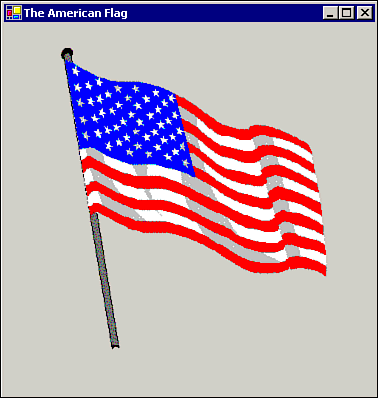 Figures 12.4 and 12.5 illustrate another nice use for the Anchor property keeping a button located near the lower-right edge of a form. Figure 12.4 shows a form with an Exit button near the lower-right corner of the form. The Button control's Anchor property has been changed from the default value of Top, Left to Bottom, Right. Figure 12.5 shows the same form after having been resized. The Exit button remains in the same relative lower-right position. Figure 12.4. This form has an Exit button near its lower-right corner. 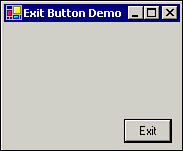 Figure 12.5. Because the Exit button's Anchor property is set to Bottom, Right, the button appears in the same lower-right corner even when the form is enlarged. 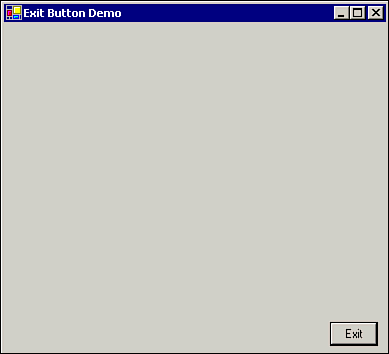 Docking Controls In certain situations, you may want to have a control "docked" to one edge of a form. You can use the control's Dock property to enable this capability. You set the Dock property to one of the four edges of the form Top, Bottom, Left, or Right to dock it to that edge. A docked control will always be positioned flush against the respective edge of its container form. Its "opposite" size dimension will be modified to take up the entire width or height of the form. In other words, if you set a control's Dock property to Left, that control will always be positioned flush against the left edge of the form, and its Height property will be automatically adjusted so that the control takes up the entire height of the form. One special value of the Dock property, Fill, causes all four edges of the control to be docked to all four edges of the form. A control whose Dock property is set to Fill will always take up the entire inner area of the form. You can see an example of the Fill value of the Dock property in the sample application developed in Chapter 15, "Multiple Document Interface (MDI) Applications." In that program, a TextBox control's Dock property is set to Fill in order for the text box to always fill the form that contains it. One potential use of the Dock property is to have a Label control displaying status information always positioned along the bottom edge of the form and taking up the form's entire width, as illustrated in Figure 12.6. Figure 12.6. The status label shown here is docked to the lower edge of the form. 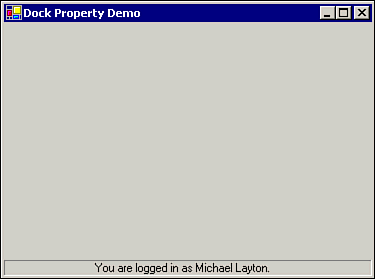 Note The Anchor and Dock properties cannot be used at the same time for the same control. If, for example, you set the Anchor property of a control to something other than its default value, and set its Dock property to Bottom, Left, for instance, the control's Anchor property reverts to its default value of Top, Left. When you want a control to remain positioned along one (or more) of the form's edges, use the Dock property. If you want a control's position inside the form (not docked to an edge) to remain constant, use the Anchor property.
|