Locking Tracks to Avoid Synchronization Problems
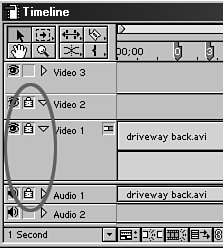
| Trimming clips in your timeline is one of many ways to knock a shot out of sync (either with its natural sound or with other clips that you lined up during previous editing). One way to avoid knocking clips or entire tracks out of sync (messing up their timing and positioning) is to lock your tracks (see Figure 4.28). Locking tracks can be beneficial if you want to protect the work you've done while you continue editing other tracks in the timeline. If you started your project by completely editing and finalizing an audio mix, you might consider locking the audio tracks before going on to edit your video tracks as a precaution. Figure 4.28. Track locks protect you from accidentally ruining your edited timeline.
To lock timeline tracks, do the following:
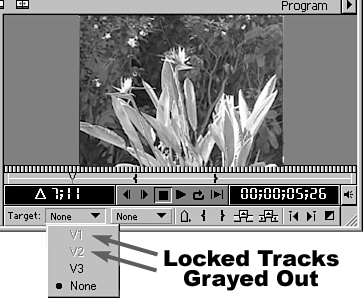
note If you want to lock video clips that contain synced audio, you must select each track and lock it separately. When a track is locked, you cannot add any clips to it or trim any shots within it. Premiere does not let you select a locked track in the Target field, located under the Edit Monitor (see Figure 4.29). For example, if you lock Video Track 1, you cannot add or remove any clips already edited into that track. You can make changes, however, to any unlocked track. This is where you can wind up knocking your unprotected clips out of sync in your timeline. Figure 4.29. Premiere does not allow you to perform an edit on locked tracks.
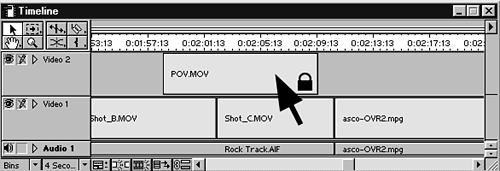
note When a track is locked, not only is it protected from insert or overwrite editing from source clips, but each segment is locked so that you can't accidentally drag a clip even slightly out of position in the timeline. The cursor changes to a black arrow with a padlock when you roll the mouse over a locked track, indicating that you cannot move any clips in that particular track, as shown in Figure 4.30). Figure 4.30. On locked tracks, the cursor changes to a solid black cursor with a padlock when the track is rolled over.
|


