Outputting to Tape Using Deck Control
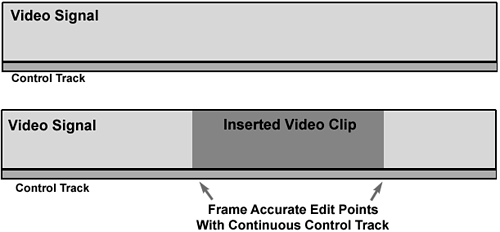
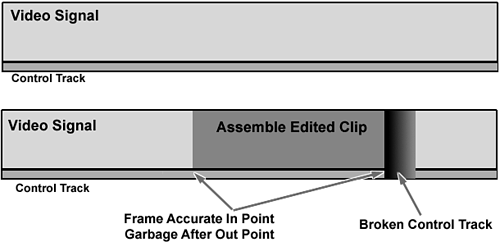
| Ideally, having full deck control offers many more advantages when you output your movie to tape than not having device control. Depending on your deck and connection, this might allow you to have full control of your deck completely from within Premiere. If your deck has frame accuracy control, you can begin recording your program onto tape at a specific point you select (Insert or Overwrite Editing). This is important, especially when you're outputting your program for broadcast. It's recommended that you start the first frame of your movie at the one-hour timecode mark (01:00:00:00). Another advantage of decks that run on device/remote control from Premiere is that they allow you to insert-edit. Insert editing is the ability to frame-accurately add a video clip to the middle of an existing program already on tape (covering up what was previously there). The difference between frame-accurate insert editing and assemble editing is what happens at the end of the recording process. Insert editing pops out of record mode at the exact frame the clip you're adding is finished, seamlessly continuing with the next frame on the tape (see Figure 10.10). Assemble editing adds a few frames to a few seconds of garbage at the end of the clip, including destroying your control track. Therefore, you wind up not having a clean edit point at the end of the edit, as shown in Figure 10.11. In addition, insert editing allows you to control which tracks you want to record to the master tape. Do you want to output just video? Do you want Audio Track 1 only, Audio Track 2 only, or both? Now you can begin to see the advantages of having device control for output. Figure 10.10. Insert editing allows frame-accurate editing.
Figure 10.11. Assemble editing is used only to build a program from the beginning. It breaks the control track signal after editing.
To record to tape using device control, do the following:
|