Implementing the User Account-Related Pages
| In the preceding hour we created the ASPNETDB database, which houses the database tables responsible for managing user accounts. These tables were automatically created by ASP.NET by using the ASP.NET Website Administration Tool and setting the authentication settings. To create a site that fully supports user accounts, however, generating these tables is only the first step. At minimum, we'll need to add a page that allows users with existing accounts to log back into the site. Depending on the application's requirements, we may also need web pages that allow visitors to create accounts and help them reset their forgotten passwords. The design requirements laid out in the preceding hour for the online photo album application were a little vague as to what features needed to be supported. Specifically, the requirements stated that "The site must support user accounts." The use cases talk about a fictional user creating a new user account through the site but don't mention whether a user must be able to retrieve a forgotten password. Therefore, the online photo album application won't include a password reminder page. This is something, however, that you are encouraged to add on your own! The photo album application has two web pages for working with user accounts:
These two pages will use the login Web controls examined previously in Hour 20, "Managing Your Site's Users." If you need to brush up on these controls, feel free to skim through Hour 20 to refamiliarize yourself as needed. Allowing Visitors to Create User AccountsThe process for implementing the CreateAccount.aspx page can be broken down into the following steps:
For step 1, add whatever instructional or heading text you deem necessary. I decided to add Create a New Account at the top of the content region, followed by a short message explaining that only users with an account can add pictures to the site. After you have added the text you want to appear on the page, go to the Toolbox's Login section and locate the CreateUserWizard control. Drag and drop this control onto the CreateAccount.aspx page. Finally, configure the CreateUserWizard control's properties. Again, feel free to use whatever property settings you like. For my implementation, I started by using the Auto Format Wizard and chose the Classic option. Next, I wanted to include a Cancel button on this page, so I set the DisplayCancelButton property to true and the CancelDestinationPageUrl property to ~/Default.aspx. With these property settings, if users decided they do not want to create an account, they can click the Cancel button, at which point they'll be returned to the site's home page. Recall that after users create an account, they are shown a confirmation messageYour account has been successfully createdalong with a Continue button. The ContinueDestinationPageUrl property specifies where they are taken after creating an account. You can set this to the home page's URL, if you like; however, after users create an account, it might be nice to send them directly to the page where they can manage their photo album. Therefore, I set this property value to ~/PhotoAdmin/Default.aspx. Figure 23.2 shows CreateAccount.aspx when viewed through a browser. Take a moment to test your page in a browser and add a handful of new user accounts. Figure 23.2. The CreateAccount.aspx page, when viewed through a browser.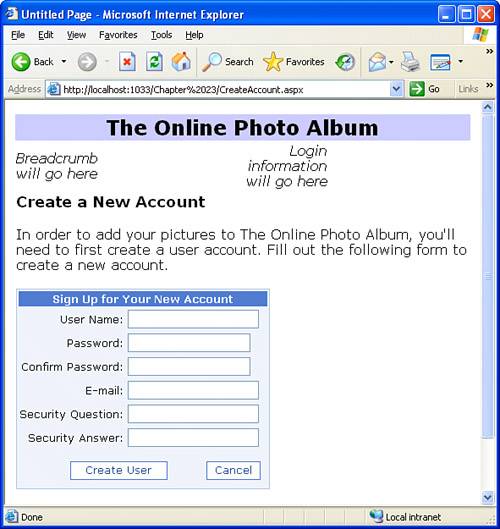
Providing a Login PageSimilar to the CreateAccount.aspx page, the process for implementing the Login.aspx page can be broken down into the following steps:
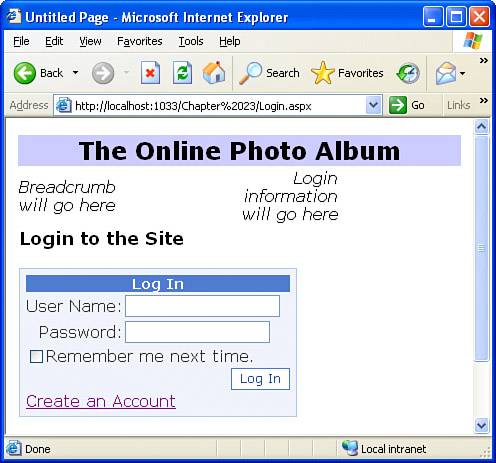
For step 1, I added a single header titled Login to the Site to the top of the content region. After you have added the text you want to appear on the page, go to the Toolbox's Login section and drag and drop the Login control onto the page's Design view. As with the CreateUserWizard control in the previous section, I started step 3 by improving the Login control's appearance through the Auto Format Wizard, opting again for the Classic option. Because users might reach the login page but not have an account already created, I set the Login control's CreateUserText and CreateUserUrl properties to Create an Account and ~/CreateAccount.aspx, respectively. This adds a link at the bottom of the Login control that the users can click to create an account. Figure 23.3 shows Login.aspx when viewed through a browser. As with the CreateAccount.aspx page, be sure to take a few minutes to test the functionality; ensure that you can log in with an existing user's credentials. Figure 23.3. An existing user can log in to the site through the Login.aspx page. Adding Login Information to the Master PageNow that we have created the login page, let's go back to the master page and add in the login information in the header region. Specifically, we'll use a LoginView control. Recall that the LoginView control has two templates: AnonymousTemplate and LoggedInTemplate. When the visiting user is authenticated, the LoggedInTemplate's content is rendered; however, if the visiting user has not logged in, the AnonymousTemplate is displayed instead. For anonymous users, let's display a link to the login page. For authenticated users, let's display a short messageWelcome back, usernamealong with a link to log out the users and a link to take them to the page where they can administer their photo album. The Login and Logout links in the two templates can both be added using the LoginStatus control. This control, which we examined in Hour 20, displays a Login link for anonymous users and a Logout link for authenticated users. To add the link for logged-in users to administer their photo album, use a HyperLink control in the LoggedInTemplate whose NavigateUrl property points to the PhotoAdmin/Default.aspx page. To accomplish this, perform the following steps:
If you save the master page and view the site's home page, you will not be logged in and should therefore see a screen similar to Figure 23.4. Note that when you're not logged in, the Login link is shown. Finally, create a new user account. After doing so, you should notice that the login user interface has changed from a Login link to the message Welcome back, username, along with a Logout link (see Figure 23.5). Figure 23.4. When you visit the home page as an anonymous user, the Login link is shown.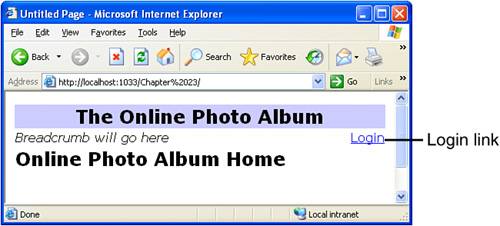 Figure 23.5. When users are authenticated, a welcome message is displayed along with two links.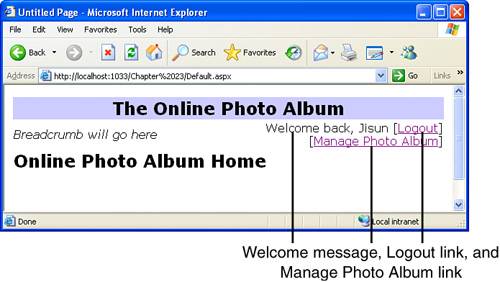 |
EAN: 2147483647
Pages: 233