Creating a New Database
| Before you can start using a database system like SQL Server 2005 Express Edition, the first thing you will need to do is create a new database. Each database contains a group of one or more database tables. Each SQL Server 2005 Express Edition database is physically implemented as a separate file. ASP.NET provides a special directory, App_Data, where you can place these database files for use in your ASP.NET web application. Creating a new database, then, is as simple as adding the appropriate database file to the App_Data folder.
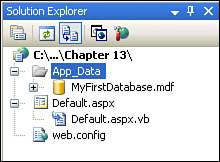
To create a new database with Visual Web Developer, start by creating a new website using the ASP.NET Web Site template. Recall that the ASP.NET Web Site template, among other things, adds an App_Data folder to your website. (If you do not have an App_Data folder in your website, go to the Website menu, select the Add ASP.NET Folder menu option, and then pick the App_Data option.) To add a database to your website, right-click on the App_Data folder in the Solution Explorer and choose Add a New Item. This will bring up the Add New Item dialog box, which contains three choices, one of which is to add a new SQL Database (see Figure 13.5). Figure 13.5. To add a database to your website, add a new SQL Database item.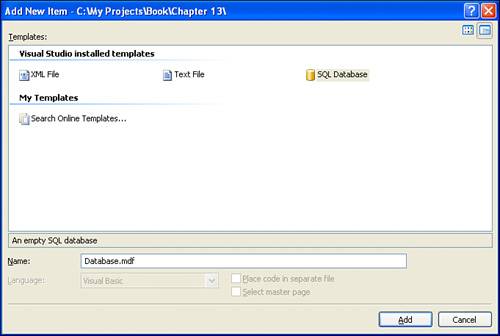 Select the SQL Database option and change the name of your database file in the Name text box from Database.mdf to MyFirstDatabase.mdf. After you click the OK button, Visual Web Developer will start to create your new SQL Server database file. When it has completed, the Solution Explorer will be updated to show the new database file in the App_Data folder (see Figure 13.6). Figure 13.6. The new database is listed in the App_Data folder. In addition to adding the database file to the App_Data folder, you should now also see the newly added database within the Data Connections section of the Database Explorer window. By default, the Database Explorer window shares a pane with the Solution Explorer. If you don't see the Database Explorer on your screen, go to the View menu and select the Database Explorer option. The Database Explorer provides a more detailed listing of a database's elements than the Solution Explorer. As Figure 13.7 shows, many database elements can be manipulated through Visual Web Developer, such as database diagrams, tables, views, stored procedures, and so on. Figure 13.7. The Database Explorer lists the elements of the database. For the data-driven examples we'll be exploring in this book, the only database element we'll need to use are the tables. The next section, "Creating Database Tables," examines how to create and define database tables; the section after that looks at how to populate tables with data through Visual Web Developer.
|

EAN: 2147483647
Pages: 233