DataGrid Column Basics
| Our earlier discussions examined the five provided DataGrid column controls:
All of these column types are each represented by a class in the System.Web.UI.WebControls namespace with the same name. That is, the BoundColumn control is a control defined by the class System.Web.UI.WebControls. BoundColumn, the ButtonColumn control is a control defined by the class System. Web.UI.WebControls.ButtonColumn, and so on. All of these controls are derived from the DataGridColumn class, which is also found in the System.Web.UI.WebControls namespace. NOTE The DataGridColumn class is an abstract class, meaning that it cannot be used directly. To utilize its functionality, you must create a class that inherits the functionality of the DataGridColumn class and then use that class. The DataGridColumn class contains the base set of properties that all DataGrid column types must include. These properties are listed in Table 12.1.
The DataGridColumn class contains two important methods: Initialize() and IntializeCell(). When a DataGrid's DataBind() method is called, the Initialize() method of each column is called. This method allows for a DataGrid column to initialize any variables or data structures prior to the column being rendered. The InitializeCell() method, on the other hand, is called while the DataSource is being bound to the DataGrid. Specifically, for each row in the DataSource, the InitializeCell() method is called once for each DataGrid column. The InitializeCell() method's formal definition is given in the following:
When called, the InitializeCell() method's task is to add the needed content to the cell TableCell. The columnIndex and itemType input parameters are used to help determine how to render the content. The five provided DataGrid columns inherit the properties and methods of the DataGridColumn class, and extend the default functionality. For example, the BoundColumn class contains the properties listed in Table 12.1, along with the properties DataField, DataFormatString, and ReadOnly. The InitializeCell() method for the BoundColumn class needs to retrieve the DataField field from the DataSource, format it according to the DataFormatString property, and then add the formatted string to the TableCell cell. TIP If you are not familiar with inheritance and object-oriented design, consider reading Ian Stalling's "Using Object-Orientation in ASP.NET" article series, referenced in the "On the Web" section at the end of this chapter. Creating Your First Custom DataGrid Column ClassesThere's no reason why we can't create our own DataGrid column classes. In doing so, we must make certain that the classes are directly or indirectly derived from the DataGridColumn class, just like the five built-in DataGrid columns are. NOTE A class is said to be directly derived from a class if it inherits that class explicitly. For example, if you examine the ButtonColumn class's technical documentation, you'll find that it is derived from the DataGridColumn class. Therefore, it is said to be directly derived from the DataGridColumn class. However, there could exist a class that's derived from the ButtonColumn class. Such a class would be indirectly derived from the DataGridColumn class, because it directly inherits the DataGridColumn class, but does so indirectly, because it inherits the ButtonColumn class, which inherits the DataGridColumn class. When creating a DataGrid column class, we must use a .NET programming language, such as Visual Basic .NET or C#. After the code for the class has been written, to use it in an ASP.NET Web page, we need to compile in into an assembly (a DLL) and copy the assembly to the Web application's /bin directory. After these steps have been performed, the custom DataGrid column class can be used via a DataGrid in an ASP.NET Web page. Before we examine how to use a compiled DataGrid column class in an ASP.NET Web page, though, we must first examine the ins and outs of the code required for such a class. To create a custom DataGrid class, then, we need to create a class that inherits, directly or indirectly, the DataGridColumn class. If it inherits this class directly, we'll need to provide, at a minimum, the code for the InitializeCell() method. If, on the other hand, we derive from the DataGridColumn class indirectly, by perhaps deriving our custom class from the BoundColumn class, we might be able to reuse the BoundColumn class's implementation of the InitializeCell() method, meaning we do not have to write our own method. Let's start by creating a very simple custom DataGrid column class, derived directly from the DataGridColumn class. This DataGrid column class, when used in a DataGrid, will add a column to the DataGrid that displays the message "Hello, World!" To create our first DataGrid column class, follow these steps:
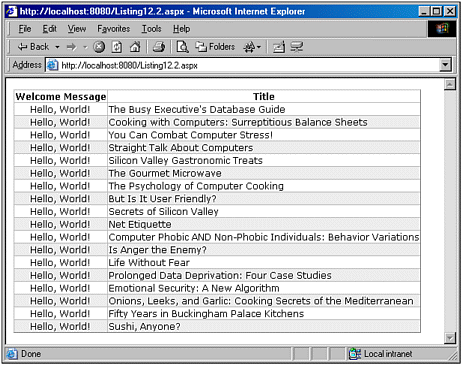
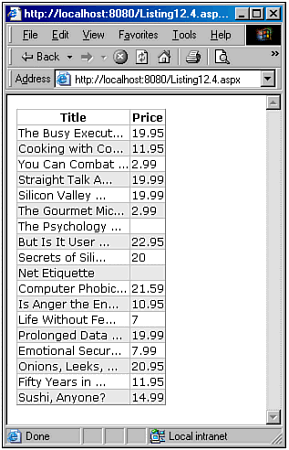
NOTE If you do not own a copy of Visual Studio .NET, you can create this class using your favorite text editor, such as the ASP.NET Web Matrix Project, or even Notepad. Name the file you create SimpleColumn.vb. Listing 12.1 contains the source code for the custom DataGrid column class, MyFirstDataGridColumn. Listing 12.1 The Class MyFirstDataGridColumn Is Directly Derived from the DataGridColumn Class1: Imports System 2: Imports System.Web 3: Imports System.Web.UI 4: Imports System.Web.UI.WebControls 5: 6: Public Class MyFirstDataGridColumn 7: Inherits DataGridColumn 8: 9: Public Overrides Sub InitializeCell(ByVal cell As TableCell, _ 10: ByVal columnIndex As Integer, ByVal itemType As ListItemType) 11: MyBase.InitializeCell(cell, columnIndex, itemType) 12: 13: If itemType = ListItemType.AlternatingItem Or _ 14: itemType = ListItemType.Item Or _ 15: itemType = ListItemType.SelectedItem Then 16: cell.Text = "Hello, World!" 17: End If 18: End Sub 19: End Class The first thing to take note of in Listing 12.1 is that the MyFirstDataGridColumn class is directly derived from the DataGridColumn class (line 7). This means that the MyFirstDataGridColumn class has the same properties and methods that are included in the DataGridColumn class. As designers of this new class, it is our responsibility to add any necessary additional properties and methods, and to override methods from the DataGridColumn class that we need to customize for our own purposes. Because the MyFirstDataGridColumn class's purpose is to simply emit a "Hello, World!" message for each row in the DataGrid, we don't need to provide any properties other than those already included by the DataGridColumn class (refer back to Table 12.1 for a listing of those properties). Furthermore, we don't need to provide any additional methods to achieve our limited functionality. Instead, the only code we need to provide is the code for the InitializeCell() method. Specifically, we must override the DataGridColumn class's version of this method and replace it with our own functionality. To override a base class's method, we must use the Overrides keyword, as shown on line 9. When overriding a function, we should call the base class's version of the method first. In Visual Basic .NET, this can be accomplished by referencing the MyBase object and calling the appropriate function, as shown on line 11. By calling the base class's version of this method, the base class will perform whatever work it usually does for this method. After it has completed this work, you can add whatever functionality you need to add in the remainder of the method. The benefit to this approach is that if there is a method whose functionality you want to augment, you can override the method, call the base class's version of the file, and then provide the augmented functionality in the remainder of the overridden method. TIP If you are creating your custom DataGrid column classes using C#, note that instead of using MyBase to refer to the derived classes base class (as done on line 11 in Listing 12.1), you should use base. After we call the base class's version of the InitializeCell() method, we are ready to set the contents of the TableCell cell to the string "Hello, World!" This can be accomplished by simply setting the TableCell's Text property to the string we want to emit. Alternatively, we could add a LiteralControl to the TableCell's Controls collection, which would change line 16 in Listing 12.1 to cell.Controls.Add(New LiteralControl("Hello, World!")) Before we add the "Hello, World!" message to the TableCell, we first check to ensure that the item being added is an item, alternating item, or selected item, and not a header, footer, or edit item. This check occurs on lines 13 15, where we check to see that the passed-in itemType property is one of the proper types. The InitializeCell() method is called for every row that is created in the DataGrid. This includes header and footer rows, or when the row is marked as editable. (Recall from Chapter 9, "Editing the DataGrid Web Control," that the row whose index equals the DataGrid's EditItemIndex is considered to be in "edit mode.") If we omit the checks on lines 13 15, the message "Hello, World!" appears, regardless of the type of item being added. This means that the header and footer cells for this column would have that message. Compiling Your Custom DataGrid Column ClassTo use your custom DataGrid column class in an ASP.NET Web page, you will need to compile the class into an assembly (a DLL file) and deploy it to the Web application's /bin directory. Compiling the class is simple enough if you are using Visual Studio .NET simply go to the Build menu and select the Build Solution option. Assuming you named your project SimpleColumn, this will create a DLL named SimpleColumn.dll. The location of this file is in the /bin subdirectory of the folder where you opted to save the Visual Studio .NET project. Before you can use this assembly in an ASP.NET Web page, you will need to copy the DLL file from its current location to the /bin directory of your Web application. TIP If you are developing your Web application using Visual Studio .NET as well, you can avoid having to move this DLL file yourself by adding both the Web application and SimpleColumn projects to the same solution, and then specifying the SimpleColumn.dll file as a reference for the Web application. If you did not use Visual Studio .NET to create this class, you will need to compile it into an assembly from the command line. However, before you do this, a small change needs to be made to the code presented in Listing 12.1. Specifically, before line 6, you need to add Namespace SimpleColumn, and after line 16, you need to add End Namespace. This is not necessary when using Visual Studio .NET, because it automatically performs this step for you when compiling your project. After you have made this small change, drop to the command line and navigate to the directory where the SimpleColumn.vb file is located and enter vbc /t:library /r:System.dll,System.Web.dll SimpleColumn.vb This will create a file named SimpleColumn.dll, which you will then need to copy to the Web application's /bin directory. Using Your Custom DataGrid Column Class in an ASP.NET Web PageAfter you have created a custom DataGrid column class using Visual Studio .NET or your favorite text editor, compiled it into an assembly, and moved the assembly to your Web application's /bin directory, you are ready to use the custom column in a DataGrid Web control in an ASP.NET Web page! To accomplish this, you need to provide the following directive at the top of your ASP.NET Web page: <%@ Register TagPrefix="prefixName" Namespace="Namespace" Assembly="Assembly" %> Here, Assembly is the name of the assembly that contains the custom DataGrid class; Namespace is the namespace where the custom column class is found within the assembly, and prefixName is the prefix name you want to give to your control. NOTE The prefix of a Web control is what appears before the colon in the Web control declaration tag. All built-in ASP.NET Web controls have the prefix asp; for example, to declare a TextBox Web control, you use the prefix and then the class name: <asp:TextBox ... />. For our example, let's choose a prefixName of custCols. The Assembly value will be SimpleColumn, the name of our assembly, and the Namespace value will also be SimpleColumn, because that is the namespace in which MyFirstDataGridColumn class resides. After we provide a Register directive at the top of our ASP.NET Web page, we can use our custom DataGrid column just like we use any of the built-in DataGrid columns. Listing 12.2 illustrates how to create a simple DataGrid that uses our custom column control. Listing 12.2 A Custom DataGrid Column Is Used Just Like Any of the Provided DataGrid Columns1: <%@ Register TagPrefix="custCols" Namespace="SimpleColumn" Assembly="SimpleColumn" %> 2: <%@ import Namespace="System.Data" %> 3: <%@ import Namespace="System.Data.SqlClient" %> 4: <script runat="server" language="VB"> 5: Sub Page_Load(sender as Object, e as EventArgs) 6: BindData() 7: End Sub 8: 9: 10: Sub BindData() 11: '1. Create a connection 12: Const strConnString as String = "server=localhost;uid=sa; pwd=;database=pubs" 13: Dim objConn as New SqlConnection(strConnString) 14: 15: '2. Create a command object for the query 16: Const strSQL as String = "SELECT * FROM titles" 17: Dim objCmd as New SqlCommand(strSQL, objConn) 18: 19: objConn.Open() 'Open the connection 20: 21: 'Finally, specify the DataSource and call DataBind() 22: dgTitles.DataSource = objCmd.ExecuteReader(CommandBehavior. CloseConnection) 23: dgTitles.DataBind() 24: 25: objConn.Close() 'Close the connection 26: End Sub 27: </script> 28: 29: <asp:DataGrid runat="server" 30: AutoGenerateColumns="False" 31: Font-Name="Verdana" Font-Size="9pt" 32: HeaderStyle-HorizontalAlign="Center" 33: HeaderStyle-Font-Bold="True" 34: AlternatingItemStyle-BackColor="#eeeeee"> 35: <Columns> 36: <custCols:MyFirstDataGridColumn HeaderText="Welcome Message" 37: ItemStyle-HorizontalAlign="Center" /> 38: <asp:BoundColumn DataField="title" HeaderText="Title" /> 39: </Columns> 40: </asp:DataGrid> If you ignore line 1 and the seemingly funny syntax for the DataGrid column control on line 36, the code in Listing 12.2 looks just like many of the examples we've seen throughout the last eleven chapters. That's the beauty of using custom DataGrid column controls they serve as a means to encapsulate code and functional complexity. That is, when using the MyFirstDataGridColumn DataGrid column control, we don't need to worry how exactly the message "Hello, World!" is produced. We can use it without concerning ourselves with the implementation details. Similarly, when we use any of the built-in DataGrid column types, we don't worry about how they work behind the scenes. We just know that if we use a BoundColumn control, we'll see the value of a specified field in the DataSource; if we use a ButtonColumn control, we know that each row will have a command button associated with it. The lines worth noting in Listing 12.2 are line 1, which includes the Register directive, and lines 36 and 37, which contain the custom DataGrid column control. We use the normal Web control syntax to display this column control, but instead of using asp as the prefix, we use the prefix specified in the Register directive. We put the name of the class we want to display after the prefix and preceding colon. After that, we can specify any properties. Recall that the code for the MyFirstDataGridColumn class did not contain any properties (refer back to Listing 12.1 if needed). Rather, it only contained the overridden version of the InitializeCell() method. However, on lines 36 and 37, we specify properties for this column control. What gives? Remember that the MyFirstDataGridColumn class is derived from the DataGridColumn class, which means the MyFirstDataGridColumn class inherits the public and protected properties of the DataGridColumn class. It is the DataGridColumn class that contains the HeaderText and ItemStyle properties used in lines 36 and 37. This illustrates one of the benefits of inheritance the MyFirstDataGridColumn class contains, for free, the functionality of the DataGridColumn class. That is, our MyFirstDataGridColumn class can utilize the properties listed in Table 12.1 without us having to write a single line of code! Figure 12.1 contains a screenshot of Listing 12.2 when viewed through a browser. Note that the first column in the DataGrid has a "Hello, World!" message displayed for each row. The text "Welcome Message" is found in the header, which is the value of the HeaderText property (line 36). Finally, each "Hello, World" message in the DataGrid column is centered, as specified by the ItemStyle-HorizontalAlign property (line 37). Figure 12.1. The first column in the DataGrid is a custom column control. Creating Custom DataGrid Column Controls Derived from Existing DataGrid Column ControlsWhen creating a custom DataGrid column control, it is imperative that it is derived from the DataGridColumn class. For example, the custom column control created in Listing 12.1 inherits the DataGridColumn class using the Inherits keyword (line 7). However, your custom column class need not inherit the DataGridColumn class directly; rather, it can inherit a class that itself inherits the DataGridColumn class. This is good news, because it means we can create a custom DataGrid column class by inheriting one of the pre-existing DataGrid column classes. This can provide useful if we want to extend the functionality of an existing DataGrid column class, because by inheriting the class, we obtain its functionality free of cost, and then can add our own customized code. For example, say that we want to create a column type that displays a text field from a DataSource, but rather than display the entire text field, we want to limit the display to a developer-specified number of characters. Let's create a custom DataGrid column class named LimitColumn that achieves this aim. You can limit the amount of data displayed from a DataSource field by using a TemplateColumn that calls a custom function limiting the length of data, or by writing an event handler for the DataGrid's ItemDataBound event. (We examined these two approaches to modifying data before it is displayed in the previous chapter.) One benefit to using a custom DataGrid column class to achieve this functionality is that the column class hides the implementation details, leaving your ASP.NET page free from the excess code needed to provide this functionality with either a custom function or an event handler for the ItemDataBound event. Less code means fewer bugs and more maintainable code! Because the LimitColumn class limits the number of characters of a particular field from the DataGrid's DataSource, it makes sense to have it derived from the BoundColumn class. After all, the BoundColumn was designed to render a particular field from the DataGrid's DataSource. By having our LimitColumn class inherit from the BoundColumn class, the LimitColumn class will have all the properties of the BoundColumn class, such as DataField and DataFormatString, in addition to the properties listed in Table 12.1. However, to implement our class, we'll need to add an additional property that specifies how many characters to limit the output of the column to. Let's call this property CharacterLimit, and make it of type Integer. Furthermore, let's apply the following semantics to the CharacterLimit property: If it's negative, no truncation occurs; if it's a positive value, each DataSource value displays only its first CharacterLimit number of characters, followed by an ellipsis (...). In addition to needing a custom property, we must have some way to alter the contents of the DataSource field for each row of our column, displaying only the first CharacterLimit characters. We can accomplish this by overriding the BoundColumn's FormatDataValue(dataValue ) method. The FormatDataValue(dataValue ) method is called to format the data for each row in the BoundColumn prior to it being rendered. For example, in previous examples, we've looked at using a BoundColumn to display the price field in the titles database table. By setting the BoundColumn's DataFormatString property to {0:c}, we could have the price formatted as a currency. This formatting occurs in the BoundColumn's FormatDataValue(dataValue ) method. As the DataGrid is being rendered, the price BoundColumn for each row has its InitializeCell() method called. A series of steps then occurs in the InitializeCell() method (which we'll discuss later in this chapter), and eventually the FormatDataValue(dataValue ) method is called with the value of the price field passed in as the dataValue parameter. The FormatDataValue(dataValue ) method returns a formatted version of the price field, which is then added to the Controls collection of the TableCell object passed into the InitializeCell() method. Certainly, this process is a bit complicated! Fortunately, we do not have to concern ourselves with the ins and outs of what's occurring in the BoundColumn's InitializeCell() method. Instead, we can simply override the FormatDataValue(dataValue ) method and return a truncated version of the dataValue parameter. NOTE We will be examining the InitializeCell() method for more complex DataGrid column types later in this chapter. Listing 12.3 contains the source code for the LimitColumn class. Listing 12.3 The LimitColumn Class Only Displays a Specified Number of Characters from a Specified DataSource Field1: Imports System 2: Imports System.Web 3: Imports System.Web.UI 4: Imports System.Web.UI.WebControls 5: 6: Public Class LimitColumn 7: Inherits BoundColumn 8: 9: Private m_charLimit As Integer = -1 10: 11: 12: Public Property CharacterLimit() As Integer 13: Get 14: Return m_charLimit 15: End Get 16: Set(ByVal Value As Integer) 17: If Value >= 0 Then 18: m_charLimit = Value 19: Else 20: m_charLimit = -1 21: End If 22: End Set 23: End Property 24: 25: 26: Protected Overrides Function FormatDataValue(ByVal dataValue As Object) As String 27: Dim result As String = MyBase.FormatDataValue(dataValue) 28: 29: If m_charLimit = -1 Then 30: 'No restrictions should be applied to the length 31: Return result 32: Else 33: 'Only show the first m_charLimit characters 34: If result.Length < m_charLimit Then 35: Return result 36: Else 37: Return result.Substring(0, m_charLimit) & "..." 38: End If 39: End If 40: End Function 41: End Class Because the LimitColumn class is derived from the BoundColumn class (see line 7), the LimitColumn class inherits the public and protected properties and methods of the BoundColumn class. Therefore, without writing a line of code, our LimitColumn class has properties like DataField, DataFormatString, and all the properties inherent in the DataGridColumn class as well (see Table 12.1). Unfortunately these properties are not enough; rather, we need an additional property for our LimitColumn class, one that will enable the user to specify a character limit for the column. Lines 12 through 23 use a public Property statement to create a read/write CharacterLimit property of type Integer, with the value of the property being stored to the private member variable m_charLimit (declared on line 9). Note that the Set portion of the Property statement checks to see whether the passed-in value is not negative (lines 17). If it is, m_charLimit is assigned to the value specified by the user (line 18); otherwise, m_charLimit is assigned the value 1 (line 20). Also note that the m_charLimit has a default value of 1 (line 9), meaning that if the developer using our custom DataGrid control does not specify a CharacterLimit property value, no truncation will occur. On lines 26 through 40, the BoundColumn's protected FormatDataValue(dataValue ) method is overridden. Recall from our earlier discussions that this method has the value of the DataSource field specified by the BoundColumn's DataField property passed in as an object; the FormatDataValue(dataValue ) method then formats the data according to the DataFormatString property and returns a formatted string, which is what is displayed in the BoundColumn. We can perform the truncating of data to the specified CharacterLimit limit by overriding this function and returning a truncated version of the dataValue parameter. On line 27, a string variable named result is set equal to the result of the DataFormatString(dataValue ) method of the BoundColumn class. Then the value of m_charLimit is checked (line 29). If m_charLimit equals 1, no truncating should be performed, and the value of result is returned (line 31). However, if m_charLimit does not equal 1, we check whether the length of result is greater than the value specified by m_charLimit (line 34). If the length of result is less than the value of m_charLimit, no truncation need occur, and the value of result is returned (line 35). However, if result has more characters than specified by the m_charLimit member variable, the Substring method is used to return only the first m_charLimit characters, and this result is followed by an ellipsis (line 37). CAUTION When overriding a method it is important to call the base class's version of the method. For example, on line 27 of Listing 12.3, a string variable named result is set equal to the result of the DataFormatString(dataValue ) method of the BoundColumn class. This call to the BoundColumn's version of the DataFormatString(dataValue ) method applies any formatting specified by the DataFormatString property. If you omit this call, the output result will not be formatted as directed by the DataFormatString property. To use the LimitColumn class in an ASP.NET Web page, we must compile the class into an assembly. Rather than create a new assembly, we can add it to the SimpleColumn assembly created in Listing 12.1. To accomplish this using Visual Studio .NET, open up the SimpleColumn project and choose to add a new class to the project. Then enter the code from Listing 12.3 into that new class. Finally, build the solution, which will produce the file SimpleColumn.dll, an assembly that contains both the MyFirstDataGridColumn class from Listing 12.1 and the LimitColumn class from Listing 12.3. If you used the command-line compiler to compile the class in Listing 12.1, you will need to make a small change to the code in Listing 12.3; namely, add Namespace SimpleColumn before line 6 and add End Namespace after line 41. Assuming you named the file containing the code from Listing 12.3 LimitColumn.vb, drop to the command line, navigate to the directory where both the LimitColumn.vb and SimpleColumn.vb files exist, and issue the following command: vbc /t:library /r:System.dll,System.Web.dll SimpleColumn.vb LimitColumn.vb Recall that SimpleColumn.vb is the name of the file that contains the code for the MyFirstDataGridColumn class (Listing 12.1). After the LimitColumn class has been compiled, copy the assembly to the Web application's /bin directory. To use the LimitColumn class in an ASP.NET Web page, the first step is to include the Register directive. Because we are using the same assembly, and because the LimitColumn class is found under the same namespace as the MyFirstDataGridColumn class, the Register directive from Listing 12.2 can be used verbatim. Listing 12.4 contains the code for an ASP.NET Web page that utilizes the LimitColumn class. Specifically, the LimitColumn class is used to display the title field from the title table, limiting the number of characters to 15. Listing 12.4 The LimitColumn Column Control Can Be Used to Restrict the Number of Characters Displayed1: <%@ Register TagPrefix="custCols" Namespace="SimpleColumn" Assembly="SimpleColumn" %> 2: <%@ import Namespace="System.Data" %> 3: <%@ import Namespace="System.Data.SqlClient" %> 4: <script runat="server" language="VB"> 5: '... The Page_Load event handler and BindData() subroutines have been ... 6: ' ... omitted for brevity. Refer back to Listing 12.2 for details ... 7: </script> 8: 9: <asp:DataGrid runat="server" 10: AutoGenerateColumns="False" 11: Font-Name="Verdana" Font-Size="9pt" 12: HeaderStyle-HorizontalAlign="Center" 13: HeaderStyle-Font-Bold="True" 14: AlternatingItemStyle-BackColor="#eeeeee"> 15: <Columns> 16: <custCols:LimitColumn HeaderText="Title" 17: CharacterLimit="15" DataField="title" /> 18: <asp:BoundColumn DataField="price" HeaderText="Price" /> 19: </Columns> 20: </asp:DataGrid> Note that the Register directive on line 1 in Listing 12.4 is identical to the same line in Listing 12.2. This is because the custom DataGrid column classes that we wanted to use in both Listings 12.2 and 12.4 were found in the same assembly under the same namespace. With this Register directive in place, to use the LimitColumn class as a DataGrid column control, we simply specify the chosen prefixName from the Register directive (custCols) followed by a colon, followed by the name of the class we want to use. After this tag name, the properties follow. On line 16, we set the HeaderText property to "Title"; on line 17, the DataField property is set to title, meaning that the LimitColumn column will display the title field from the DataSource, and the CharacterLimit property is set to 15, meaning that at most 15 characters will be displayed from the title field. If the value of the title field is a string whose character count is greater than 15, only the first 15 characters will be displayed, followed by an ellipsis. Figure 12.2 shows a screenshot of Listing 12.4. Note that titles such as Net Etiquette and Sushi, Anyone?, with fewer than 15 characters, are displayed as is. However, longer titles are truncated at 15 characters and have their truncated value followed by ellipses. Figure 12.2. Only the first 15 characters of the title field are displayed. NOTE The idea of creating a custom DataGrid column limiting the length of a DataSource field came from an article written by John Dyer titled "Creating a Custom DataGridColumn Class." In his article, John employed a more intelligent algorithm to limit the length of a DataSource field so that the break would not occur in the middle of a word. If you are interested in this approach or want a more detailed view of creating a custom DataGrid column class that derives from the BoundColumn class, I highly encourage you to read John's great article. A reference to the article can be found in the "On the Web" section at the end of this chapter. |
EAN: 2147483647
Pages: 111