Adding a Command Button to a Template
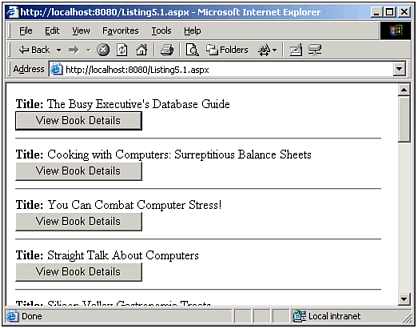
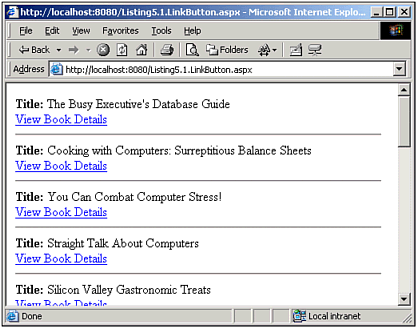
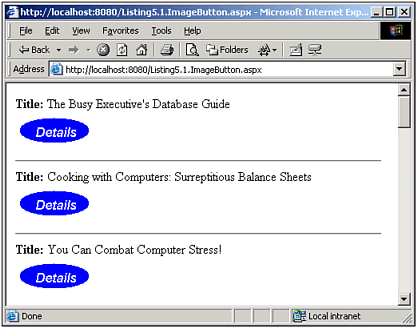
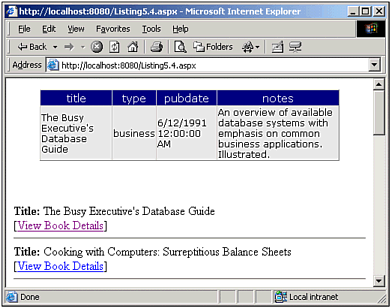
| As we have seen in past code examples in both Chapters 1 and 3, the ASP.NET data Web controls all provide template support. Recall that a template includes both HTML markup and data from the DataSource to emit data from the DataSource in the template we use the data-binding syntax, which takes the form <%# ... %>. Typically, inside the <%# ... %> tags we call the DataBinder.Eval() method, passing in Container.DataItem as the first parameter, and the name of the field we want to have returned as the second column. That is, if our DataSource was, for instance, a SqlDataReader that contained a field named ProductID, we could emit the ProductID in the template by using the following data-binding syntax: <%# DataBinder.Eval(Container.DataItem, "ProductID") %> In addition to HTML markup and data-binding syntax, templates can contain ASP.NET Web controls. For example, Listing 5.1 shows a DataList whose ItemTemplate contains an ASP.NET Button control, as well as some HTML markup and data-binding syntax. Listing 5.1 An ASP.NET Button Control Is Contained Within a DataList's ItemTemplate1: <%@ import Namespace="System.Data" %> 2: <%@ import Namespace="System.Data.SqlClient" %> 3: <script runat="server" language="VB"> 4: Sub Page_Load(sender as Object, e as EventArgs) 5: If Not Page.IsPostBack then 6: BindData() 7: End If 8: End Sub 9: 10: 11: Sub BindData() 12: '1. Create a connection 13: Const strConnString as String = "server=localhost;uid=sa;pwd=; database=pubs" 14: Dim objConn as New SqlConnection(strConnString) 15: 16: '2. Create a command object for the query 17: Const strSQL as String = "SELECT * FROM titles" 18: Dim objCmd as New SqlCommand(strSQL, objConn) 19: 20: objConn.Open() 'Open the connection 21: 22: 'Finally, specify the DataSource and call DataBind() 23: dlTitles.DataSource = objCmd.ExecuteReader(CommandBehavior.CloseConnection) 24: dlTitles.DataBind() 25: 26: objConn.Close() 'Close the connection 27: End Sub 28: </script> 29: 30: <form runat="server"> 31: <asp:DataList runat="server" > 32: <ItemTemplate> 33: <b>Title:</b> <%# DataBinder.Eval(Container.DataItem, "title") %> 34: <br /> 35: <asp:Button runat="server" 36: Text="View Book Details" /> 37: </ItemTemplate> 38: 39: <SeparatorTemplate> 40: <hr> 41: </SeparatorTemplate> 42: </asp:DataList> 43: </form> As with the ButtonColumn control that we examined in the previous chapter, when using a Button control within a data Web control's template, you must place the data Web control inside a Web form (see lines 30 and 43). This is because when the user clicks one of the Button controls, a postback is performed. NOTE Recall from Chapter 4, "Adding Buttons and Hyperlinks to the DataGrid Web Control," that a postback is when a form whose action parameter is set to the current page URL is submitted. It's referred to as a postback because the Web pages posts its data back to itself, as opposed to some other page. Because we want some server-side code to execute when the user clicks a DataGrid button, it is vital that the button click triggers a postback. Therefore, when using Button controls within a DataGrid, the DataGrid needs to be enclosed by a Web form. Currently the code in Listing 5.1 does nothing but display a list of titles from the titles table (line 33). Underneath each book title is a View Book Details button (lines 35 and 36). The SeparatorTemplate is a template that both the DataList and Repeater Web controls have at their disposal. This particular template dictates the content that should be placed between each ItemTemplate. In Listing 5.1, the SeparatorTemplate consists of a horizontal rule tag (<hr>) (line 40). Figure 5.1 depicts a screenshot of Listing 5.1 when viewed through a browser. Figure 5.1. An ASP.NET Button control is included in each row in the DataList. Recall that the DataGrid's ButtonColumn has a ButtonType property, which determines whether the ButtonColumn is rendered as a hyperlink or traditional HTML button. Unfortunately, the ASP.NET Button control does not contain such a property it always renders as a standard HTML button. If you want to create a hyperlink that has the same semantic behavior as the Button control, use the ASP.NET LinkButton control. Figure 5.2 shows what the user would see if we were to change lines 35 and 36 from Listing 5.1 to Figure 5.2. The LinkButton is rendered as a hyperlink. <asp:LinkButton runat="server" Text="View Book Details" /> Furthermore, ASP.NET ImageButtons can be used in place of the standard Button or LinkButton controls by changing lines 35 and 36 from Listing 5.1 to <asp:ImageButton runat="server" AlternateText="View Book Details" ImageUrl="details.gif" /> Again, the semantics of the DataList in Figures 5.2 and 5.3 is identical to that in Figure 5.1. The only difference is an aesthetic one: Figure 5.1 uses a Button control, which renders HTML buttons; Figure 5.2 uses a LinkButton control, which renders a hyperlink; and Figure 5.3 uses an ImageButton control, which renders an image tag. These three controls the Button, LinkButton, and ImageButton are referred to as command buttons. Figure 5.3. The ImageButton is rendered as an image tag. NOTE Listing 5.1 illustrates the use of a Button control inside the ItemTemplate of a DataList. However, we could have just as easily used a Repeater or DataGrid. Recall that to use templates within a DataGrid, you must use a TemplateColumn column type in the Columns tag. (Refer back to Listing 3.4 in Chapter 3, "Customizing the HTML Output," for an example of using TemplateColumns in a DataGrid.) Responding to the Clicking of a Command ButtonWhen a command button placed inside of a template is clicked, a postback occurs and the data Web control's ItemCommand event is fired. This scenario is identical to that of the DataGrid's ButtonColumn control. The similarities between using command buttons in templates and the DataGrid's ButtonColumn control do not end here. The command buttons contain a number of properties similar to that of the ButtonColumn control. For example, recall that if multiple ButtonColumns were used, the CommandName property could be set to uniquely identify each ButtonColumn. The command buttons contain a CommandName property as well, which serves the same purpose. NOTE Given the similarities between the DataGrid's ButtonColumn and the use of the ASP.NET Button and LinkButton controls in templates, you might not be surprised to learn that the DataGrid's ButtonColumn is actually rendered as an actual Button or DataGridLinkButton control, depending on the ButtonColumn's ButtonType property. (The DataGridLinkButton control extends the LinkButton control, hence it contains the same base properties and methods as the LinkButton.) Let's extend Listing 5.1, adding an event handler for the ItemCommand event and giving the View Book Details button a CommandName. Listing 5.2 contains these extensions. Listing 5.2 When a Command Button Is Clicked, the Data Web Control's ItemCommand Event Is Raised1: <%@ import Namespace="System.Data" %> 2: <%@ import Namespace="System.Data.SqlClient" %> 3: <script runat="server" language="VB"> 4: ' ... Page_Load and BindData have been removed for brevity ... 5: ' ... Consult Listing 5.1 for their details ... 6: 7: Sub dlTitles_ItemCommand(sender as Object, e as DataListCommandEventArgs) 8: If e.CommandName = "Details" then 9: ' The Details button has been clicked. 10: End If 11: End Sub 12: </script> 13: 14: <form runat="server"> 15: <asp:DataList runat="server" 16: OnItemCommand="dlTitles_ItemCommand"> 17: <ItemTemplate> 18: <b>Title:</b> <%# DataBinder.Eval(Container.DataItem, "title") %> 19: <br /> 20: [<asp:LinkButton runat="server" 21: Text="View Book Details" CommandName="Details" />] 22: </ItemTemplate> 23: 24: <SeparatorTemplate> <hr> </SeparatorTemplate> 25: </asp:DataList> 26: </form> As with the DataGrid's ButtonColumn class, to handle an event, we must first create an event handler. Lines 7 10 contain a suitable event handler named dlTitles_ItemCommand. Note its definition: Sub EventHandlerName(sender as Object, e as DataListCommandEventArgs) This is identical to the event handler we used for the DataGrid's ItemCommand event handler, save one important detail. With the DataList, the second parameter to the event handler is of type DataListCommandEventArgs, whereas with the DataGrid was of type DataGridCommandEventArgs. Not surprisingly, when writing an ItemCommand event handler for the Repeater control, the second parameter must be of type RepeaterCommandEventArgs. In the dlTitles_ItemCommand event handler, we simply check whether the item triggering the event is our View Book Details LinkButton control. Notice that we check the CommandName property of the DataListCommandEventArgs parameter (e) on line 8, and that on line 21 we specify that the LinkButton's CommandName property is Details. If the event was indeed triggered by the details button, we begin executing on line 9. (In the next code listing, we'll come back and insert some code starting at line 9, but for now let's just concentrate on the code needed to set up and handle the LinkButton's click.) The last step is an important one: wiring up the DataList's ItemCommand event to the dlTitles_ItemCommand event handler. As with the DataGrid, this is accomplished using OnItemCommand="EventHandlerName " in the DataList's declaration. (This is also the technique used when wiring up a Repeater's ItemCommand event to a suitable event handler.) Passing Along Primary Key InformationIn our example Listing 5.2, we need to be able to obtain the primary key field (title_id) of the book whose View Book Details button was clicked to retrieve the book's details. As we saw in Chapter 4, when dealing with the DataGrid and ButtonColumns, there are two ways to retrieve the clicked row's primary key field: using a hidden BoundColumn that contains the primary key information, or using the DataKeyField and DataKeys properties. When using the DataList and templates, the same two options for passing along primary key information exist you can store the primary key information in a hidden Web control in the template and then programmatically access its value in the ItemCommand event handler; or you can use the DataList's DataKeyField and DataKeys properties. Unfortunately, the Repeater control does not have the DataKeyField and DataKeys properties; therefore, if you're using the Repeater and need to pass along primary key information, you'll need to resort to hiding the information in hidden Web controls in the template. In addition to these two techniques, a third option exists. The command buttons contain a property called CommandArgument. This property is similar to the CommandName property in that it is also an optional string property. The two properties differ in that the CommandName is typically used to differentiate which command button was clicked in a given row, whereas the CommandArgument is typically used to differentiate which row of the data Web control had its command button clicked. This, understandably, might sound a bit confusing, but when we examine a code example utilizing the CommandName and CommandArgument properties, this confusion will hopefully clear up. As we've already examined how to use the DataKeyField and DataKeys properties (see the section "Using the DataKeyField Property and the DataKeys Collection to Pass Along a Primary Key Field" in Chapter 4), let's focus our attention on the other two approaches. In the next two sections, we'll look at how to use hidden Web controls in a template to pass primary key field information along, and then how to use the CommandArgument property to achieve the same ends. Storing Primary Key Field Information in a Hidden Web ControlIn this section we'll be examining how to determine the primary key field of a data Web control row that had a command button clicked. Specifically, we'll be looking at how to retrieve and display the selected book's details. For this example, let's use a Repeater control, because we've yet to show an example using these techniques for this control. First, we need to add a hidden Web control to the template that contains the primary key field from the Repeater's DataSource. To accomplish this, we'll use a Label Web control with its Visible property set to False. We'll then dynamically set the Label control's Text property to the primary key field using data-binding syntax. The following code snippet presents the Repeater declaration needed to hide the primary key field in a hidden Web control: <asp:Repeater runat="server" OnItemCommand="rptTitles_ItemCommand"> <ItemTemplate> ... markup and data binding syntax ... <asp:label Visible="False" runat="Server" Text='<%# DataBinder.Eval(Container.DataItem, "title_id") %>' /> </ItemTemplate> </asp:Repeater> Note that the Label control's Visible property is set to False, meaning that it won't be rendered into HTML like the other ItemTemplate contents. However, it is still programmatically accessible. The value of the Text property is set using data-binding syntax; specifically, it is assigned the value of the primary key field (title_id). NOTE When setting an ASP.NET Web control's property using data binding, you must delimit the data-binding expression with a single apostrophe ('), as opposed to the standard double apostrophe ("). All that remains now is to write the code for the Repeater's ItemCommand event handler, such that when it is fired we can determine the value of the primary key field of the row whose command button was clicked. Listing 5.3 shows how to accomplish this feat. Listing 5.3 The Hidden Web Control Can Be Programmatically Accessed in the ItemCommand Event Handler 1: <%@ import Namespace="System.Data" %> 2: <%@ import Namespace="System.Data.SqlClient" %> 3: <script runat="server" language="VB"> 4: ' ... Page_Load and BindData have been removed for brevity ... 5: ' ... Consult Listing 5.1 for their details ... 6: 7: Sub rptTitles_ItemCommand(sender As Object, e As RepeaterCommandEventArgs) 8: If e.CommandName = "Details" then 9: ' The details button has been clicked, find out the PK field value 10: ' First, create a variable to hold the appropriate Label control 11: Dim lc as Label = e.Item.FindControl("lblTitleID") 12: 13: 'Next, read the value of the Label control 14: Dim strTitleID as String = lc.Text 15: 16: ' ... code to retrieve / display the book details goes here ... 17: End If 18: End Sub 19: </script> 20: 21: <form runat="server"> 22: <asp:Repeater runat="server" 23: OnItemCommand=rptTitles_ItemCommand"> 24: <ItemTemplate> 25: <b>Title:</b> <%# DataBinder.Eval(Container.DataItem, "title") %> 26: <br /> 27: [<asp:LinkButton runat="server" 28: Text="View Book Details" CommandName="Details" />] 29: 30: <asp:label Visible="False" runat="Server" 31: Text='<%# DataBinder.Eval(Container.DataItem, "title_id") %>' /> 32: </ItemTemplate> 33: 34: <SeparatorTemplate> <hr> </SeparatorTemplate> 35: </asp:Repeater> 36: </form> Lines 11 through 14 of Listing 5.3 illustrates how to programmatically access the hidden Label control that is added to the template on lines 30 and 31. Our dlTitles_ItemCommand event handler begins by checking to see whether it was the View Book Details LinkButton that triggered the ItemCommand event (line 8). If that is the case, line 11 is reached next, which accesses the Label control. Here we simply create a local variable named lc of type Label. We then set it equal to the control returned by the FindControl method of the RepeaterItem returned by e.Item. Note that we pass the name of the control we want to retrieve into the FindControl method lblTitleID is the name of the hidden Label that stores the primary key field value (see line 30). After we have a reference to the Label control (lc), we can read its Text property (line 14) and store it in a variable (strTitleID). At this point, we will need to write the code to access the details information for a particular book and then display that information. We'll examine how to do this shortly, but for now, make sure that you understand how the value of the hidden Label control is programmatically accessed in the ItemCommand event handler. Finally, be sure to take note that the Repeater's ItemCommand event handler's second parameter is of type RepeaterCommandEventArgs. Recall that each data Web control has a unique signature for its ItemCommand event handler. NOTE The FindControl method is a method defined in the Control base class, meaning that every ASP.NET control has this method at its disposal. When using SomeControl. FindControl(ID ), the children controls of SomeControl are searched for a child control whose ID property matches the supplied ID input parameter. The RepeaterItem, which represents a "row" in the Repeater control, contains as children controls all the controls that appear in the template that was used to generate the row. For more information on the FindControl method, consult the resources in the "On the Web" section at the end of this chapter. Now that we have looked at how to programmatically retrieve the value of the hidden Label control, let's finish off this example by completing the ItemCommand event handler so that the book whose LinkButton was clicked has its details displayed. To accomplish this, we'll need to add a new function, GetBookDetails(TitleID ), which returns a SqlDataReader with the details for a particular book. The code for the completed example is shown in Listing 5.4, while a screenshot can be seen in Figure 5.4. Figure 5.4. The details for the selected book are displayed in a DataGrid. Listing 5.4 Clicking the Show Book Details Link Displays the Book's Details in a DataGrid 1: <%@ import Namespace="System.Data" %> 2: <%@ import Namespace="System.Data.SqlClient" %> 3: <script runat="server" language="VB"> 4: ' ... Page_Load and BindData have been removed for brevity ... 5: ' ... Consult Listing 5.1 for their details ... 6: 7: 8: Function GetBookDetails(TitleID as String) as SqlDataReader 9: '1. Create a connection 10: Const strConnString as String = "server=localhost;uid=sa;pwd=; database=pubs" 11: Dim objConn as New SqlConnection(strConnString) 12: 13: '2. Create a command object for the query 14: Dim strSQL as String 15: strSQL = "SELECT title, type, pubdate, notes FROM titles " & _ 16: "WHERE title_id = @TitleID" 17: Dim objCmd as New SqlCommand(strSQL, objConn) 18: 19: '3. Create a parameter for the TitleID param 20: Dim paramTitleID as SqlParameter 21: paramTitleID = New SqlParameter("@TitleID", SqlDbType.VarChar, 10) 22: paramTitleID.Value = TitleID 23: objCmd.Parameters.Add(paramTitleID) 24: 25: objConn.Open() 'Open the connection 26: 27: 'Finally, return the SqlDataReader 28: Return objCmd.ExecuteReader(CommandBehavior.CloseConnection) 29: End Function 30: 31: 32: Sub rptTitles_ItemCommand(sender As Object, e As RepeaterCommandEventArgs) 33: If e.CommandName = "Details" then 34: ' The details button has been clicked, find out the PK field value 35: ' First, create a variable to hold the appropriate Label control 36: Dim lc as Label = e.Item.FindControl("lblTitleID") 37: 38: 'Next, read the value of the Label control 39: Dim strTitleID as String = lc.Text 40: 41: ' Display the book's details 42: dgBookDetails.DataSource = GetBookDetails(strTitleID) 43: dgBookDetails.DataBind() 44: 45: ' Make sure the dgBookDetails DataGrid is Visible 46: dgBookDetails.Visible = True 47: End If 48: End Sub 49: </script> 50: 51: <form runat="server"> 52: <%-- The dgBookDetails DataGrid displays the details 53: for the selected book... --%> 54: <asp:DataGrid runat="server" 55: Font-Name="Verdana" HorizontalAlign="Center" 56: Visible="False" Width="85%"> 57: <HeaderStyle BackColor="Navy" ForeColor="White" 58: Font-Size="11pt" HorizontalAlign="Center" /> 59: 60: <ItemStyle BackColor="#eeeeee" Font-Size="9pt" /> 61: </asp:DataGrid> 62: <p> </p> 63: 64: <%-- The rptTitles Repeater displays all of the books --%> 65: <asp:Repeater runat="server" 66: OnItemCommand="rptTitles_ItemCommand"> 67: <ItemTemplate> 68: <b>Title:</b> <%# DataBinder.Eval(Container.DataItem, "title") %> 69: <br /> 70: [<asp:LinkButton runat="server" 71: Text="View Book Details" CommandName="Details" />] 72: 73: <asp:label Visible="False" runat="Server" 74: Text='<%# DataBinder.Eval(Container.DataItem, "title_id") %>' /> 75: </ItemTemplate> 76: 77: <SeparatorTemplate> <hr> </SeparatorTemplate> 78: </asp:Repeater> 79: </form> Whew! Listing 5.4 is a lengthy code sample (and I even omitted the code for the Page_Load event handler and BindData function!). Before we delve into what's new with the Listing 5.4, let's take a look at what's the same from Listing 5.3. First, the Repeater code (lines 65 through 78) has not changed one iota from Listing 5.3; furthermore, the rptTitles_ItemCommand event handler's first few lines (lines 32 through 39) are the same as they were in Listing 5.3 (lines 7 14). In the HTML section, a DataGrid control (lines 54 61) has been added. This DataGrid control (dgBookDetails) will be used to display the details about a particular book. Its declaration sets some display properties the Font, Width, HorizontalAlign, HeaderStyle, and ItemStyle properties as well as its Visible property, which is set to False (line 56). Because the Visible property is initially set to False, the dgBookDetails DataGrid won't be shown on the user's first visit to the page. The rptTitles_ItemCommand event handler has had a few lines added. Recall that in Listing 5.3, we had coded the rptTitles_ItemCommand event handler only up until the point where we retrieved the book's title_id from the hidden Label Web control. In Listing 5.4 (lines 41 through 46), we complete the code for this event handler by passing the retrieved title_id to the GetBookDetails(TitleID ) function (lines 8 29). The GetBookDetails(TitleID ) function returns a SqlDataReader that contains the title, type, pubdate, and notes fields from the titles table for the particular book. This returned SqlDataReader is specified as the dgBookDetails DataSource (line 42). The DataBind() method is then called, and the DataGrid's Visible property is set to True, so that the book details' DataGrid is displayed. Storing Primary Key Field Information in the CommandArgument PropertyNow that we have examined how to pass along primary key field information through hidden Web controls, let's look at a more elegant solution: using the CommandArgument property. To store primary key field information in this property, we simply need to set the command button's CommandArgument property equal to the primary key field of the DataSource. We can accomplish this by using the same data-binding syntax used in Listing 5.4 (line 74), where we set the Text property of the hidden Label control to the title_id field of the DataSource. To apply the CommandArgument technique to our book details example, we'd start by specifying the CommandArgument of our command button like so: <ItemTemplate> <b>Title:</b> <%# DataBinder.Eval(Container.DataItem, "title") %> <br /> [<asp:LinkButton runat="server" Text="View Book Details" CommandName="Details" CommandArgument='<%# DataBinder.Eval(Container.DataItem, "title_id") %>' />] </ItemTemplate> Then, in our ItemCommand event handler, we can reference this primary key field value by simply accessing the CommandArgument parameter of the second parameter to the event handler (which is either of type DataGridCommandEventHandler, DataListCommandEventHandler, or RepeaterCommandEventHandler, depending on what data Web control is being used). Listing 5.5 illustrates how to pass along and read the primary key field information using the LinkButton's CommandArgument property. In this example, we use a DataGrid's TemplateColumn to display the list of books, as opposed to using a Repeater or DataList. Listing 5.5 The LinkButton's CommandArgument Property Is Used to Pass on the Primary Key Field Information1: <%@ import Namespace="System.Data" %> 2: <%@ import Namespace="System.Data.SqlClient" %> 3: <script runat="server" language="VB"> 4: ' ... Page_Load and BindData have been removed for brevity ... 5: ' ... Consult Listing 5.1 for their details ... 6: 7: ' ... For the GetBookDetails function, see Listing 5.4 ... 8: 9: 10: Sub dgTitles_ItemCommand(sender As Object, e As DataGridCommandEventArgs) 11: If e.CommandName = "Details" then 12: ' The details button has been clicked, find out the PK field value 13: Dim strTitleID as String = e.CommandArgument 14: 15: ' Display the book's details 16: dgBookDetails.DataSource = GetBookDetails(strTitleID) 17: dgBookDetails.DataBind() 18: 19: ' Make sure the dgBookDetails DataGrid is Visible 20: dgBookDetails.Visible = True 21: End If 22: End Sub 23: </script> 24: 25: <form runat="server"> 26: <%-- The dgBookDetails DataGrid displays the details 27: for the selected book... --%> 28: <asp:DataGrid runat="server" 29: Font-Name="Verdana" HorizontalAlign="Center" 30: Visible="False" Width="85%"> 31: <HeaderStyle BackColor="Navy" ForeColor="White" 32: Font-Size="11pt" HorizontalAlign="Center" /> 33: 34: <ItemStyle BackColor="#eeeeee" Font-Size="9pt" /> 35: </asp:DataGrid> 36: <p> </p> 37: 38: <%-- The dgTitles DataGrid displays all of the books --%> 39: <asp:DataGrid runat="server" 40: OnItemCommand="dgTitles_ItemCommand" 41: AutoGenerateColumns="False" ShowHeader="False"> 42: <Columns> 43: <asp:TemplateColumn> 44: <ItemTemplate> 45: <b>Title:</b> 46: <%# DataBinder.Eval(Container.DataItem, "title") %> 47: <br /> 48: [<asp:LinkButton runat="server" 49: Text="View Book Details" CommandName="Details" 50: CommandArgument='<%# DataBinder.Eval(Container.DataItem, "title_id") %>' />] 51: </ItemTemplate> 52: </asp:TemplateColumn> 53: </Columns> 54: </asp:DataGrid> 55: </form> The key lines in Listing 5.5 are the setting of the LinkButton's CommandArgument property on line 50 and the use of the CommandArgument property of the DataGridCommandEventArg variable e in the dgTitles_ItemCommand event handler on line 13. Figure 5.5 shows a screenshot of Listing 5.5 when viewed through a browser. Figure 5.5. The CommandArgument property can be used to pass along primary key field information. Deciding Which Method to Use to Pass Primary Key Field InformationRecall that by placing command buttons in templates, there are three ways to pass primary key field information:
Which method is the best? Personally, I find the DataKeyField and DataKeys approach to be the most natural option. Of course, this is only an option if you are using the DataGrid or DataList controls; even then, as you'll recall from Chapter 4, the DataKeyField and DataKeys approach only works with simple, single-field primary keys. Similarly, the CommandArgument approach does not naturally work for composite primary keys. Although you could programmatically set the CommandArgument property to contain multiple primary key fields in an ItemDataBound event handler, it would require some complicated programming. The hidden Web controls approach grants you the most flexibility in passing along data, but is clearly the most complicated and non-natural approach. Ideally, try to use the DataKeyField and DataKeys properties, if possible. |

EAN: 2147483647
Pages: 111