The Repeater Control
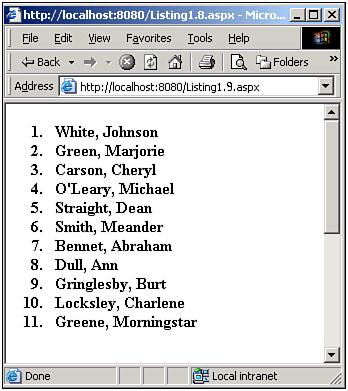
| As we have seen, the DataGrid and DataList, when viewed through a browser, are rendered as HTML table tags. The DataGrid imposes a grid, with one row for each row in the DataSource, and one column for each field in the DataSource. The DataList, on the other hand, provides a more flexible structure, allowing the developer to specify the HTML markup and data from the DataSource that should appear in each table row. The Repeater control contains templates like the DataList, but does not place the templates in an HTML table. Absolutely no additional HTML markup is added when using the Repeater. If you want your data to exist in a table, you need to explicitly provide the opening and closing HTML table tags, as well as the other associated table tags (tr, td, th, and so on). An example should clear up any confusion. First, let's look at mimicking the behavior of the DataList using a Repeater. Recall that the DataList automatically adds a table tag, and then a tr and a specified number of td tags for each row in the DataSource. Using the Repeater control, our ItemTemplate will be identical to the one in Listings 1.5 and 1.7. However, we must also supply a HeaderTemplate and FooterTemplate template, which will be used to emit the table, tr, and td tags. Listing 1.8 demonstrates the use of the Repeater. Listing 1.8 Using a Repeater to Mimic the Output of a DataList[View full width] 1: <%@ import Namespace="System.Data" %> 2: <%@ import Namespace="System.Data.SqlClient" %> 3: <script runat="server"> 4: 5: Sub Page_Load(sender as Object, e as EventArgs) 6: 7: ... Code the same from previous listings. Omitted for brevity ... 8: 9: 'Finally, specify the DataSource and call DataBind() 10: rptAuthors.DataSource = objDS 11: rptAuthors.DataBind() 12: End Sub 13: 14: </script> 15: 16: <asp:repeater runat="server"> 17: <HeaderTemplate> 18: <table cellspacing="0" border="0" style="border-collapse: collapse; The HTML output of Listing 1.8 is identical to that of the DataList example in Listing 1.5, and can be seen in Listing 1.6; to view a screenshot of the this code, refer to Figure 1.3. Notice that Listing 1.8 contains the entire HTML markup that was produced for us automatically by the DataList. The HeaderTemplate, which is rendered once when the data binding begins, simply emits the HTML table tag. The ItemTemplate, which is rendered for each row in the DataSource, emits an HTML table row with a single column, and with the last and first name of the current author. Finally, the FooterTemplate, which is rendered once at the end of the data binding process, emits the closing table tag. Using the Repeater control to display data in an HTML table is pretty silly, because there are already two fine data Web controls that do just that. You will more often use the Repeater to list data in ways that do not involve HTML tables, such as in an ordered list, perhaps. Listing 1.9 provides an alternative Repeater declaration that lists the authors in an ordered list. A screenshot of Listing 1.9 can be seen in Figure 1.5. Figure 1.5. A list of authors is presented as an ordered list. Listing 1.9 Repeaters Can Be Used to Produce Ordered Lists1: <asp:repeater runat="server"> 2: <HeaderTemplate> 3 : <ol> 4: </HeaderTemplate> 5: 6: <ItemTemplate> 7: <li><b><%# DataBinder.Eval(Container.DataItem, "au_lname") %>, 8: <%# DataBinder.Eval(Container.DataItem, "au_fname") %></b></li> 9: </ItemTemplate> 10: 11: <FooterTemplate> 12: </ol> 13: </FooterTemplate> 14: </asp:repeater> Although the Repeater allows the most flexibility in the emitted HTML, it also has the fewest bells and whistles. The Repeater control lacks inherent support for pagination, sorting, and editing, features the DataGrid and DataList have. Of course, this extra functionality can be added to an ASP.NET page that uses a Repeater control, but requires much additional coding. Now that we've taken a quick look at the three data Web controls, let's take a moment to examine some real-world applications and determine which of the data Web controls would be the best fit. |
EAN: 2147483647
Pages: 111