Performing Basic Windows Configuration
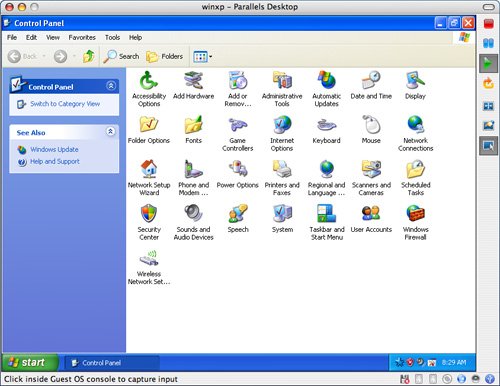
| Just like Mac OS X, Windows XP enables you to configure many different aspects of the operating system to suit your preferences. However, because you are running Windows in a virtual machine, a number of the configuration options simply don't apply because they are controlled by the Mac OS. That's because Windows is really running as just another application under the control of Mac OS X. Prime examples of this are the energy-saving options available under Windows. Because you are running Windows as a Mac application, the energy-saving settings of Mac OS apply because they control the Mac hardware. Still, there are a number of configuration options you'll want to set in the virtual Windows environment. Windows uses the Control Panel to perform system configuration. To open and configure the Control Panel, do the following:
In the following sections, you'll learn about some of the more important control panels that you are likely to need to use. Adding and Removing SoftwareDespite its name, the Add or Remove Programs control panel is typically used more frequently to remove applications installed under Windows than it is to install them. That's because most Windows applications come with an installer application that installs the application for you so you don't need to use the control panel to do so (you'll see an example of this a little later in this chapter). However, you should always use this control panel to remove applications from Windows. When most Windows applications are installed, multiple files are installed in various locations and the core OS is often changed. Using the remove function of this control panel will give you the best chance to uninstall an application, removing its associated files, and undoing system changes that were made when the application was installed. When you open the Add or Remove Programs control panel, it will generate a list of all the applications installed under Windows and present them in the right part of the panel (see Figure 8.3). Figure 8.3. There aren't many Windows applications installed in this virtual environment yet.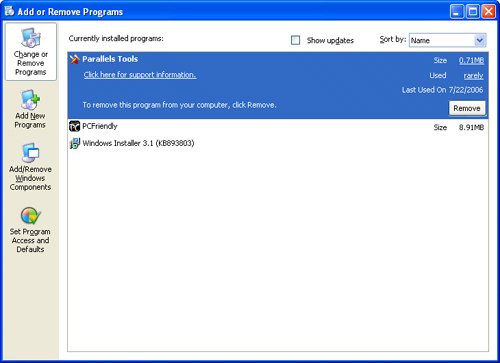 Along the left side of the panel are buttons that change the mode in which the panel is operating. These are as follows:
To remove an application from Windows, select the Change or Remove Programs option. Then select the application you want to remove. Information about your usage of the application will appear on the right side of the window along with the date on which you installed it (see Figure 8.4). To remove the application, click Remove. The appropriate uninstaller application will launch and, hopefully, will remove the application and all of its components. Figure 8.4. I use the Mac to watch DVDs, so there's no need to keep the PCFriendly application; clicking the Change/Remove button will get rid of it.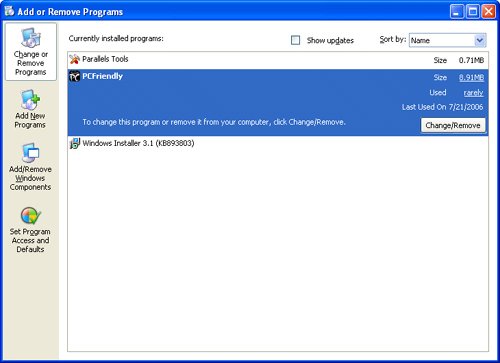 As you explore Windows, you'll probably add quite a few applications to it. Remember to periodically visit this control panel and remove any applications that you don't use to keep the size of the Windows disk image file down. Configuring Automatic UpdatesWindows is subject to constant attacks of various kinds. Microsoft regularly releases updates to Windows, most of which are to correct a security problem. Use the Automatic Updates control panel to configure how you want these updates to be handled. When you open the Automatic Updates control panel, you'll see the following choices:
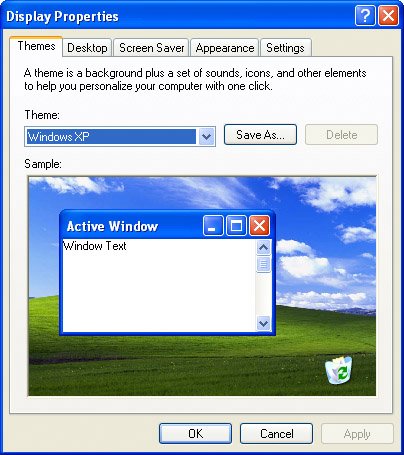
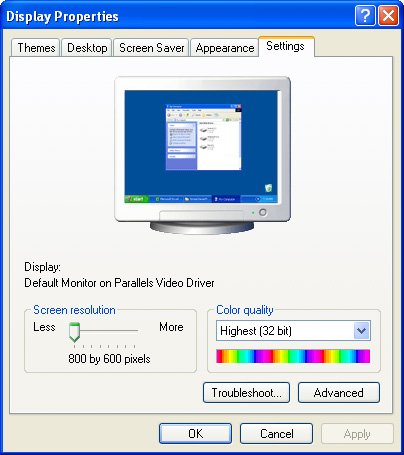
For any of the automatic options to work, your Windows system must be running and be able to connect to the Internet. Because you are running Windows as a Mac application, you'll probably not have it running all the time. So, if you run Windows infrequently, you'll also want to check for updates manually. You can do this by clicking the Windows Update website link on the Automatic Updates control panel. Setting the Windows Date and TimeIf you've installed Parallels Tools and enabled the Time Synchronization function, you don't need to worry about the date and time settings because the Windows environment will take these settings from the Mac OS. If you haven't done this, you definitely should (refer to the two previous chapters for information about the Parallels Tools software). Configuring the Windows DisplayThe Windows Display Properties control panel enables you to configure various display settings, including resolution, desktop picture, and so on (see Figure 8.5). Figure 8.5. The Settings tab of the Display Properties control panel enables you configure the display's resolution. The Display Properties control panel has the following tabs:
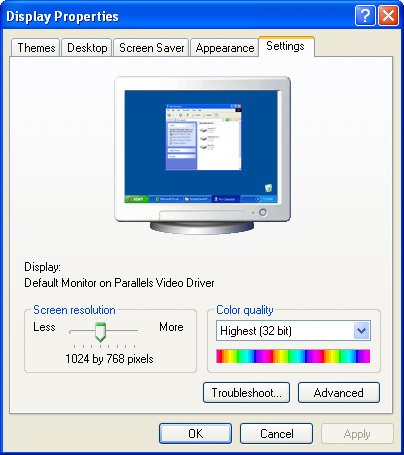
Windows running in a VM uses the Mac's display settings and when you open the Settings tab of the Display Properties control panel, you'll see that the selected display is called "Default Monitor on Parallels Video Driver" (refer to Figure 8.5). The display Windows is using is a virtual display (the hardware display is whatever your Mac is using). How the screen resolution setting affects your Windows view depends on the mode in which you are operating: Windowed or Fullscreen. When you are operating in Windowed mode, the Screen Resolution setting controls the size of the VM's window. If you increase the resolution beyond what can be displayed on your Mac's desktop, you'll lose access to the toolbar and other window controls (see Figure 8.6). If this happens, just open the Settings tab and move the slider to the left to reduce the size of the Parallels Desktop for Mac window until it fits on the desktop again. Figure 8.6. If this Mac is using a 1024x768 resolution or less, the full parallels desktop for Mac wouldn't be visible. Note Many Windows control panels have OK and Apply buttons. OK saves your changes and closes the control panel. Apply saves your changes, but leaves the control panel open. When you are in Fullscreen mode, the Screen Resolution slider controls the resolution of the Windows desktop as it would were you running Windows on a Windows PC. Be aware that the screen resolution you set will be in effect in both modes. So, if you set the resolution to be fairly small, when you move to Fullscreen mode, the Windows environment might not even fill the desktop. You can use the Desktop Properties control panel to increase its resolution until it does. You're likely to use Windows in one mode or the other more frequently. Set the resolution for that mode and you'll be able to work around it or change the display resolution as needed. There are also two Parallels Desktop for Mac preferences that affect how the two resolutions (Mac OS X and Windows) influence each other when you work with the Fullscreen mode (see "Setting Parallels Desktop for Mac Preferences" in Chapter 7, "Controlling and Configuring a Windows Virtual Machine," for the details). Tip Most Intel Macs support dual monitor display. If you have two displays connected to your Mac, you can display the Windows environment in Fullscreen mode on one display and Mac OS X on the other. This is an ideal situation because you basically are running each OS on its own display. Move the Parallels Desktop for Mac to one of your displays and then enter the Fullscreen mode. You'll have Windows on one display and Mac OS X on the other. This makes it really easy to use both operating systems at the same time. Configuring the Keyboard for a Windows VMThe Keyboard Properties control panel enables you to set basic properties of the keyboard you are using, such as repeat delay, repeat rate, and the cursor blink rate. Use the respective sliders to configure these properties of the keyboard you are using. Configuring the Mouse/Trackpad for a Windows VMThe Mouse Properties control panel also has a number of tabs, which are as follows:
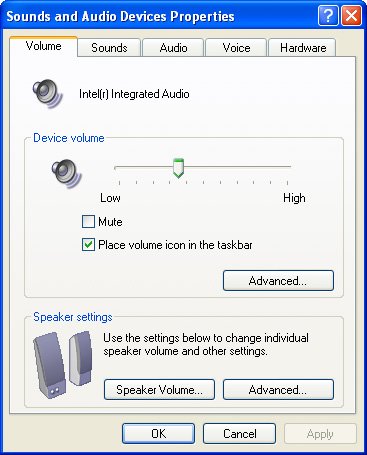
Configuring Sounds Under a Windows VMThe Sounds and Audio Devices Properties control panel enables you to configure various audio settings (see Figure 8.7). Figure 8.7. The Volume tab of the Sounds and Audio Devices Properties control panel enables you to set the current volume level and to choose a speaker configuration. The tabs of this control panel are as follows:
Tip You can mute the sound from the Windows environment by clicking the Speaker icon located in the Status bar in the bottom-right corner of the Parallels Desktop for Mac window and choosing Mute. Configuring the Taskbar and Start MenuThe Windows taskbar is a very important element of the OS because it provides information to you and enables you to control the system by choosing files or applications to open, managing open applications, and so on. The Start menu is also important because you can use it to quickly navigate to just about anything on the Windows partition of the computer. You can configure various properties of these elements with the Taskbar and Start Menu Properties control panel (see Figure 8.8). Figure 8.8. Use the Taskbar tab of the Taskbar and Start Menu Properties control panel to determine how your Windows taskbar looks and works. On the Taskbar tab, you'll find the following options:
Use the Start menu tab to customize your Start menu. There are two basic options. Click the Start Menu radio button to use the standard XP Start menu. Click the Classic Start Menu radio button to use the Start menu from older versions of Windows. After you've selected a Start menu configuration, use the Customize button to configure it. For example, you can choose specific applications (such as your web browser) and folders to include on the menu. Configuring Windows User AccountsLike Mac OS X, Windows XP supports multiple user accounts. When you installed Windows, you created at least one user account, and might have created more than one. Access the User Accounts Properties control panel to set up more user accounts and to configure the user accounts that have been created (see Figure 8.9). For example, you can click the Create a New Account link to create new user accounts. Or, you can click the Change an Account link to reconfigure an existing account. Most user account tasks are accomplished by clicking the link for the action you want to complete and then filling in any required information. Figure 8.9. If you'll be sharing a virtual Windows on your Mac, you can create multiple user accounts for others to use.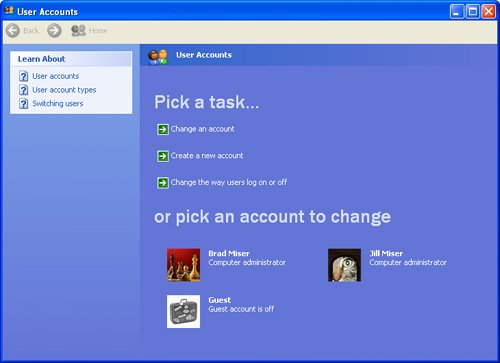 |

EAN: N/A
Pages: 58
- Enterprise Application Integration: New Solutions for a Solved Problem or a Challenging Research Field?
- The Effects of an Enterprise Resource Planning System (ERP) Implementation on Job Characteristics – A Study using the Hackman and Oldham Job Characteristics Model
- Distributed Data Warehouse for Geo-spatial Services
- Intrinsic and Contextual Data Quality: The Effect of Media and Personal Involvement
- Relevance and Micro-Relevance for the Professional as Determinants of IT-Diffusion and IT-Use in Healthcare