Creating a New Outline
3 4
Creating a new outline in Word is a simple matter. If you're just starting a document, simply click the Outline View button to the left of the horizontal scroll bar. Follow these steps to start the new outline:
- Type the text for your heading. The heading is automatically formatted in the Heading 1 style.
- Press Enter. The insertion point moves to the next line in the outline.
- To create a sublevel, click Demote on the Outlining toolbar. Word indents the insertion point and changes the first outline symbol (-) to a plus (+) symbol, indicating that the heading level now has a subordinate entry. Type the text for that entry.
- Press Enter to move to the next line in your outline. By default, Word creates the same level heading as the heading you last entered. If you want to create another sublevel, click Demote.
- To raise an entry one heading level, click the Promote button. If you want to move all the way out to the left margin and create a Heading 1 outline level, click the Promote To Heading 1 button.
- Continue typing entries until your outline is completed. Figure 11-4 shows a sample outline with multiple outline levels.
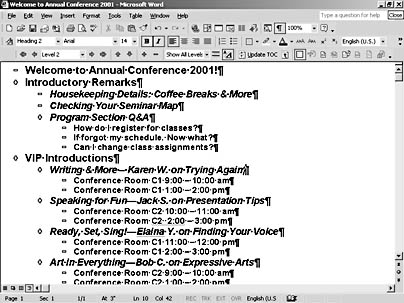
Figure 11-4. Outlining is a simple matter of identifying key topics in
your document, naming them, and ordering them the way you want them.
Tip - Change the look of Heading 1
It's true that you must have your headings formatted in the styles Word will recognize—Heading 1, Heading 2, or Heading 3—in order for them to act and display properly in the Outline window, but you do have the choice of creating the styles you like for those headings. You can use the Reveal Formatting task pane to change the formatting choices for those styles and save the changes in the current document. You can also have Word automatically make the changes to all similar heading styles in your document. For more information on using the Reveal Formatting task pane to format headings easily, see Chapter 6, "Putting Text Tools to Work."
Caution
In some instances, you might want to use the Tab key not to indent a heading level in your outline but to actually insert a Tab character between words. When you want to insert a tab as a tab in your outline, press Ctrl+Tab instead.
EAN: 2147483647
Pages: 337