Understanding Styles
3 4
In Word, the term style refers to a collection of formatting commands that are grouped together and given a name. To apply a style, you simply select the text you want to format (or position the insertion point in a new paragraph where you want the formatting to begin when you enter text) and then select a style from the Style drop-down list on the Formatting toolbar—all with a single click instead of many. When you apply a style, all the formatting settings contained in the style are applied at once. In Word 2002, styles come in four types:
- Paragraph affects all the properties associated with a paragraph's appearance, such as text alignment, tab stops, line spacing, borders, and shading. Paragraph styles can include character formatting.
- Character formats selected text within a paragraph, including properties such as font, size, boldface, italic, and underlining.
- new feature! Table gives a uniform appearance to table borders, colors, shading, alignment, and fonts.
- new feature! List affects alignment, numbering or bullet components, and fonts used within lists.
Note
Prior to Word 2002, you could create and use only two types of styles: paragraph and character. The table and list styles are new additions to the style scene.
You create, use, and modify the four types of styles in the same basic manner, and you can access all style types in the Styles And Formatting task pane, the Style drop-down list on the Formatting toolbar, and the Style dialog box. But before you start customizing your documents using homegrown styles, you should take a look at the sizable collection of built-in styles provided with Word, described next.
Working with Word's Default Styles
As you probably know, Word uses the Normal.dot template to create new documents, and you use the Normal default style when you start entering text in a new, blank document. (By default, the Normal style settings are Times New Roman, 12 point, left aligned, single spaced.) The Normal.dot template includes over 110 built-in styles, including paragraph, character, list, and table styles. Five of the most widely used built-in styles also have keyboard shortcuts. Two additional keyboard shortcuts let you promote and demote headings by one level. Table 10-1 summarizes these built-in style-related keyboard shortcuts.
Note
Remember, a template, such as Normal.dot, is a document that contains the formatting settings and other layout components used within a document, including styles, standard (or boilerplate) text, graphics, page components, and so forth. For more information about templates, see Chapter 22, "Formatting Documents Using Templates, Wizards, and Add-Ins."
Table 10-1. Built-In Style-Related Keyboard Shortcuts
| Style | Keyboard shortcut |
|---|---|
Normal | Ctrl+Shift+N |
List Bullet | Ctrl+Shift+L |
Heading 1 | Ctrl+Alt+1 |
Heading 2 | Ctrl+Altl+2 |
Heading 3 | Ctrl+Alt+3 |
Demotes Heading Level | Alt+Shift+Right Arrow |
Promotes Heading Level | Alt+Shift+Left Arrow |
For more information about creating a keyboard shortcut for any style, see "Assigning Keyboard Shortcuts to Styles."
When you work in a Word document, the default styles are available for you to use and customize. You can opt to use only the default styles (which are effective, albeit a bit conservative), customize existing styles on a document-by-document basis, create custom styles from scratch and save them in the document or in a custom template, or customize the Normal.dot template if you want the changes to appear in all new documents. We'll look at each of these alternatives in the following sections.
Getting to Know the New Styles And Formatting Task Pane
In this version of Word, you can view available styles in three places: the Style drop-down list on the Formatting toolbar, the Style dialog box (accessed by double-clicking a style name in the Style Area or by clicking Styles in the Format Settings dialog box), and the new Style And Formatting task pane. The Style drop-down list and the Style dialog box are familiar tools that have been around for a few versions of Word. Their functionality remains fairly consistent with earlier versions of Word, although the Style dialog box has had a minor face-lift to make working with the options easier, as shown in Figure 10-1.
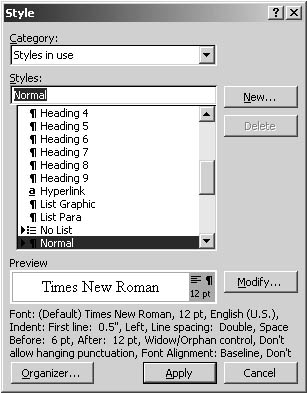
Figure 10-1. The Style dialog box has been slightly revamped to more clearly show sample text style, eliminating the Paragraph Preview section used in Word 2000.
On the other hand, the Styles And Formatting task pane, shown in Figure 10-2, is a completely new feature in Word 2002, and it's designed to make using, creating, and modifying styles easier and more intuitive than ever. In fact, the Styles And Formatting task pane makes working with styles so convenient that it might significantly weaken the barriers many users have erected concerning styles.
To open the Styles And Formatting task pane, click the Styles And Formatting button on the Formatting toolbar (to the left of the Style drop-down list), or if your task pane is open, click the task pane's drop-down arrow and choose Styles And Formatting. The Styles And Formatting task pane contains the following elements:
- Formatting Of Selected Text drop-down list displays the style of the current paragraph or selected text.
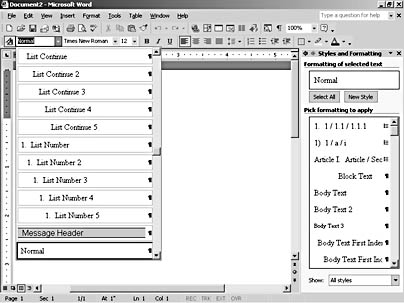
Figure 10-2. The Style drop-down list provides quick access to available styles, and the Styles And Formatting task pane displays style names with their associated formatting.
- Select All button selects all instances of the current style, as indicated in the Formatting Of Selected Text drop-down list as well as in the Style drop-down list on the Formatting toolbar.
- New Style button opens the New Style dialog box, where you can create and modify styles and templates. (The New Style dialog box is discussed in detail in the section "Creating New Styles.")
- Pick Formatting To Apply list displays a list of styles, as specified in the Show drop-down list. Most styles are accompanied by a symbol to the right of the style name. The symbols identify the style type—character, paragraph, list, or table. If no symbol appears next to a list item, the item represents a formatting combination, used within the document, that hasn't been named and saved as a style.
- Show drop-down list enables you to specify which styles are displayed in the Pick Formatting To Apply list and in the Style drop-down list on the Formatting toolbar. You can choose Available Formatting, Formatting In Use, Available Styles, All Styles, or Custom.
Tip - Display all built-in Word styles
When you first open a blank document in Word 2002, the Styles And Formatting task pane and Style drop-down list show only four built-in styles: Heading 1, Heading 2, Heading 3, and Normal. To show all the built-in Word styles in the Styles And Formatting task pane and in the Styles drop-down list, select All Styles in the Show drop-down list in the Styles And Formatting task pane.
Customizing the Style List in the Styles And Formatting Task Pane
You can temporarily customize the Styles And Formatting task pane by selecting Custom in the Show drop-down list. When you select Custom, the Format Settings dialog box opens, as shown in Figure 10-3.
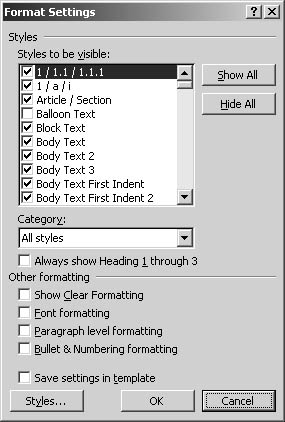
Figure 10-3. The Format Settings dialog box enables you to control which styles display in the Styles And Formatting task pane.
In the Format Settings dialog box, you can specify which styles will be displayed by selecting a style category and then selecting check boxes in the Styles To Be Visible list. You can configure additional settings in the Other Formatting section, including the Show Clear Formatting option, which adds the Clear Formatting option to the Style list. The Clear Formatting option is discussed in the section "Clearing Formatting from Selected Text."
Finally, you can customize the Style And Formatting task pane view for all documents that use the template that's attached to the current document. To do so, select the styles you want to make visible, choose the Save Settings In Template check box, and click OK. Word will automatically display the selected styles in the Style And Formatting task pane for the current document as well as future documents created using the same template. Nicely enough, you can change which styles display at any time by revisiting the Format Settings dialog box.
Configuring the Width of the Style Area
Often you'll find it convenient to view applied styles while you work. For example, you might want to verify that you're properly applying a defined set of styles, or you might need to differentiate between styles with similar appearances. When you view styles as you work, you can easily distinguish which styles are applied to which paragraphs because Word displays each paragraph's style name in the Style Area.
To display styles while you work, first make sure that you're in Normal or Outline view, and then configure the Style Area Width display setting. By default, Style Area Width is set to 0 inches, so it is hidden from view. To increase the width of the Style Area, follow these steps:
- Choose Tools, Options, and click the View tab.
- In the Styles Area Width box near the bottom of the View tab, type an appropriate value. Figure 10-4 shows the result of specifying a Style Area Width of 1 inch.
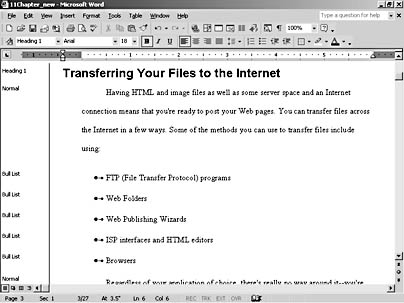
Figure 10-4. The Style Area identifies each paragraph's style in an adjustable-width column located to the left of a document's content.
After you display the Style Area, you can change its width by dragging the border left or right. You can select a paragraph (or paragraphs) in your document by clicking the paragraph's style name in the Style Area, and you can access the Style dialog box by double-clicking a style name. To hide the Style Area, either drag the border all the way to the left or change the Style Width Area setting on the View tab to 0.
EAN: 2147483647
Pages: 337