Creating a Basic Form
3 4
Forms enable you to create interactive documents that call for more information from readers. You can create a fill-in-the-blanks form, with text boxes, check boxes, and drop-down lists. You can create tables for your forms and use all standard Word elements, such as borders, shading, columns, background designs, graphics, and more.
Planning the Form
A good form requires some thought. What types of information do you want to capture? How long or short should the form be? What types of questions will you ask? Your answers to these and other questions will give you what you need to build a form that does what you intend it to do. Consider these issues as you plan:
- The shorter the better. Who likes to be held captive by a long form with seemingly endless questions? Forms that ask too many questions—or that won't let you proceed to the next application until you finish this one—can be a real turnoff for readers. Try to keep your form short, and limit the questions to those that ask the items you most need to know, in the order you need to know them.
- Make it simple. If you make your form easy for readers to understand and follow, with questions that are clear and to the point, you'll get a better response to your questions than if your form is complex and congested. Be concise and careful in your wording, and provide prompts and Help text where necessary, to explain to readers what you want them to do.
- Order counts. Readers will expect some kind of logical structure to your form. You might move from general questions to more specific questions, or you might follow a process. For example, if you're creating a customer response form that asks visitors to your Web site to evaluate their online shopping experience with your company, you might ask questions about their computer equipment and access, their ability to access your site, their experience using your site, how effective they feel your ordering system is, what they felt about your sales security, and how they would like to be notified when their order is shipped.
- Invite suggestions. Before you deploy your form for wide use, do a few tests to see how effective it is. Ask coworkers or a few customers to use the form and evaluate it. You can then make any necessary changes and incorporate suggestions to improve the form.
Starting a Form with an Existing Document
If you have a document you've used for other things—perhaps a questionnaire or interview sheet you've previously printed and handed out—you can easily turn the document into an interactive form. To use an existing document, follow these basic steps:
- Open the document you'd like to use as a form.
- Delete any unnecessary information, and add text if needed.
- Apply the styles and formats you want to use, complete with borders and shading as needed.
- In the spots where you want users to add information, add spaces or placeholder characters (such as * or &).
- Choose File, Save As, and save the form as a template.
Note
If you want to edit the form later, be sure to open the template and not the document. To make sure you're opening a template, choose File, Open, and in the Files Of Type field, select Document Templates.
Creating Your Own Form
You can create a form by starting with a new Word document and building your own. You might want to use a table to help provide the basic structure of the form; it'll make it easier for users to move from field to field by pressing Tab, and it helps provide an organized look for the document. (See Figure 36-8.)
When you're creating your own form, you can add, modify, and enhance text and graphics just as you would a regular text document. For example, you might want to do the following things:
- Include your company logo in the form heading
- Use styles to format headings and body text
- Select a Table AutoFormat to apply a predesigned look to your form
- Use the Draw Table button in the Tables And Borders toolbar to customize the way you draw lines for rows and columns
- Add shading to highlight certain sections of your form
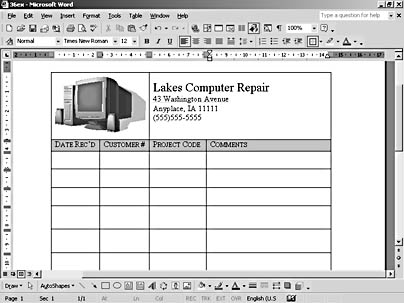
Figure 36-8. You can create a simple form quickly by using a Word table.
Tip - Save your form as a template
After you design your form the way you want it, remember to save it as a template so you can use it to build the interactive features that will capture the data for you. To save the file as a template, click File, Save As, and navigate to the folder in which you want to store the file. Click the Save As Type down arrow, and choose Document Template. Enter a name for the template in the File name box, and click Save.
Choosing a Form Template on the Web
Word also makes form templates available on the Web so that you can download existing forms and modify them to suit your needs. To find the form templates on line, follow these steps:
- Establish your Internet connection.
- Choose File, New. The New Document task pane appears.
- Click the Templates On Microsoft.com link. Your Web browser opens and displays the Microsoft Office Template Gallery, where you can find and download the templates you want to use.
- In the Browse By Category section, click the Business Forms hyperlink and browse the various forms available.
- Close your Web browser after you've finished downloading new forms.
Working with the Forms Toolbar
You'll use the Forms toolbar to create and add form fields to your form. To display the toolbar, choose View, Toolbars, Forms. Table 36-3 describes the different functions of the Forms buttons.
Table 36-3. The Forms Toolbar
| Button | Name | Description |
|---|---|---|
| Edit Box | Adds a text field at the insertion point so users can enter information |
| Check Box | Inserts a check box field in the document at the insertion point |
| Combo Box | Enables users to display a drop-down list of choices |
| Properties | Displays form field settings after a field has been added to the form |
| Draw Table | Opens the Tables And Borders toolbar so that you can add tables and table elements to the form |
| Insert Table | Lets you create a table with a selected number of rows and columns |
| Frame | Adds a floating frame on the form |
| Show Field Shading | Works as a toggle to display and hide shading for text, check boxes, and drop-down fields |
| Reset Form Fields | Resets form fields to their default settings |
| Protect Form | Works as a toggle to protect and unprotect parts of the form or the entire form |


Note
Here's a quirk you might discover as you begin to create forms with Word. On the Forms toolbar, the name of the buttons may not seem to match the actual name of the tool you're using. For example, a combo box, which is the type of field that allows you to create a field that offers a combination of choices, is created with the Drop Down Form Field button.
Form Terminology
If you're creating a form for the first time, you might see some terms that are new to you. Here's a quick introduction to form terms and phrases:
- Control is an item you use on the form, such as a text box, check box, scroll bar, or command button. The item is called a control because it enables you to control the form by making selections or adding information.
- Form fields are the data receptacles into which you enter data. One form field, for example, might be Customer Name, which enables you to enter each customer's name on the form.
- Property is a characteristic of an object, such as the color, size, location, or display of an item.
EAN: 2147483647
Pages: 337