Creating Multiple-Column Listings
| Now that you've gotten a taste for working with multiple columns in part of the item listing, let's use that same approach to divide the entire listing into multiple columns. Template 8.3. Two Equal Columns with Centered Title and TOS In this template, we've simply split the listing into two vertical halves, as shown in Figure 8.3. Each half has a mix of text and pictures, alternating one and the other. The title and TOS span both columns, at the top and the bottom of the listing, respectively. Figure 8.3. Using two columns to position text and pictures on a 2 x 2 grid in the middle of the listing. Technically, what we're dealing with here is a table with four rows and two columns. The first and last row (title and TOS) span across the two columns; the two middle rows are both divided in two. The two middle rows form a 2 x 2 grid, and are set to align the text at the top of each row (via the valign="top" attribute). For this example, we've done away with the table borders, for a cleaner look. <table width="80%" align="center" cellpadding="10"> <tr> <td align="center" colspan="2"> <h1 style="font-family: Arial; font-size: 24pt; font-weight: bold"> Title </h1> </td> </tr> <tr valign="top"> <td width="50%"> <p style="text-align: left; font-size: 12pt; font-family: Arial"> Description paragraph one </p> </td> <td width="50%"> <img src="url1"> </td> </tr> <tr valign="top"> <td width="50%"> <img src="url2"> </td> <td width="50%"> <p style="text-align: left; font-size: 12pt; font-family: Arial"> Description paragraph two </p> </td> </tr> <tr> <td align="center" colspan="2"> <p style="text-align: center; font-size: 8pt; font-family: Arial"> <strong>Terms of Sale</strong><br> Terms of service </p> </td> </tr> </table> Template 8.4. Wide Left Column, Narrow Right Column Now we'll do something a little different. The design shown in Figure 8.4 is similar to Template 8.3, except we've made the left column wider than the right column. This lets us put the main descriptive text and pictures in the big left column, while reserving the narrower right column for bulleted item details. Figure 8.4. Descriptive text paragraphs in the wide left column, short text bullets in the narrow right column.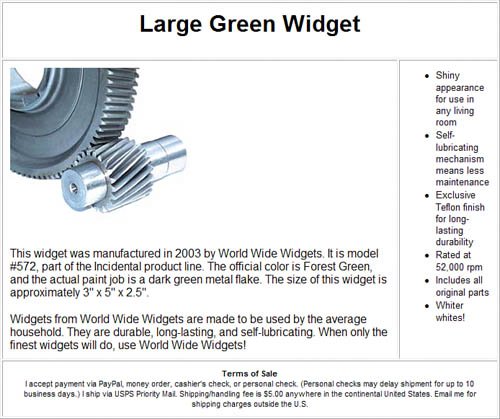 The key to this approach is to define the width of the left column as 75% of the total table width in the <td> tag, and then define the width of the right column as 25% of the table width. That's a good ratio; since the right column contains short text bullets, it doesn't have to be any wider than that. (We've also turned back on the table borders; you can turn them off by deleting the border attribute in the <table> tag.) <table width="80%" align="center" cellpadding="10" border="1"> <tr> <td align="center" colspan="2"> <h1 style="font-family: Arial; font-size: 24pt; font-weight: bold"> Title </h1> </td> </tr> <tr valign="top"> <td width="80%"> <img src="url"> <p style="text-align: left; font-size: 12pt; font-family: Arial"> First description paragraph </p> <p style="text-align: left; font-size: 12pt; font-family: Arial"> Second description paragraph </p> </td> <td width="20%"> <ul style="font-family: Arial; font-size: 10pt"> <li>Bullet one</li> <li>Bullet two</li> <li>Bullet three</li> <li>Bullet four</li> </ul> </td> </tr> <tr> <td align="center" colspan="2"> <p style="text-align: center; font-size: 8pt; font-family: Arial"> <strong>Terms of Sale</strong><br> Terms of service </p> </td> </tr> </table> Template 8.5. Two Columns with Centered Top Picture and Title This template is similar to Template 8.4, except that it places the photo(s) in a full-width row above the two-column description. As you can see in Figure 8.5, this approach works especially well if you have two or three pictures that can span the entire width of the listing. Figure 8.5. Centered top pictures above uneven dual columns.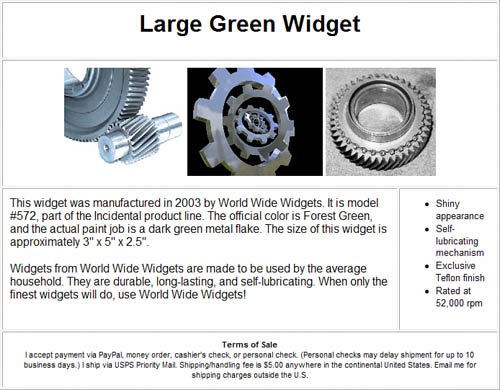 This code inserts a new row between the title row and the description row. This second row is set to span both columns; just insert one <img> tag after another to have your pictures line up in a horizontal row. (We've also specified the height for each image as a uniform 150 pixels.) As with the previous template, you can turn off the table borders by deleting the border attribute in the <table> tag. <table width="80%" align="center" cellpadding="10" border="1"> <tr> <td align="center" colspan="2"> <h1 style="font-family: Arial; font-size: 24pt; font-weight: bold"> Title </h1> </td> </tr> <tr> <td align="center" colspan="2"> <img src="url1" height="150"> <img src="url2" height="150"> <img src="url3" height="150"> </td> </tr> <tr valign="top"> <td width="80%"> <p style="text-align: left; font-size: 12pt; font-family: Arial"> First description paragraph </p> <p style="text-align: left; font-size: 12pt; font-family: Arial"> Second description paragraph </p> </td> <td width="20%"> <ul style="font-family: Arial; font-size: 10pt"> <li>Bullet one</li> <li>Bullet two</li> <li>Bullet three</li> <li>Bullet four</li> </ul> </td> </tr> <tr> <td align="center" colspan="2"> <p style="text-align: center; font-size: 8pt; font-family: Arial"> <strong>Terms of Sale</strong><br> Terms of service </p> </td> </tr> </table> |

EAN: 2147483647
Pages: 101
- ERP System Acquisition: A Process Model and Results From an Austrian Survey
- The Second Wave ERP Market: An Australian Viewpoint
- The Effects of an Enterprise Resource Planning System (ERP) Implementation on Job Characteristics – A Study using the Hackman and Oldham Job Characteristics Model
- Context Management of ERP Processes in Virtual Communities
- Relevance and Micro-Relevance for the Professional as Determinants of IT-Diffusion and IT-Use in Healthcare