Creating New Blog Posts
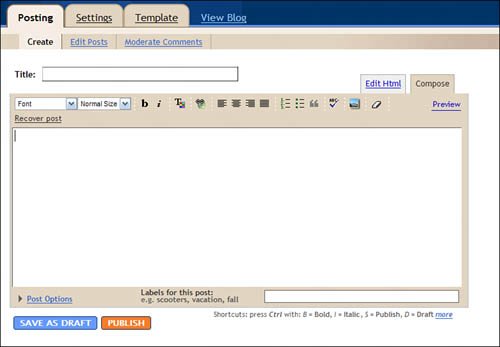
| It's not enough to create a blog page; you have to keep your blog fresh by making new posts to your blog. Read on to learn how to post. Caution With the previous version of Blogger, you could post a blog entry from any page on the Web, using the Send To > Blogger button on the Google toolbar. Unfortunately, this functionality is not yet activated within the new Blogger. Posting from the Blogger DashboardAfter you launch your blog, it's time to write your first blog post. Most of the time, you'll make your posts from the Blogger Dashboard. All you have to do is follow these steps:
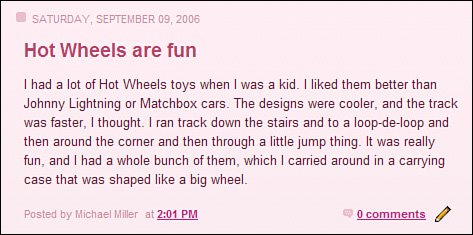
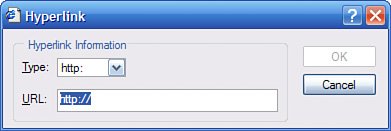
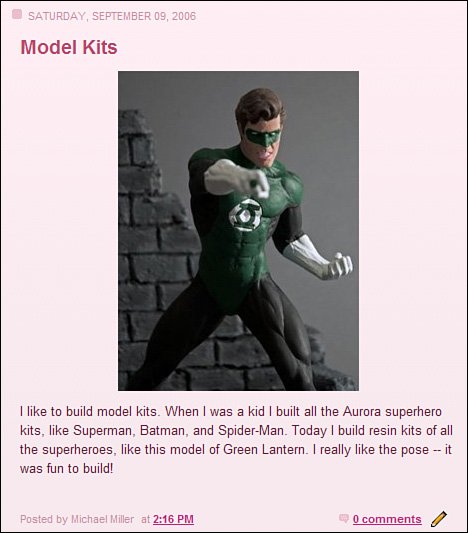
Blogger now publishes your post, and then displays a confirmation screen. Click the View Blog button to view your blog, with the new post at the top of the page, as shown in Figure 25. Figure 25. Your new post is now posted. Posting via EmailBlogger also lets you email in your posts. That's right; you can create a post in an email message, and then send that message to Blogger to post to your blog. For this to work, you first have to create a mail-to-Blogger address. You do this by clicking the Settings link next to your blog name in the Blogger Dashboard, and then clicking the Email link. When the next page appears, as shown in Figure 26, enter or confirm the email address in the Mail-to-Blogger Address section, check the Publish option, and then click the Save Settings button. Figure 26. Setting your mail-to-Blogger email address.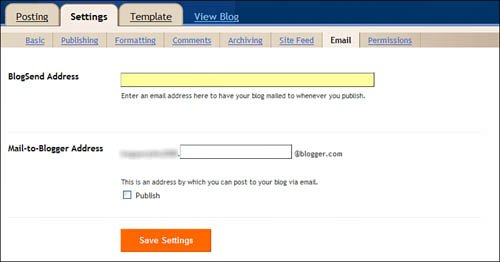 Now you can open a new message in your email program and compose your post within that message. Email the message to your mail-to-Blogger address, and Blogger automatically uses the text of your email to create a new blog post. Adding Links to Your PostsOne of the neat things about a blog is the ability to link to other pages on the Web, via the use of inline hyperlinks. Fortunately, Blogger makes it easy to add links to your post. You add links while you're creating the blog post. Just highlight the text from which you want to link, and then click the Link button. This displays the Hyperlink dialog box, shown in Figure 27. Enter the URL for the link, and then click OK. Figure 27. Linking to another web page from within your post. Adding Pictures to Your PostsAnother way to make a visually interesting blog is to incorporate pictures into your blog entries. Again, Blogger makes this relatively easy to do. You add pictures while you're creating your blog post. Just position your cursor where you want the picture to appear, and click the Add Image button. This displays the Upload Images window, shown in Figure 28. Figure 28. Adding a photo to your blog post.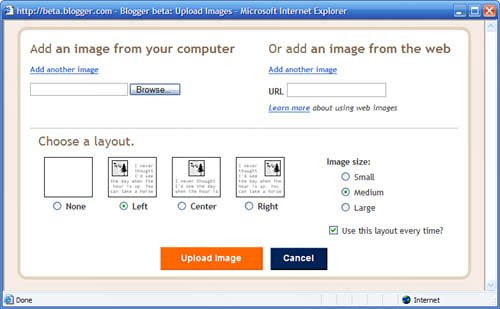 To upload an image file from your computer, click the Browse button in the Add an Image from Your Computer section, and then navigate to and select the image file. You can upload additional pictures by clicking the Add Another Image link. To point to an image hosted elsewhere on the Web, enter the full web address for that image into the URL box in the Or Add an Image from the Web section. Click the Add Another Image link to link to additional images. After you select the images to include, you can choose how to display that image in the blog post. In the Choose a Layout section, select how you want the image aligned, relative to the blog text: left, center, or right. In the Image Size section, select how big you want the image to appear: small, medium, or large. Clicking the Upload Image button adds the photo to this blog post. Figure 29 shows a post with such an image; blog visitors can click the image to view it full size. Figure 29. A blog posting with an embedded photo. Adding Labels to Your PostsWhen you get a lot of posts in your blog, it becomes increasingly difficult to find any particular post. You can make this easier for your blog visitors by using labels to categorize your posts. Visitors can then click a label in the label list to view all posts related to that particular topic. To add a label to your post, all you have to do is enter the label into the Labels for This Post box at the bottom of the Create page, as shown in Figure 30. You can enter multiple labels for any post; just separate the labels with commas. Figure 30. Adding a label to a blog post.Tip To view a list of all the labels you've previously created, click the Show All link beside the label box. Figure 31 shows how the labels appear underneath the live post. They're clickable, so visitors can view similar posts by clicking one of the label links. Figure 31. A blog post categorized with labels. Tip To help your visitors navigate via labels, be sure to add a Labels element to your page, as previously discussed. |


EAN: N/A
Pages: 17