This May Be All You Need to Know about Printing
This May Be All You Need to Know about Printing
When things are in working order, printing isn’t a difficult process. Though it involves slightly more than picking up your mouse and saying “print” into it, printing doesn’t require a whole lot of preparation. In fact, a quick perusal of the following steps may be all you need to get up to speed. If you need more details, read “Choosing a printer” and “Understanding your printing options,” which follow this section and expand on some of the basics here:
-
Turn on your printer.
And don’t forget to remove that printer cozy your uncle knitted for you.
-
Choose File→Save or press Ctrl+S (z+S on a Mac).
Tip It’s always a good idea to save your image immediately before you print it. Your computer derives a unique kind of satisfaction by delivering works of art from the printer and then locking up at the last minute, all the while knowing that the image saved on disk is several hours behind the times. If you weren’t the butt of the joke, you’d probably think that it was amusing, too.
-
Choose File→Print with Preview . . . Ctrl+Alt+P (z+Option+P on a Mac).
In the Print dialog box shown in Figure 6-1, you can adjust the position and size of the image on the page and preview the print job. You also can set the image’s position on the printed page, adjust its size, set the printed color tone to match your computer screen, and select the printer you are going to use.
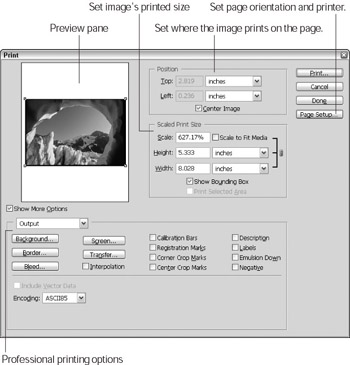
Figure 6-1: A preview of your image appears on the left side of the Print dialog box. -
Make sure that the image fits on the page.
In the upper-left side of the Print dialog box is a preview of your image. If the image is too large or small for the paper size you’re using, drag one of the little square handles to resize the image or enter a scale percentage in the Scale text box. Or if you’re feeling lazy, click in the Scale to Fit Media check box to have Photoshop do the work for you.
Tip If you’re sure that your image should fit on the selected paper size, but Photoshop barks at you with a little dialog box like the one in Figure 6-2, telling you that some clipping will occur, click the Cancel button to close the warning box. (The portion of an image that can’t fit on the printed page won’t print or will be clipped off.) Then click the Page Setup button and double-check the page orientation. If the paper is big enough for the image in a portrait orientation but the file is oriented in a landscape, Photoshop will think it’s too large.
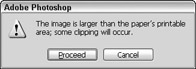
Figure 6-2: If you see this warning, check the image’s orientation on the page.Remember Changing the size of the image in the Print dialog box has no effect on the actual image; it only affects how the image will print. To change the size of the image itself, use the Image Size dialog box discussed in Chapter 4.
-
Click Print.
Wait, nothing’s printing! No, you’re not quite there yet; another Print dialog box like the one in Figure 6-3 appears to let you set how many copies you would like. If you need to select a specific printer, you can do that here, too.
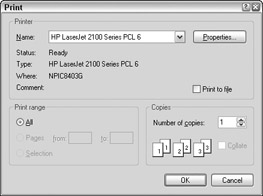
Figure 6-3: You can use this dialog box to select a printer and set how many copies to print. -
Click OK or press Enter (Return on a Mac).
Your printer will go to work and the printed image will appear in the printer’s output tray. Congratulations!
Tip If your image did not print correctly on the page, you might need to change the size of the paper you are printing on. Take a look at “Setting Paper Size and Page Orientation” for more details. Also, if your image looks smooth on the screen and jagged on the printed page, resolution could be your problem. Check out Chapter 4 for details about setting image resolution.
EAN: 2147483647
Pages: 221
- An Emerging Strategy for E-Business IT Governance
- Linking the IT Balanced Scorecard to the Business Objectives at a Major Canadian Financial Group
- Measuring ROI in E-Commerce Applications: Analysis to Action
- Technical Issues Related to IT Governance Tactics: Product Metrics, Measurements and Process Control
- The Evolution of IT Governance at NB Power