Working with Groups
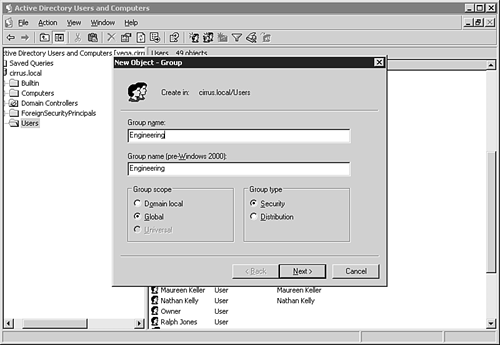
| Groups, in contrast to administration, have had some sorely needed features added or enhanced in Exchange Server 2003 to make working with groups of users easier. To start, the same concepts from groups in Exchange 2000 apply here: Within the Active Directory, you can create either a security or a distribution group. The difference between the two groups is that they both can have an email address associated with them, but the distribution group cannot be used to configure security settings. (For example, you can't create a distribution group called Sales Team and then assign security rights to that group.) To create a new group of either type, open the Active Directory Users and Computers console and right-click on the Users node. Then select New, Group from the shortcut menu to open the dialog box shown in Figure 5.9. Figure 5.9. Group setup options.
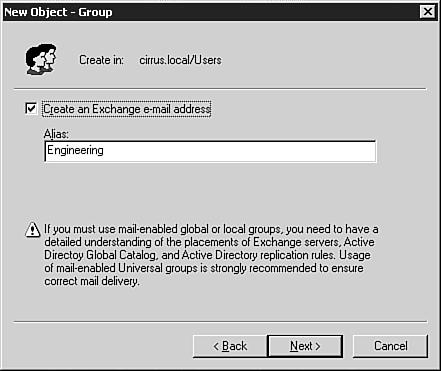
Enter a name for the group and select the type of group you would like to create. Then click Next, which opens the dialog box shown in Figure 5.10 and allows you to assign an email address to this group. Figure 5.10. Group email options.
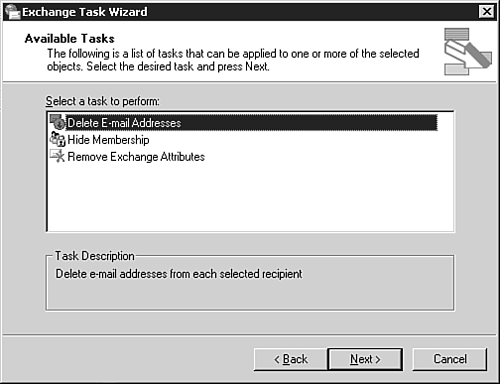
Click Next and then Finish to create your group. The group then appears in the Active Directory, enabling you to add users to the group through the group's property pages, which you will look at a little later. Exchange Task WizardIn addition to user administration, you can use the Exchange Task Wizard to work with groups, as shown in Figure 5.11. Figure 5.11. Group-related tasks.
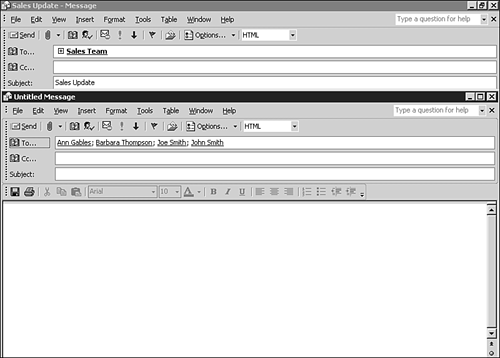
You can use the Task Wizard to remove the email addresses that are associated with a particular group, as well as hide the membership of the group from users. You can see this feature in action from within Outlook 2003. When you include a group in the To, Cc, or Bcc fields, you have the option to expand the group to reveal its members, as shown in Figure 5.12. Figure 5.12. A group with the members expanded.
With this option turned off, users cannot see which users comprise a particular group. SECURITY NOTICE Keep in mind that a security loophole exists if your domain supports clients before Windows 2000 using the built-in Pre-Windows 2000 Compatible Access security group. Working with Group PropertiesIn addition to the Task Wizard, you can configure groups through the property pages that are associated with each group. To access these property pages, right-click on the group and select Properties from the shortcut menu. Each group has four Exchange-related property pages:
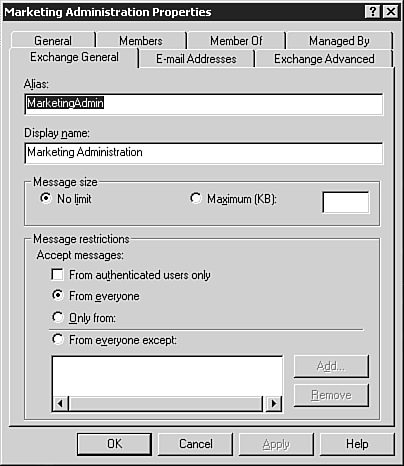
OTHER PROPERTY PAGES In addition to the Exchange-specific property pages, you can add members to your group by using the Members tab or create subgroups by using the Member Of tab. You can also delegate administration of the group by using the Managed By tab. All these options are similar to the options found in Exchange Server 2000. When you're working with these properties, you'll notice that with Exchange Server 2003, you now have greater control over how distribution groups are utilized using the Exchange General property page shown in Figure 5.13. Figure 5.13. Exchange general properties.
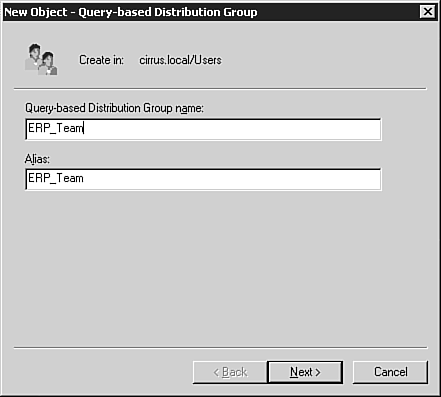
By using the Message Restriction settings at the bottom of the page, you can control the maximum size of messages sent to the group, as well as who can send messages to the group. If you click the first check box for From Authenticated Users Only, you can restrict access to only authenticated users and then set the options immediately below independent of this setting. Three restriction options are available. From Everyone allows any user to send an email to the group. Only From and From Everyone Except are used to grant or deny access to send email to the group. With any of these settings you use, the Add and Remove buttons to open the standard Exchange Select Recipient dialog to search for and select users and groups. BEST PRACTICE FOR MANAGING GROUPS The most effective way to lock down access to distribution lists is through restricting access to only authenticated users and using groups to grant or deny access. Try to limit using individual users when granting or denying access because this can be difficult to administer as users leave or join your organization. Creating a New Query-Based GroupIn addition to the two types of mail-enabled groups, Exchange 2003 also introduces a third category of group, called query-based distribution groups (QBDGs), which are based on a dynamic Lightweight Directory Access Protocol (LDAP) query selection instead of hand-picking which members will be part of the group. For Exchange administrators who have gone through the tedious chore of maintaining multiple groups, this feature is long overdue. To be able to successfully create and use this type of distribution group, you need to look at your Exchange architecture to ensure that you meet the minimum requirements. For organizations that are running Exchange 2003 alongside Exchange 2000, you need to be running in native mode, and all the Exchange 2000 servers need to be running Service Pack 3 (SP3). Because query-based grouping can be resource intensive, you might also want to consider adding more servers to your Exchange topology. When you're configuring QBDGs, you can specify an expansion server, which is an Exchange server that you can use exclusively to process queries and expand the group. You will look at configuring these server options a little later in this chapter. Two methods are available for creating QBDGs: You can either select from a number of preconfigured filters, or you can create your own custom filter. Following are the preconfigured filters:
These preconfigured options are handy when you're creating simple groups (such as All Users); however, if you need to specify additional or complex criteria, you must create a custom filter. To create a QBDG by using a custom filter, follow these steps:
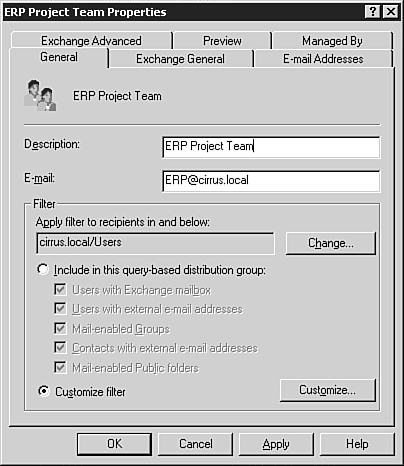
Working with Query-Based GroupsAfter you have created a query-based group, you can manage it through property pages that are associated with that group, as shown in Figure 5.17.
Figure 5.17. Group property pages.
The properties that are associated with a QBDG are similar to the options that are associated with normal groups. The exception is the filter settings on the General property page and the Preview property page, which previews the results of your filter criteria (that is, which users will be included in the group). ABOUT EXPANSION SERVERS The choice of expansion server in the Exchange Advanced property page is vitally important for using query-based groups. Microsoft recommends that if you are going to use this type of group, you should establish a server in your Exchange topology. (It should be one that has plenty of processing time available, such as an Exchange server that doesn't host Mailboxes.) This server should deal specifically with these requests. |
EAN: 2147483647
Pages: 109