Working with Brushes and Pens
| Drawing graphics requires a combination of Brushes and Pens. Brushes help fill in backgrounds and surfaces with a color or pattern. Pens are used to draw lines.
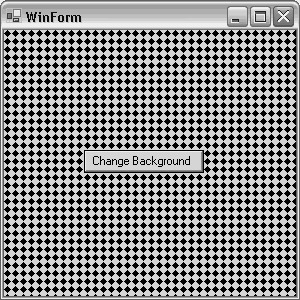
Both the Brushes and Pens classes have 141 static members for defining the color they use to draw with. In Listing 9.1, the DrawString method used Brushes.Black as its Brush parameter. Any of the other colors can be used the same way. For a complete listing, refer to the Brushes and Pens classes in the System.Drawing namespace of the .NET Framework SDK documentation. Whenever the Paint event occurs, an application must be able to redraw the client area. Often, there will be client area objects that move or are no longer needed. To just redraw the screen would be messy unless it is cleared. Listing 9.2 shows how to clear the client area. Listing 9.2 Clearing the Client Area (Clearing.cs) public WinForm() { // // Required for Windows Form Designer support // InitializeComponent(); ResizeRedraw = true; } protected override void OnPaint(PaintEventArgs pea) { base.OnPaint(pea); Graphics g = pea.Graphics; g.Clear(BackColor); StringFormat strFormat = new StringFormat(); int Height = ClientRectangle.Height; int Width = ClientRectangle.Width; Random rand = new Random(); int x = rand.Next(Width); int y = rand.Next(Height); strFormat.Alignment = StringAlignment.Center; strFormat.LineAlignment = StringAlignment.Center; g.DrawString("Welcome to C#Builder Kick Start!", Font, new SolidBrush(ForeColor), x, y, strFormat); } The call to Clear is the first statement in Listing 9.2 after the Graphics object reference is obtained from the PaintEventArgs parameter. The rest of the code is modified to demonstrate the benefits of the Clear method. In doing so, every time the OnPaint method executes, it draws a string in a random location of the client area. It gets the random location by obtaining the maximum width and height of the client area and uses the Random class to generate a new set of coordinates. These x and y values are passed to another overload of the DrawString method. Also notice the ResizeRedraw property, which is set to true in the constructor. Without this, any form resizing corrupts the client area and prevents the Clear method from working properly. Comment it out to see what I mean. Painting with BrushesOne problem with the Brush parameter in the DrawString method of Listing 9.1 was the way it was hard-coded with the Brushes.Black property. This doesn't take into consideration what would happen if someone adjusted Windows system color properties. Listing 9.3 shows a good way to prevent problems with changing system colors. Listing 9.3 Setting a Brush to the Form's ForeColor (SystemColors.cs) protected override void OnPaint(PaintEventArgs pea) { base.OnPaint(pea); Graphics g = pea.Graphics; StringFormat strFormat = new StringFormat(); strFormat.Alignment = StringAlignment.Center; strFormat.LineAlignment = StringAlignment.Center; g.DrawString("Welcome to C#Builder Kick Start!", Font, new SolidBrush(ForeColor), ClientRectangle, strFormat); } The difference between Listing 9.1 and Listing 9.3 is the Brush parameter in the DrawString method. It is created by instantiating a SolidBrush object and passing it the inherited ForeColor property. All of the brushes shown so far have been solid colors, but they don't have to be. There are different types of brushes, including HatchBrush, LinearGradientBrush, PathGradientBrush, and TextureBrush. The following sections discuss each brush type and demonstrate how to use them. HatchBrush, LinearGradientBrush, and PathGradientBrush are members of the System.Drawing.Drawing2D namespace, so unless you want to fully qualify them each time they are used, add a using declaration at the top of the file. Using HatchBrushesA HatchBrush creates a repeatable pattern, which is a member of the HatchStyle enum. Listing 9.4 demonstrates how to use a HatchBrush. Listing 9.4 Using the HatchBrush Class (HatchBrushes.cs) protected override void OnPaint(PaintEventArgs pea) { base.OnPaint(pea); const int MaxHatches = 53; Random rand = new Random(); int hatchPattern = rand.Next(MaxHatches); HatchBrush hatchBrush = new HatchBrush((HatchStyle)hatchPattern, ForeColor, BackColor); Graphics g = pea.Graphics; g.FillRectangle(hatchBrush, ClientRectangle); } private void btnChangeBackground_Click(object sender, System.EventArgs e) { Invalidate(); } The example in Listing 9.4 displays a random HatchBrush pattern in the client area of a form every time a button is clicked. The Invalidate method call in the Click event handler for the button generates a Paint event, which effectively causes the OnPaint method to be called. There are 53 members of the HatchStyle enum, and one is generated randomly each time OnPaint is called. The code uses FillRectangle, another method of the Graphics class, to fill the entire client area, defined by ClientRectangle, with the HatchBrush pattern. Figure 9.2 shows the HatchBrushes program in action. Figure 9.2. HatchBrush class demonstration.
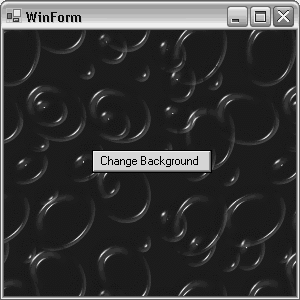
Using TextureBrushesA TextureBrush renders a specified image in the area painted by the brush. Listing 9.5 shows how to use the TextureBrush. Listing 9.5 Using the TextureBrush Class string[] imageFiles; /// <summary> /// Required designer variable. /// </summary> private System.ComponentModel.Container components = null; private System.Windows.Forms.Button btnChangeBackground; public WinForm() { // // Required for Windows Form Designer support // InitializeComponent(); imageFiles = Directory.GetFiles( Environment.GetEnvironmentVariable( "windir"), "*.bmp"); } protected override void OnPaint(PaintEventArgs pea) { base.OnPaint(pea); int MaxImageFiles = imageFiles.Length; Random rand = new Random(); int texture = rand.Next(MaxImageFiles); TextureBrush textureBrush = new TextureBrush(Image.FromFile(imageFiles[texture])); Graphics g = pea.Graphics; g.FillRectangle(textureBrush, ClientRectangle); } private void btnChangeBackground_Click(object sender, System.EventArgs e) { Invalidate(); } The code in the constructor, after InitializeComponent, gets a list of bitmap files from the main Windows directory. The environment variable "windir" may be found by searching in Tools, Options, Environment Options, Environment Variables, System Variables. The OnPaint method gets a random bitmap from the bitmap list to display each time the Paint event occurs. The TextureBrush is created by generating an Image from the selected file, which is its only argument. Because the TextureBrush is derived from Brush, it can be passed to FillRectangle like any other Brush. Figure 9.3 shows the TextureBrush application. Remember the call to ResizeRedraw in the constructor for correct drawing behavior. Figure 9.3. TextureBrush class demonstration.
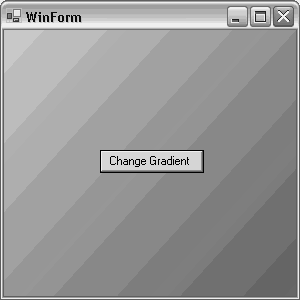
Using LinearGradientBrushesLinearGradientBrushes paint an area between two points with two colors. The start color begins at the start point and fades into the end color gradually until it reaches the end point. Listing 9.6 shows how this works. Listing 9.6 Using a LinearGradientBrush (LinearGradientBrushes.cs) protected override void OnPaint(PaintEventArgs pea) { base.OnPaint(pea); Point startPoint = new Point(0, 0); Point endPoint = new Point( ClientRectangle.Width, ClientRectangle.Height); int MaxColor = 256; Random rand = new Random(); int red = rand.Next(MaxColor); int green = rand.Next(MaxColor); int blue = rand.Next(MaxColor); Color startColor = Color.FromArgb(red, green, blue); red = rand.Next(MaxColor); green = rand.Next(MaxColor); blue = rand.Next(MaxColor); Color endColor = Color.FromArgb(red, green, blue); LinearGradientBrush linGradBrush = new LinearGradientBrush( startPoint, endPoint, startColor, endColor); Graphics g = pea.Graphics; g.FillRectangle(linGradBrush, ClientRectangle); } private void btnChangeGradient_Click(object sender, System.EventArgs e) { Invalidate(); } The code in Listing 9.6 displays a linear gradient pattern with random colors. Each color is created by randomly creating the red, green, and blue colors and passing them as arguments to the FromArgb method of the Color class. The particular overload of the LinearGradientBrush accepts a starting point, an ending point, a starting color, and an ending color. The .NET Framework SDK documentation includes other overloads for more control over linear gradient brushes. Figure 9.4 shows how this demonstration appears. Figure 9.4. LinearGradientBrush class demonstration.
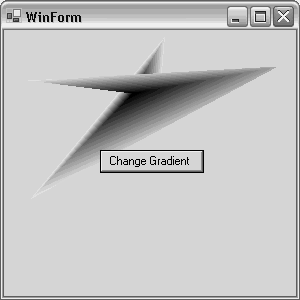
Using PathGradientBrushesThe final brush type, PathGradientBrush, places a gradient pattern in a polygon of any shape. Applying the PathGradientBrush can lead to some dramatic images and visual effects, as shown in Listing 9.7. Listing 9.7 Using the PathGradientBrush Class protected override void OnPaint(PaintEventArgs pea) { base.OnPaint(pea); const int MaxColor = 256; const int MaxColorObjects = 20; Random rand = new Random(); Color[] colors = new Color[MaxColorObjects]; int red, green, blue; for (int i=0; i < MaxColorObjects; i++) { red = rand.Next(MaxColor); green = rand.Next(MaxColor); blue = rand.Next(MaxColor); colors[i] = Color.FromArgb(red, green, blue); } const int MaxPoints = 20; Point[] points = new Point[MaxPoints]; for (int i=0; i < MaxPoints; i++) { points[i].X = rand.Next(ClientRectangle.Width); points[i].Y = rand.Next(ClientRectangle.Height); } PathGradientBrush pathGradBrush = new PathGradientBrush(points); pathGradBrush.SurroundColors = colors; Graphics g = pea.Graphics; g.FillRectangle(pathGradBrush, ClientRectangle); } private void btnChangeGradient_Click(object sender, System.EventArgs e) { Invalidate(); } The algorithm in Listing 9.7 creates a random 20-point polygon and 20 random colors to generate a shape painted with a gradient pattern (see Figure 9.5). The PathGradientBrush has a few more overloads, but also contains a few properties. Figure 9.5. The PathGradientBrush class.
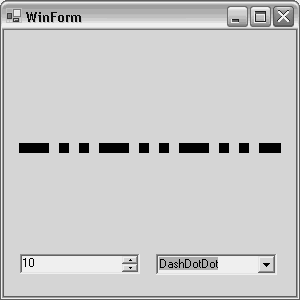
The SurroundColors property was used in Listing 9.7 to supply an array of colors. Two other properties may be set for additional effects. CenterPoint accepts a PointF type, which is simply a point that takes floating-point coordinates, to establish the location where the first color begins drawing. When the CenterPoint isn't set, GDI+ will attempt to find the absolute center location itself. The CenterColor property is the color that begins at the location defined by CenterPoint. When the CenterColor is not set, the first element of the Color array passed to SurroundColor is used. Drawing Lines with PensIn many graphics applications there is a need to draw lines. That is what Pens are for. A Pen can create more than a plain solid line. They can also draw patterned lines with dash styles. The ends of a line can be set to different shapes, and the way lines join can also be controlled. Drawing Pens with Different Dash Styles and WidthsIn addition to solid lines, pens may be defined with different dash styles. A dash style is the pattern that a line is drawn with. For example, the dash style could be dashes or a combination of dashes and dots. A pen's width may also be adjusted so that lines can be drawn with a specified thickness. The first pen program (see Listing 9.8) shows how to control the width and dash style of a Pen in real time. Listing 9.8 Pen DashStyle and Width Properties (DashStyle.cs) public WinForm() { // // Required for Windows Form Designer support // InitializeComponent(); cboDashStyle.Items.AddRange( Enum.GetNames(typeof(System.Drawing.Drawing2D.DashStyle))); cboDashStyle.SelectedIndex = 0; } protected override void OnPaint(PaintEventArgs pea) { base.OnPaint(pea); const int borderOffset = 15; int startX = borderOffset; int endX = ClientRectangle.Width - borderOffset; int startY = ClientRectangle.Height / 2 - borderOffset; int endY = startY; Point lineStart = new Point(startX, startY); Point lineEnd = new Point(endX, endY); Pen pen = new Pen(ForeColor); pen.Width = Int32.Parse(nudPenWidth.Text); pen.DashStyle = (System.Drawing.Drawing2D.DashStyle)Enum.Parse( typeof(System.Drawing.Drawing2D.DashStyle), cboDashStyle.SelectedItem.ToString()); Graphics g = pea.Graphics; g.DrawLine(pen, lineStart, lineEnd); } private void nudPenWidth_ValueChanged( object sender, System.EventArgs e) { Invalidate(); } private void cboDashStyle_SelectedIndexChanged( object sender, System.EventArgs e) { Invalidate(); } The application that Listing 9.8 works with has a NumericUpDown control, which sets pen width, and a ComboBox control, which sets dash style. The ComboBox is set in the constructor with the members of the DashStyle enum. Notice that it uses the static GetNames method of the Enum class, which returns an array of strings with the text of each DashStyle member. When using a ComboBox control, be sure to set the initial item to avoid exceptions in case it is read by the program before the user sets it. When either control is modified, they generate a Changed event that invalidates the form and causes a Paint event. The OnPaint method gets the current values of the controls and uses them to draw a new line on the screen. Notice the call to Int32.Parse on the Text property of the NumericUpDown control. This is the way to convert a number in string format to its native type. Figure 9.6 shows what the program in Listing 9.8 looks like when it executes. Figure 9.6. Pen DashStyle and Width properties.
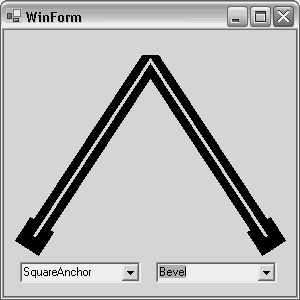
Drawing Pens with LineCap and LineJoin StylesOther pen customizations include caps and joins. The Pen type has properties named StartCap and EndCap that set the shape of the beginning and ending of a line, respectively. The LineJoin property controls how the lines look when they come together. Listing 9.9 shows how to set these properties. Listing 9.9 Pen StartCap, EndCap, and LineJoin Properties (CapsAndJoins.cs) public WinForm() { // // Required for Windows Form Designer support // InitializeComponent(); cboCaps.Items.AddRange( Enum.GetNames(typeof(System.Drawing.Drawing2D.LineCap))); cboCaps.SelectedIndex = 0; cboJoins.Items.AddRange( Enum.GetNames(typeof(System.Drawing.Drawing2D.LineJoin))); cboJoins.SelectedIndex = 0; } protected override void OnPaint(PaintEventArgs pea) { base.OnPaint(pea); const int borderOffset = 30; int startX = borderOffset; int midX = ClientRectangle.Width / 2; int endX = ClientRectangle.Width - borderOffset; int startY = borderOffset; int endY = ClientRectangle.Height - (borderOffset * 2); Point[] points = { new Point(startX, endY), new Point(midX, startY), new Point(endX, endY) }; Pen thickPen = new Pen(ForeColor); Pen thinPen = new Pen(BackColor); const int ThinPenWidth = 3; const int ThickPenWidth = 20; thickPen.MiterLimit = 1.2f; thinPen.Width = ThinPenWidth; thickPen.Width = ThickPenWidth; thickPen.LineJoin = (System.Drawing.Drawing2D.LineJoin)Enum.Parse( typeof(System.Drawing.Drawing2D.LineJoin), cboJoins.SelectedItem.ToString()); thickPen.StartCap = (System.Drawing.Drawing2D.LineCap)Enum.Parse( typeof(System.Drawing.Drawing2D.LineCap), cboCaps.SelectedItem.ToString()); thickPen.EndCap = thickPen.StartCap; Graphics g = pea.Graphics; g.DrawLines(thickPen, points); g.DrawLines(thinPen, points); } private void cboCaps_SelectedIndexChanged(object sender, System.EventArgs e) { Invalidate(); } private void cboJoins_SelectedIndexChanged(object sender, System.EventArgs e) { Invalidate(); } Listing 9.9 initializes two ComboBox controls in the constructor. Both of the value sets loaded, LineCap and LineJoin, are enums, which are put into the ComboBox as strings. To retrieve and use these values, they must be pulled out of their ComboBox and converted back into their enum type in the OnPaint method. The LineJoin enum value is assigned to the pen's LineJoin property and the LineCap enum value is assigned to the pen's StartCap and EndCap properties. To get the join appearance, the lines must be drawn with the DrawLines method. Otherwise, each individual line has its own start and end and there won't be a join style. With the continuous line in DrawLines, the first point is the StartCap and the last point is the EndCap. Figure 9.7 shows how the program in Listing 9.9 appears when running. Figure 9.7. Pen LineCap and LineJoin properties.
|
