Controlling the Workspace
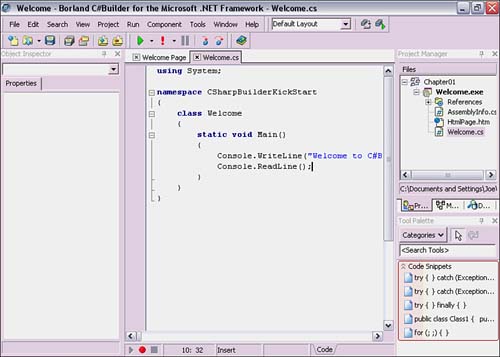
| One of the first things many people do when opening an IDE is to customize it to their own personal preferences. C#Builder includes several customization features that help maintain a workspace, making it more comfortable and productive for the developer. I've already described toolbar customization in an early section. This discussion will focus on the three primary desktop layouts: default, classic undocked, and debug. Default LayoutOut of the box, C#Builder appears with the default layout, as shown in Figure 1.14. The Welcome Page is in the center with the Object Inspector docked to the left and the Project Manager and Tool Palette docked to the right. Figure 1.14. The C#Builder workspace in default layout.
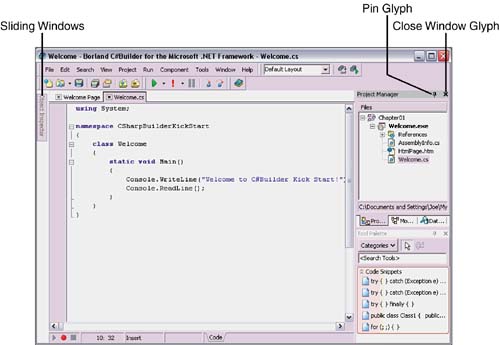
By clicking the title bar of any of the docked windows, you can move them about the workspace independently or dock them in another location. As a window is being redocked, its shadow will follow the direction of the cursor. When the window reaches a possible docking destination, its shape will change to fit where it would go if dropped. When you let go of the mouse button, the window will drop into place where it can be docked. Sometimes you have to play with the positioning to get it into the right place. If a window is not docked, it will float freely upon the desktop. On the right end of each title bar are two glyphs: a pin and an "x". The "x" enables you to close the window. Opening the View menu and selecting the window you just closed will bring it back in the same position. The pin glyph is visible only when a window is docked. Selecting the pin causes the window to change from docked to sliding (see Figure 1.15). Hovering over a sliding window will make it slide out for working with its contents. This is a nice feature that helps save screen space, but keeps the window handy for quick access. Figure 1.15. Sliding windows.
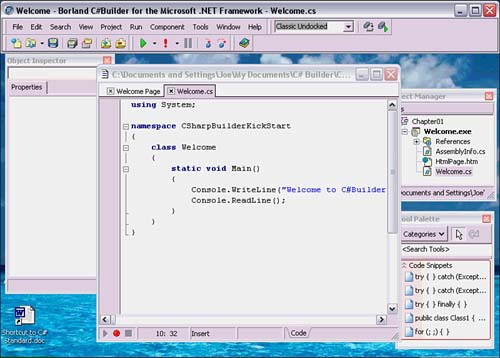
Classic Undocked LayoutYou can change layouts by selecting the Desktop speedsetting combo box on the toolbar. When you select the classic undocked layout, the workspace transforms such that the title bar with menu and toolbar stay at the top of the screen, but each of the windows becomes an independent entity, floating on the desktop (see Figure 1.16). Figure 1.16. The C#Builder workspace in classic undocked layout.
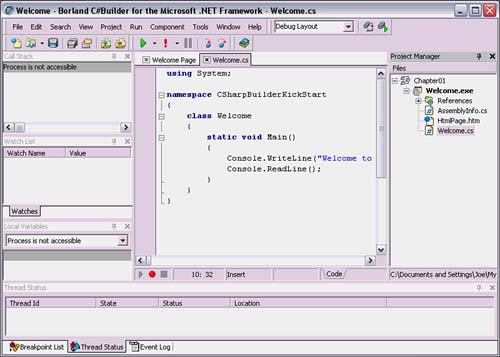
Debug LayoutThe debug layout describes how the workspace is rendered when code is being debugged. It can be modified, just like the other layouts. One of the modifications I like to make on the debug layout is adding the Project Manager (see Figure 1.17). This way, it is easier to locate files for browsing and setting breakpoints during the debugging process (described in Chapter 5). Make sure the layout is set to debug layout, using the combo box as described in the preceding section, and select View, Project Manager. The next section explains how to save desktop settings. The screen might get a little busy, so this might not be practical at lower resolutions. One way to manage the desktop is to enable sliding windows as described in the previous section, "Default Layout." Sliding windows at the bottom of the screen must be clicked before they will slide up. Figure 1.17. The C#Builder workspace in debug layout.
|