Running Programs
| C#Builder offers several options for building and running programs. Each option depends on whether you want to build, run and debug, or run a program without debugging. The following discussion shows the program, describes its syntax, and explains how to run it. A Program ExampleTo begin checking out the features of C#Builder, it will be useful to have at least a minimal C# program to begin with. Listing 1.1 shows a very simple C# program that we'll use to demonstrate these concepts. Chapters 2 through 4 go into greater detail on the C# language itself. Listing 1.1 A Welcome Program (Welcome.cs) using System; namespace CSharpBuilderKickStart { class Welcome { static void Main() { Console.WriteLine("Welcome to C#Builder Kick Start!"); Console.ReadLine(); } } } Listing 1.1 begins with a using declaration, stating that this program has access to the System namespace. A namespace helps organize code and prevents name clashes. The System namespace includes the most basic types that are required in a C# program. The rest of the code in Listing 1.1 is enclosed in a namespace declaration called CSharpBuilderKickStart. This establishes a naming scope for all the types within this namespace. Curly braces {} mark the beginning and ending of a block of code. Within the CSharpBuilderKickStart namespace is a class named Welcome. As an object-oriented language, all C# code resides within a type, such as a class or struct. The Main method is the entry point for this program. Assemblies that have a Main method are normally executable (*.exe) programs. Assemblies without a Main method are libraries (*.dll). The parentheses are empty, indicating that the method doesn't accept parameters. The type of the return value is void, indicating that Main does not return any values. In C#, there are two ways to call code, by type or by instance. The first time a type is used, the Common Language Runtime (CLR) loads it into memory. If the type is accessed by type, the code will execute and the type will remain in one place in memory. If the type is instantiated, a new instance (in addition to the type) will be loaded into memory. Only those members of a type that are declared with the static modifier may be accessed by type, and they are considered shared members that may be accessed by any code in the same program. On the other hand, instance members do not have a static modifier, and a new copy of the type is created for each instance. The state of an instance is controlled by that instance only. The reason you need to understand this right now is that the Main method must be declared with the static modifier. Because the Main method is the first code called in a program, there is no way to create an instance prior to its execution. Therefore, the CLR loads the Main method by type. Code within the Main method is the heart of this program. It uses the Console class, which provides I/O support for console programming. Many of the programs in the beginning of this book will use console I/O because it is the simplest way to understand the language. Later, examples will use Windows Forms or ASP.NET Web Forms where the focus will be exclusively on those technologies. Table 1.2 lists the most common members of the Console class and what they do. Other members, listed in the documentation, offer more granular control of Console I/O.
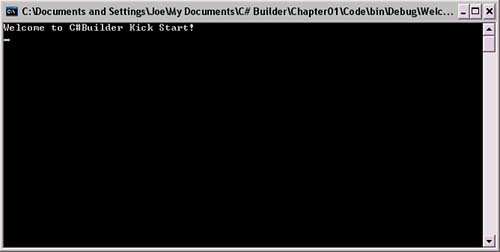
Compiling and ExecutingPressing F9 will force the program to compile and execute. When the program starts running, the IDE will transform into the default debug layout configuration (described in a later section of this chapter), and execution will stop on the first executable line of code in the program. This is indicated by a highlight on the line Console.WriteLine("Welcome to C#Builder Kick Start!");. The debugging process is described in more detail in Chapter 5. For right now, press the F9 key again and the program will run. When the program runs, it may appear behind the IDE, and you can bring it into the foreground by locating and clicking its command window on the Windows taskbar. The console program from Listing 1.1 displays a Windows command window, as shown in Figure 1.5. The words Welcome to C#Builder Kick Start! were displayed by the Console.WriteLine method. The second line of code from Listing 1.1 is the Console.ReadLine method, which waits for user input. Actually, Console.ReadLine is not being used primarily for input in this program, but to make the program stay open so that its output can be viewed. If the Console.ReadLine had been left out, you would have seen a quick flash on the screen as the program displayed its output and closed. Figure 1.5. A console program executing.
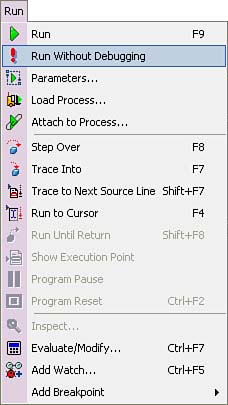
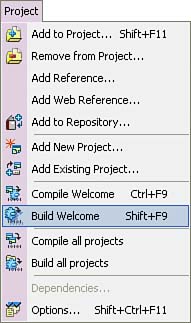
Another option for running code is the Run Without Debugging command, located on the Run menu (see Figure 1.6). The Project menu holds the options necessary to just build or compile a project (see Figure 1.7). Figure 1.6. The Run menu.
Figure 1.7. The Project menu.
|