Project 25. Create Custom CD or DVD Labels Create your own CD labels for family photos, music mixes, or business use. Tools: Photoshop Elements Materials: Your photos Blank CD or DVD Sticky-back labels 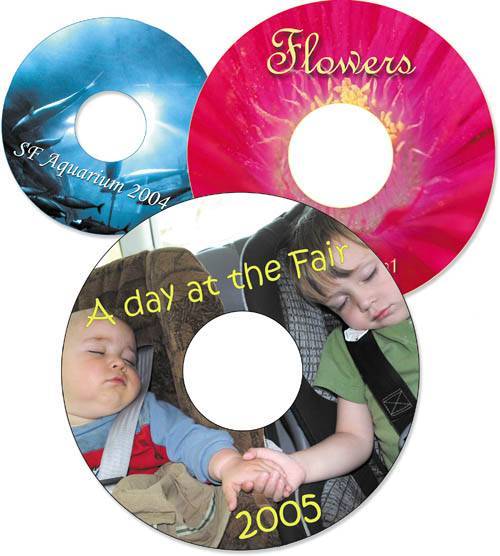
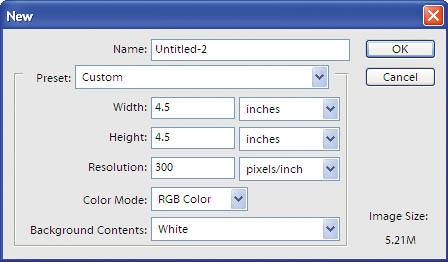
How often have you happened upon a mystery CD floating around your house with no explanation? Now, by creating a label that goes directly on the CD you can avoid that problem. Use this project to create fun, imaginative labels that will tell you exactly what is on a CD (or DVD) in one easy glance.  Open a new file. Open Photoshop Elements 4.0. In the Welcome window, choose Edit and Enhance Photos. Once the program launches, choose File > New > Blank File. Choose inches from the Width pop-up menu and enter 4.5, then enter 4.5 under Height. Set your resolution to 300 ppi for the highest quality. Open a new file. Open Photoshop Elements 4.0. In the Welcome window, choose Edit and Enhance Photos. Once the program launches, choose File > New > Blank File. Choose inches from the Width pop-up menu and enter 4.5, then enter 4.5 under Height. Set your resolution to 300 ppi for the highest quality.
 Place any artwork you want to use. Ideally, your photo should be approximately the same size and resolution as the label size. (To find out more about sizing your photos, see Project 2.) To place your artwork, choose File > Place. Navigate to your file on your hard drive, select it, and then click OK. Once it is placed in your document, you can move and resize; then press the Enter key to accept it. Be sure to hold the Shift key down when resizing to keep the proper aspect ratio. Place any artwork you want to use. Ideally, your photo should be approximately the same size and resolution as the label size. (To find out more about sizing your photos, see Project 2.) To place your artwork, choose File > Place. Navigate to your file on your hard drive, select it, and then click OK. Once it is placed in your document, you can move and resize; then press the Enter key to accept it. Be sure to hold the Shift key down when resizing to keep the proper aspect ratio.

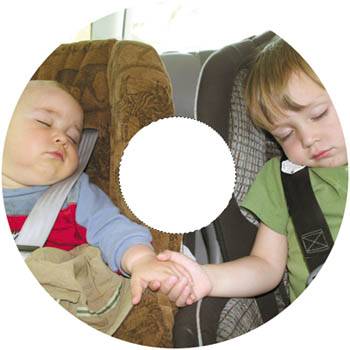
 Crop your image to a CD. Now, you want to crop your image to the label circle size. Select the Elliptical Marquee tool ( Crop your image to a CD. Now, you want to crop your image to the label circle size. Select the Elliptical Marquee tool ( ). Holding the Shift key down to constrain the proportion, click and drag from the upper-left corner to the lower-right corner. You should be able to see the selection marquee circling your image. Next, choose Select > Inverse from the menu bar. Press the Delete or Backspace key to delete the edges. ). Holding the Shift key down to constrain the proportion, click and drag from the upper-left corner to the lower-right corner. You should be able to see the selection marquee circling your image. Next, choose Select > Inverse from the menu bar. Press the Delete or Backspace key to delete the edges.


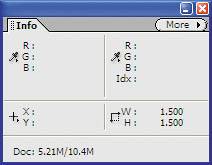
 Create a core area. The core area of the CD is the 1.5-inch circle inside the CD or DVD. You will clear this space using the Elliptical Marquee tool again. First, choose View > Rulers. (Note: You can also choose to View Grid at the same time if you want.) If the Info palette is not already open, choose Window > Info. Create a core area. The core area of the CD is the 1.5-inch circle inside the CD or DVD. You will clear this space using the Elliptical Marquee tool again. First, choose View > Rulers. (Note: You can also choose to View Grid at the same time if you want.) If the Info palette is not already open, choose Window > Info.
With the Elliptical Marquee tool selected, set the Mode to Fixed Aspect Ratio, and set both Width and Height to 1. Set your cursor at 2.25 inches down and 2.25 inches across. Holding down the Alt key to select out from the center point, click and drag until you see 1.5 inches for Width and Height on the Info palette. Press the Delete or Backspace key to delete the area.
 Add your title text. Select the Text tool in the toolbar ( Add your title text. Select the Text tool in the toolbar ( ). Click in the area where you want your title text to go and type your text. When you've finished, move your cursor away from the text until you see the Move tool ( ). Click in the area where you want your title text to go and type your text. When you've finished, move your cursor away from the text until you see the Move tool ( ), then click. If you want, you can then click to create another separate text block. To move the separate text blocks, first select the text layer in the Layers palette, and then use the Move tool to move it into position ), then click. If you want, you can then click to create another separate text block. To move the separate text blocks, first select the text layer in the Layers palette, and then use the Move tool to move it into position

 Adjust your text. You may want to change the size and color of the text after you have finished. To do this, double-click the text layer to select it, then use the options bar to change the font, size, and color. Adjust your text. You may want to change the size and color of the text after you have finished. To do this, double-click the text layer to select it, then use the options bar to change the font, size, and color.

 Save two versions of the final file. As always, you want to save a version of you file with all the layers in case you want to change it. Save the layered version in a PSD format. Finally, save a TIFF version for printing and leave the Layers option deselected. Note: Instead of saving it as a TIFF, you can save it as a PDF, which will give you a smaller file. Save two versions of the final file. As always, you want to save a version of you file with all the layers in case you want to change it. Save the layered version in a PSD format. Finally, save a TIFF version for printing and leave the Layers option deselected. Note: Instead of saving it as a TIFF, you can save it as a PDF, which will give you a smaller file.
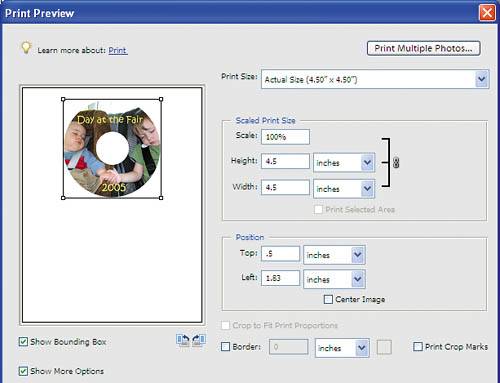
 Print. Check with your CD labels for any directions for how to position the image for printing. To position the image, choose File > Print > Deselect Center Image. You can then enter your own margins for printing. Print. Check with your CD labels for any directions for how to position the image for printing. To position the image, choose File > Print > Deselect Center Image. You can then enter your own margins for printing.
|