Change, Save, and Load Selections
Once you have created a selection, you can change it.
Modify a Selection
You can modify a selection in a number of ways: repositioning, resizing, expanding or contracting, adding to it, or subtracting from it.
Move a Selection Border
To move a selection border:
-
With any Selection tool, click inside the active selection border.
-
Hold down the mouse button, and drag the border to a new position.
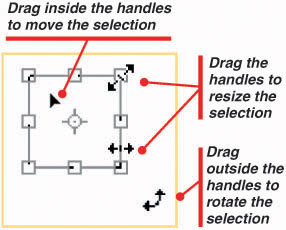
Transform a Selection
You can transform a selection—making it larger or smaller, moving it, or even rotating it.
To transform an existing selection:
-
From the menu, choose Select | Transform Selection.
-
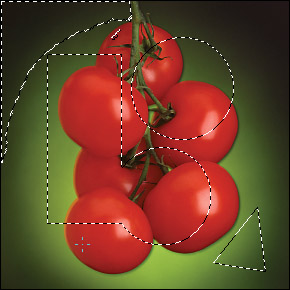
Handles appear at the sides and corners of the selection. Drag these handles or the lines that connect them to resize the selection.
-
Click within the selection and drag to move it to another position within your image.
-
Click outside of the selection and drag to rotate the selection.
Add to a Selection
To add to an existing selection:
-
Choose any selection tool from the Toolbox palette.
-
Hold down the shift key and make another selection.
-
Change tools at any time, and hold down the shift key to continue adding to the current selection.
Subtract from a Selection
To subtract from an existing selection:
-
Choose any selection tool from the Toolbox palette.
-
Hold down the alt key and select part of the active selection to subtract from it.
-
Change tools at any time, and hold down the alt key to continue subtracting from the current selection.
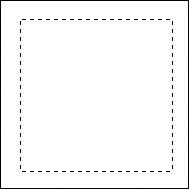
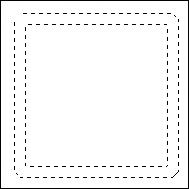
Convert a Selection to a Border
To convert the active selection into a border:
-
From the menu, choose Select | Modify | Border.
-
Type in the size of the border in pixels, and click OK. Photoshop creates a new border selection, centered on the original selection.
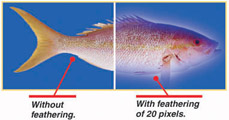
Anti-aliasing and Feathering smooth the edges of your selections. Feathering softens a selection by blurring the selection’s edges. The pixels at the edge of the selection are only partially selected. When they are copied, they will be partially transparent. If an effect or filter is applied to them, that filter or effect is rendered partially transparent.
Feather an Existing Selection
-
From the menu, choose Select | Feather.
-
Enter a Feather Radius value between 0.2 and 250 pixels. The larger the number, the more the edges of the selection will be blurred.
Create a Feathered Selection with a Selection Tool
-
Select any of the Lasso or Marquee tools.
-
In the tool’s option bar, enter a Feather value between 0.2 and 250 pixels. The larger the number, the more the edges of the selection will be blurred.
Anti-aliasing
Anti-Aliasing smoothes out the jagged edges of a selection. It works by blending the color of the pixels at the very edge of the selection with the background pixels. An element selected and copied without anti-aliasing, then pasted in front of a different colored background will display an unsightly, ragged edge.
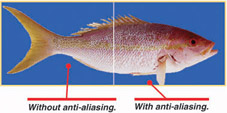
Anti-aliasing helps minimize this problem. You’ll usually want to enable anti-aliasing on the option bar of whatever selection tool you’re using: Lasso, Marquee, or Magic Wand.
Enable Anti-aliasing
Check Anti-aliased on the selection tool’s options bar.

Expand or Contract a Selection
To expand a selection:
-
Choose Select | Expand.
-
Type in the number of pixels to expand the selection by.
-
Click OK.
To contract a selection:
-
Choose Select | Contract.
-
Type in the number of pixels to contract the selection by.
-
Click OK.
Make Multiple Selections
To make multiple selections with any combination of selection tools:
-
Choose a selection tool, such as the Marquee Tool, from the Toolbox palette.
-
Make your first selection.
-
Hold down the shift key and make another selection.
-
Change tools at any time, and hold down the shift key to continue adding to the current selection.
Crop to a Selection
Cropping cuts off unwanted areas on the outside of an image. Photoshop has a Crop Tool, but it is often convenient to crop an image to fit a selection.
-
Select the Rectangular Marquee Tool from the Toolbox.
-
Click a point and drag to select a rectangle on screen.
-
If necessary, move, resize, or rotate the selection by choosing Select | Transform Selection from the menu.
Note You cannot apply anti-aliasing to an existing selection.
Delete Using Selections
If a selection is active, the delete key only deletes pixels within the selection. You can use selections to quickly and safely erase large parts of an image.
-
Use one or more selection tools to select the areas you want to delete.
-
Press deleteto delete the selected area.
-
Use the Eraser Tool to clean up the image.
Note You can crop an image to a nonrectangular selection, as well. The image will be cropped to the smallest dimensions that include all selected pixels.
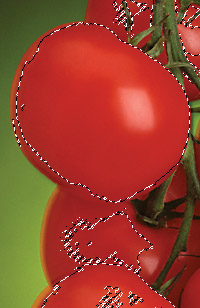
The Grow and Similar commands expand the current selection, adding pixels of similar color to those already selected.
Grow a Selection
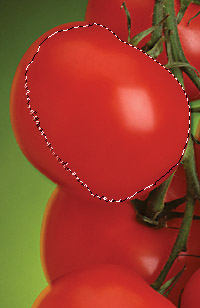
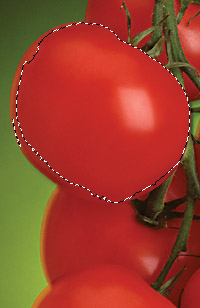
Grow expands the selection to include any adjacent pixels that fall within the Tolerance range specified in the Magic Wand tool options. With a selection active:
From the menu, choose Select | Grow. Similarly colored adjacent pixels are selected.
Expand a Selection with Similar
Similar expands the selection to include any pixels, throughout the image, that fall within the Magic Wand’s Tolerance range, whether those pixels are adjacent to the current selection or not.
With a selection active:
From the menu, choose Select | Similar. Similarly colored pixels are selected throughout the image.
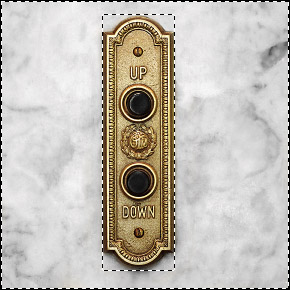
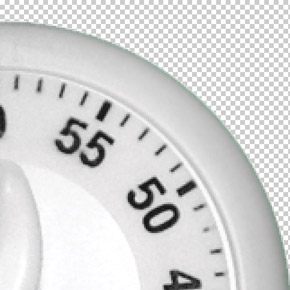
Remove Fringe Pixels
When you copy the contents of an anti-aliased selection to a new layer or document, they will often retain a fringe of the original background color. The timer below has a green fringe.
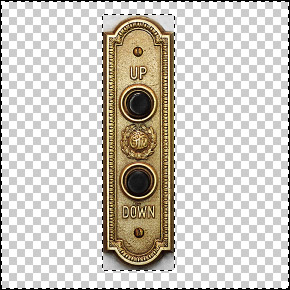
Defringe replaces the color of edge pixels with the color of nearby pixels further away from the edge. To remove the fringe:
-
Choose Layer | Matting | Defringe. The Defringe dialog box appears.
-
Enter the width in pixels of the colored halo to be replaced.
-
Press OK. The colored halo disappears.

If Defringe replaces the color on too many, or too few pixels, press ctrl+z to undo the Defringe command and try again, specifying a different Defringe width.
Save and Load Selections
You can save selections and then load them again later, easily reselecting the same area. It is important to note that saved selections will not be saved with your image in all image formats. If you want to be able to load a selection the next time you open an image, save the document in Photoshop (PSD) format.
| Note | If you delete selected pixels while working on the background layer, they are replaced with the current background layer. |
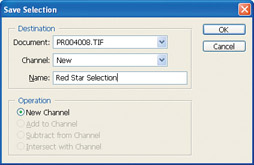
Save a Selection
With a selection active:
-
Choose Select | Save Selection. The Save Selection dialog box opens.
-
Type in a name for your selection.
-
Leave the other settings alone, and click OK to save your selection.
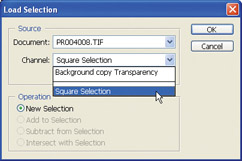
Load a Selection
To reselect a previously saved selection:
-
Choose Select | Load Selection. The Load Selection dialog box opens.
-
Open the Channel drop-down list, and click your named selection.
-
Leave the other settings alone, and click OK to load your selection.
Selections are saved in your Photoshop document as new channels. You’ll learn more about channels in Chapter 6.
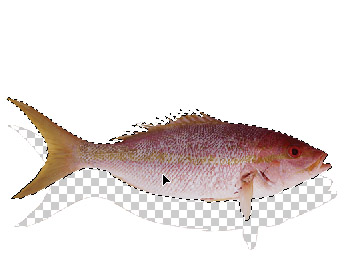
Move the Contents of a Selection
With a selection active:
-
Select the Move Tool from the Toolbox.
-
Drag within the selection to move the contents.
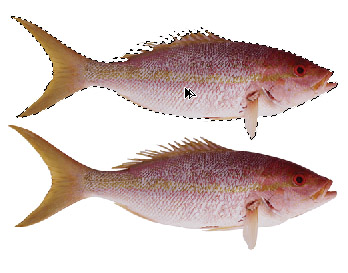
Duplicate the Contents of a Selection
With a selection active:
-
Select the Move Tool from the Toolbox.
-
Hold down the alt key, and drag within the selection to duplicate the contents.
EAN: 2147483647
Pages: 59